Introduction
Tip
Impatient readers may head straight to Quick Start.
Important
Using previous version of Kubebuilder? Check the legacy documentation for v1, v2 or v3.
Who is this for
Users of Kubernetes
Users of Kubernetes will develop a deeper understanding of Kubernetes through learning the fundamental concepts behind how APIs are designed and implemented. This book will teach readers how to develop their own Kubernetes APIs and the principles from which the core Kubernetes APIs are designed.
Including:
- The structure of Kubernetes APIs and Resources
- API versioning semantics
- Self-healing
- Garbage Collection and Finalizers
- Declarative vs Imperative APIs
- Level-Based vs Edge-Based APIs
- Resources vs Subresources
Kubernetes API extension developers
API extension developers will learn the principles and concepts behind implementing canonical Kubernetes APIs, as well as simple tools and libraries for rapid execution. This book covers pitfalls and misconceptions that extension developers commonly encounter.
Including:
- How to batch multiple events into a single reconciliation call
- How to configure periodic reconciliation
- Forthcoming
- When to use the lister cache vs live lookups
- Garbage Collection vs Finalizers
- How to use Declarative vs Webhook Validation
- How to implement API versioning
Why Kubernetes APIs
Kubernetes APIs provide consistent and well defined endpoints for objects adhering to a consistent and rich structure.
This approach has fostered a rich ecosystem of tools and libraries for working with Kubernetes APIs.
Users work with the APIs through declaring objects as YAML or JSON config, and using common tooling to manage the objects.
Building services as Kubernetes APIs provides many advantages to plain old REST, including:
- Hosted API endpoints, storage, and validation.
- Rich tooling and CLIs such as
kubectlandkustomize. - Support for AuthN and granular AuthZ.
- Support for API evolution through API versioning and conversion.
- Facilitation of adaptive / self-healing APIs that continuously respond to changes in the system state without user intervention.
- Kubernetes as a hosting environment
Developers may build and publish their own Kubernetes APIs for installation into running Kubernetes clusters.
Contribution
If you like to contribute to either this book or the code, please be so kind to read our Contribution guidelines first.
Resources
-
Repository: sigs.k8s.io/kubebuilder
-
Slack channel: #kubebuilder
-
Google Group: kubebuilder@googlegroups.com
Architecture concept diagram
The following diagram will help you get a better idea over the Kubebuilder concepts and architecture.
Quick start
This Quick Start guide will cover:
Prerequisites
- go version v1.24.6+
- docker version 17.03+.
- kubectl version v1.11.3+.
- Access to a Kubernetes v1.11.3+ cluster.
Installation
Install kubebuilder:
# download kubebuilder and install locally.
curl -L -o kubebuilder "https://go.kubebuilder.io/dl/latest/$(go env GOOS)/$(go env GOARCH)"
chmod +x kubebuilder && sudo mv kubebuilder /usr/local/bin/
Create a project
Create a directory, and then run the init command inside of it to initialize a new project. Follows an example.
mkdir -p ~/projects/guestbook
cd ~/projects/guestbook
kubebuilder init --domain my.domain --repo my.domain/guestbook
Create an API
Run the following command to create a new API (group/version) as webapp/v1 and the new Kind(CRD) Guestbook on it:
kubebuilder create api --group webapp --version v1 --kind Guestbook
OPTIONAL: Edit the API definition and the reconciliation business logic. For more info see Designing an API and What’s in a Controller.
If you are editing the API definitions, generate the manifests such as Custom Resources (CRs) or Custom Resource Definitions (CRDs) using
make manifests
Click here to see an example. (api/v1/guestbook_types.go)
// GuestbookSpec defines the desired state of Guestbook
type GuestbookSpec struct {
	// INSERT ADDITIONAL SPEC FIELDS - desired state of cluster
	// Important: Run "make" to regenerate code after modifying this file

	// Quantity of instances
	// +kubebuilder:validation:Minimum=1
	// +kubebuilder:validation:Maximum=10
	Size int32 `json:"size"`

	// Name of the ConfigMap for GuestbookSpec's configuration
	// +kubebuilder:validation:MaxLength=15
	// +kubebuilder:validation:MinLength=1
	ConfigMapName string `json:"configMapName"`

	// +kubebuilder:validation:Enum=Phone;Address;Name
	Type string `json:"type,omitempty"`
}

// GuestbookStatus defines the observed state of Guestbook
type GuestbookStatus struct {
	// INSERT ADDITIONAL STATUS FIELD - define observed state of cluster
	// Important: Run "make" to regenerate code after modifying this file

	// PodName of the active Guestbook node.
	Active string `json:"active"`

	// PodNames of the standby Guestbook nodes.
	Standby []string `json:"standby"`
}

// +kubebuilder:object:root=true
// +kubebuilder:subresource:status
// +kubebuilder:resource:scope=Cluster

// Guestbook is the Schema for the guestbooks API
type Guestbook struct {
	metav1.TypeMeta   `json:",inline"`
	metav1.ObjectMeta `json:"metadata,omitempty"`

	Spec   GuestbookSpec   `json:"spec,omitempty"`
	Status GuestbookStatus `json:"status,omitempty"`
}
Test it out
You’ll need a Kubernetes cluster to run against. You can use KinD to get a local cluster for testing, or run against a remote cluster.
Install the CRDs into the cluster:
make install
For quick feedback and code-level debugging, run your controller (this runs in the foreground, so switch to a new terminal if you want to leave it running):
make run
Install instances of custom resources
If you pressed y for Create Resource [y/n] then you created a CR for your CRD in your
config/samples/ directory.
Edit config/samples/webapp_v1_guestbook.yaml to contain a valid spec. For example:
# ...
spec:
  foo: bar
Hint: “foo” is a string field defined in api/v1/guestbook_types.go:
// foo is an example field of Guestbook. Edit guestbook_types.go to remove/update
// +optional
Foo *string `json:"foo,omitempty"`
kubectl apply -k config/samples/
You can have a look at your applied resource now:
kubectl get guestbooks.webapp.my.domain guestbook-sample -o yaml
Run it on the cluster
When your controller is ready to be packaged and tested in other clusters.
Build and push your image to the location specified by IMG:
make docker-build docker-push IMG=<some-registry>/<project-name>:tag
Deploy the controller to the cluster with image specified by IMG:
make deploy IMG=<some-registry>/<project-name>:tag
Uninstall CRDs
To delete your CRDs from the cluster:
make uninstall
Undeploy controller
Undeploy the controller to the cluster:
make undeploy
Using plugins
Kubebuilder design is based on Plugins and you can use available plugins to add optional features to your project.
Next steps
- Getting Started Guide (~30 min) - build a solid foundation
- CronJob Tutorial - learn by building a demo project
- Groups, Versions, and Kinds - understand API design concepts
Getting started
This guide creates a sample project to show you how it works. This sample:
- Reconcile a Memcached CR - which represents an instance of a Memcached deployed/managed on cluster
- Create a Deployment with the Memcached image
- Not allow more instances than the size you define in the CR
- Update the Memcached CR status
Create a project
First, create and navigate into a directory for your project. Then, initialize it using kubebuilder:
mkdir $GOPATH/memcached-operator
cd $GOPATH/memcached-operator
kubebuilder init --domain=example.com
Create the Memcached API (CRD)
Next, create the API which is responsible for deploying and managing Memcached(s) instances on the cluster.
kubebuilder create api --group cache --version v1alpha1 --kind Memcached
Understanding APIs
This command’s primary aim is to produce the Custom Resource (CR) and Custom Resource Definition (CRD) for the Memcached Kind.
It creates the API with the group cache.example.com and version v1alpha1, uniquely identifying the new CRD of the Memcached Kind.
By leveraging the Kubebuilder tool, you can define your APIs and objects representing your solutions for these platforms.
While this example adds only one Kind of resource, you can have as many Groups and Kinds as necessary.
To make it easier to understand, think of CRDs as the definition of our custom Objects, while CRs are instances of them.
Defining our API
Defining the specs
Now, define the values that each instance of your Memcached resource on the cluster can assume. In this example, the configuration allows setting the number of instances with the following:
type MemcachedSpec struct {
	...
	// +kubebuilder:validation:Minimum=0
	// +required
	Size *int32 `json:"size,omitempty"`
}
Creating status definitions
The controller also needs to track the status of operations done to manage the Memcached CR(s). This allows verification of the Custom Resource’s description of your API and determines if everything occurred successfully or if any errors were encountered, similar to how you would with any resource from the Kubernetes API.
// MemcachedStatus defines the observed state of Memcached
type MemcachedStatus struct {
    // +listType=map
    // +listMapKey=type
    // +optional
    Conditions []metav1.Condition `json:"conditions,omitempty"`
}
Markers and validations
Furthermore, validate the values added in your CustomResource
to ensure that those are valid. To achieve this, use markers,
such as +kubebuilder:validation:Minimum=1.
Now, see our example fully completed.
Apache License
Copyright 2026 The Kubernetes authors.
Licensed under the Apache License, Version 2.0 (the “License”); you may not use this file except in compliance with the License. You may obtain a copy of the License at
http://www.apache.org/licenses/LICENSE-2.0
Unless required by applicable law or agreed to in writing, software distributed under the License is distributed on an “AS IS” BASIS, WITHOUT WARRANTIES OR CONDITIONS OF ANY KIND, either express or implied. See the License for the specific language governing permissions and limitations under the License.
Imports
package v1alpha1

import (
	metav1 "k8s.io/apimachinery/pkg/apis/meta/v1"
	"k8s.io/apimachinery/pkg/runtime"
)

// EDIT THIS FILE!  THIS IS SCAFFOLDING FOR YOU TO OWN!
// NOTE: json tags are required.  Any new fields you add must have json tags for the fields to be serialized.
// MemcachedSpec defines the desired state of Memcached
type MemcachedSpec struct {
	// INSERT ADDITIONAL SPEC FIELDS - desired state of cluster
	// Important: Run "make" to regenerate code after modifying this file
	// The following markers will use OpenAPI v3 schema to validate the value
	// More info: https://book.kubebuilder.io/reference/markers/crd-validation.html

	// size defines the number of Memcached instances
	// The following markers will use OpenAPI v3 schema to validate the value
	// More info: https://book.kubebuilder.io/reference/markers/crd-validation.html
	// +kubebuilder:validation:Minimum=1
	// +kubebuilder:validation:Maximum=3
	// +kubebuilder:validation:ExclusiveMaximum=false
	// +optional
	Size *int32 `json:"size,omitempty"`
}

// MemcachedStatus defines the observed state of Memcached.
type MemcachedStatus struct {
	// INSERT ADDITIONAL STATUS FIELD - define observed state of cluster
	// Important: Run "make" to regenerate code after modifying this file

	// For Kubernetes API conventions, see:
	// https://github.com/kubernetes/community/blob/master/contributors/devel/sig-architecture/api-conventions.md#typical-status-properties

	// conditions represent the current state of the Memcached resource.
	// Each condition has a unique type and reflects the status of a specific aspect of the resource.
	//
	// Standard condition types include:
	// - "Available": the resource is fully functional
	// - "Progressing": the resource is being created or updated
	// - "Degraded": the resource failed to reach or maintain its desired state
	//
	// The status of each condition is one of True, False, or Unknown.
	// +listType=map
	// +listMapKey=type
	// +optional
	Conditions []metav1.Condition `json:"conditions,omitempty"`
}

// +kubebuilder:object:root=true
// +kubebuilder:subresource:status

// Memcached is the Schema for the memcacheds API
type Memcached struct {
	metav1.TypeMeta `json:",inline"`

	// metadata is a standard object metadata
	// +optional
	metav1.ObjectMeta `json:"metadata,omitzero"`

	// spec defines the desired state of Memcached
	// +required
	Spec MemcachedSpec `json:"spec"`

	// status defines the observed state of Memcached
	// +optional
	Status MemcachedStatus `json:"status,omitzero"`
}

// +kubebuilder:object:root=true

// MemcachedList contains a list of Memcached
type MemcachedList struct {
	metav1.TypeMeta `json:",inline"`
	metav1.ListMeta `json:"metadata,omitzero"`
	Items           []Memcached `json:"items"`
}

func init() {
	SchemeBuilder.Register(func(s *runtime.Scheme) error {
		s.AddKnownTypes(SchemeGroupVersion, &Memcached{}, &MemcachedList{})
		return nil
	})
}
Generating manifests with the specs and validations
To generate all required files:
-
Run
make generateto create the DeepCopy implementations inapi/v1alpha1/zz_generated.deepcopy.go. -
Then, run
make manifeststo generate the CRD manifests underconfig/crd/basesand a sample for it underconfig/samples.
Both commands use controller-gen with different flags for code and manifest generation, respectively.
config/crd/bases/cache.example.com_memcacheds.yaml: Our Memcached CRD
---
apiVersion: apiextensions.k8s.io/v1
kind: CustomResourceDefinition
metadata:
  annotations:
    controller-gen.kubebuilder.io/version: v0.21.0
  name: memcacheds.cache.example.com
spec:
  group: cache.example.com
  names:
    kind: Memcached
    listKind: MemcachedList
    plural: memcacheds
    singular: memcached
  scope: Namespaced
  versions:
  - name: v1alpha1
    schema:
      openAPIV3Schema:
        description: Memcached is the Schema for the memcacheds API
        properties:
          apiVersion:
            description: |-
              APIVersion defines the versioned schema of this representation of an object.
              Servers should convert recognized schemas to the latest internal value, and
              may reject unrecognized values.
              More info: https://git.k8s.io/community/contributors/devel/sig-architecture/api-conventions.md#resources
            type: string
          kind:
            description: |-
              Kind is a string value representing the REST resource this object represents.
              Servers may infer this from the endpoint the client submits requests to.
              Cannot be updated.
              In CamelCase.
              More info: https://git.k8s.io/community/contributors/devel/sig-architecture/api-conventions.md#types-kinds
            type: string
          metadata:
            type: object
          spec:
            description: spec defines the desired state of Memcached
            properties:
              size:
                description: |-
                  size defines the number of Memcached instances
                  The following markers will use OpenAPI v3 schema to validate the value
                  More info: https://book.kubebuilder.io/reference/markers/crd-validation.html
                format: int32
                maximum: 3
                minimum: 1
                type: integer
            type: object
          status:
            description: status defines the observed state of Memcached
            properties:
              conditions:
                description: |-
                  conditions represent the current state of the Memcached resource.
                  Each condition has a unique type and reflects the status of a specific aspect of the resource.

                  Standard condition types include:
                  - "Available": the resource is fully functional
                  - "Progressing": the resource is being created or updated
                  - "Degraded": the resource failed to reach or maintain its desired state

                  The status of each condition is one of True, False, or Unknown.
                items:
                  description: Condition contains details for one aspect of the current
                    state of this API Resource.
                  properties:
                    lastTransitionTime:
                      description: |-
                        lastTransitionTime is the last time the condition transitioned from one status to another.
                        This should be when the underlying condition changed.  If that is not known, then using the time when the API field changed is acceptable.
                      format: date-time
                      type: string
                    message:
                      description: |-
                        message is a human readable message indicating details about the transition.
                        This may be an empty string.
                      maxLength: 32768
                      type: string
                    observedGeneration:
                      description: |-
                        observedGeneration represents the .metadata.generation that the condition was set based upon.
                        For instance, if .metadata.generation is currently 12, but the .status.conditions[x].observedGeneration is 9, the condition is out of date
                        with respect to the current state of the instance.
                      format: int64
                      minimum: 0
                      type: integer
                    reason:
                      description: |-
                        reason contains a programmatic identifier indicating the reason for the condition's last transition.
                        Producers of specific condition types may define expected values and meanings for this field,
                        and whether the values are considered a guaranteed API.
                        The value should be a CamelCase string.
                        This field may not be empty.
                      maxLength: 1024
                      minLength: 1
                      pattern: ^[A-Za-z]([A-Za-z0-9_,:]*[A-Za-z0-9_])?$
                      type: string
                    status:
                      description: status of the condition, one of True, False, Unknown.
                      enum:
                      - "True"
                      - "False"
                      - Unknown
                      type: string
                    type:
                      description: type of condition in CamelCase or in foo.example.com/CamelCase.
                      maxLength: 316
                      pattern: ^([a-z0-9]([-a-z0-9]*[a-z0-9])?(\.[a-z0-9]([-a-z0-9]*[a-z0-9])?)*/)?(([A-Za-z0-9][-A-Za-z0-9_.]*)?[A-Za-z0-9])$
                      type: string
                  required:
                  - lastTransitionTime
                  - message
                  - reason
                  - status
                  - type
                  type: object
                type: array
                x-kubernetes-list-map-keys:
                - type
                x-kubernetes-list-type: map
            type: object
        required:
        - spec
        type: object
    served: true
    storage: true
    subresources:
      status: {}
Sample of custom resources
The manifests located under the config/samples directory serve as examples of Custom Resources that can be applied to the cluster.
In this particular example, by applying the given resource to the cluster, we would generate
a Deployment with a single instance size (see size: 1).
apiVersion: cache.example.com/v1alpha1
kind: Memcached
metadata:
  labels:
    app.kubernetes.io/name: project
    app.kubernetes.io/managed-by: kustomize
  name: memcached-sample
spec:
  # TODO(user): edit the following value to ensure the number
  # of Pods/Instances your Operand must have on cluster
  size: 1
Reconciliation process
In a simplified way, Kubernetes works by allowing you to declare the desired state of your system, and then its controllers continuously observe the cluster and take actions to ensure that the actual state matches the desired state. For your custom APIs and controllers, the process is similar. Remember, you are extending Kubernetes’ behaviors and its APIs to fit your specific needs.
In our controller, we implement a reconciliation process.
Essentially, the reconciliation process functions as a loop, continuously checking conditions and performing necessary actions until the desired state is achieved. This process will keep running until all conditions in the system align with the desired state defined in our implementation.
Here’s a pseudo-code example to illustrate this:
reconcile App {

  // Check if a Deployment for the app exists, if not, create one
  // If there is an error, then restart from the beginning of the reconcile
  if err != nil {
    return reconcile.Result{}, err
  }

  // Check if a Service for the app exists, if not, create one
  // If there is an error, then restart from the beginning of the reconcile
  if err != nil {
    return reconcile.Result{}, err
  }

  // Look for Database CR/CRD
  // Check the Database Deployment's replicas size
  // If deployment.replicas size does not match cr.size, then update it
  // Then, restart from the beginning of the reconcile. For example, by returning `reconcile.Result{Requeue: true}, nil`.
  if err != nil {
    return reconcile.Result{Requeue: true}, nil
  }
  ...

  // If at the end of the loop:
  // Everything executed successfully, and the reconcile can stop
  return reconcile.Result{}, nil

}
In the context of our example
When you apply the sample Custom Resource (CR) to the cluster (i.e. kubectl apply -f config/sample/cache_v1alpha1_memcached.yaml),
ensure that the controller creates a Deployment for the Memcached image and that it matches the number of replicas you define in the CR.
To achieve this, first implement an operation that checks whether the Deployment for the Memcached instance already exists on the cluster. If it does not, the controller creates the Deployment accordingly. Therefore, our reconciliation process must include an operation to ensure that this desired state is consistently maintained. This operation would involve:
	// Check if the deployment already exists, if not create a new one
	found := &appsv1.Deployment{}
	err = r.Get(ctx, types.NamespacedName{Name: memcached.Name, Namespace: memcached.Namespace}, found)
	if err != nil && apierrors.IsNotFound(err) {
		// Define a new deployment
		dep := r.deploymentForMemcached()
		// Create the Deployment on the cluster
		if err = r.Create(ctx, dep); err != nil {
            log.Error(err, "Failed to create new Deployment",
            "Deployment.Namespace", dep.Namespace, "Deployment.Name", dep.Name)
            return ctrl.Result{}, err
        }
		...
	}
Next, note that the deploymentForMemcached() function needs to define and return the Deployment that should be
created on the cluster. This function should construct the Deployment object with the necessary
specifications, as demonstrated in the following example:
    dep := &appsv1.Deployment{
		Spec: appsv1.DeploymentSpec{
			Replicas: &replicas,
			Template: corev1.PodTemplateSpec{
				Spec: corev1.PodSpec{
					Containers: []corev1.Container{{
						Image:           "memcached:1.6.26-alpine3.19",
						Name:            "memcached",
						ImagePullPolicy: corev1.PullIfNotPresent,
						Ports: []corev1.ContainerPort{{
							ContainerPort: 11211,
							Name:          "memcached",
						}},
						Command: []string{"memcached", "--memory-limit=64", "-o", "modern", "-v"},
					}},
				},
			},
		},
	}
Additionally, implement a mechanism to verify that the number of Memcached replicas on the cluster matches the desired count specified in the Custom Resource (CR). If there is a discrepancy, the reconciliation must update the cluster to ensure consistency. This means that whenever you create or update a CR of the Memcached Kind on the cluster, the controller will continuously reconcile the state until the actual number of replicas matches the desired count. The following example illustrates this process:
	...
	size := memcached.Spec.Size
	if *found.Spec.Replicas != size {
		found.Spec.Replicas = &size
		if err = r.Update(ctx, found); err != nil {
			log.Error(err, "Failed to update Deployment",
				"Deployment.Namespace", found.Namespace, "Deployment.Name", found.Name)
            return ctrl.Result{}, err
        }
    ...
Now, you can review the complete controller responsible for managing Custom Resources of the Memcached Kind. This controller ensures that the desired state is maintained in the cluster, making sure that our Memcached instance continues running with the number of replicas specified by the users.
internal/controller/memcached_controller.go: Our Controller Implementation
/*
Copyright 2026 The Kubernetes authors.

Licensed under the Apache License, Version 2.0 (the "License");
you may not use this file except in compliance with the License.
You may obtain a copy of the License at

    http://www.apache.org/licenses/LICENSE-2.0

Unless required by applicable law or agreed to in writing, software
distributed under the License is distributed on an "AS IS" BASIS,
WITHOUT WARRANTIES OR CONDITIONS OF ANY KIND, either express or implied.
See the License for the specific language governing permissions and
limitations under the License.
*/

package controller

import (
	"context"
	"fmt"
	"time"

	appsv1 "k8s.io/api/apps/v1"
	corev1 "k8s.io/api/core/v1"
	apierrors "k8s.io/apimachinery/pkg/api/errors"
	"k8s.io/apimachinery/pkg/api/meta"
	metav1 "k8s.io/apimachinery/pkg/apis/meta/v1"
	"k8s.io/apimachinery/pkg/types"

	"k8s.io/apimachinery/pkg/runtime"
	ctrl "sigs.k8s.io/controller-runtime"
	"sigs.k8s.io/controller-runtime/pkg/client"
	logf "sigs.k8s.io/controller-runtime/pkg/log"

	cachev1alpha1 "example.com/memcached/api/v1alpha1"
)

// Definitions to manage status conditions
const (
	// typeAvailableMemcached represents the status of the Deployment reconciliation
	typeAvailableMemcached = "Available"
)

const memcachedContainerName = "memcached"

// MemcachedReconciler reconciles a Memcached object
type MemcachedReconciler struct {
	client.Client
	Scheme *runtime.Scheme
}

// +kubebuilder:rbac:groups=cache.example.com,resources=memcacheds,verbs=get;list;watch;create;update;patch;delete
// +kubebuilder:rbac:groups=cache.example.com,resources=memcacheds/status,verbs=get;update;patch
// +kubebuilder:rbac:groups=cache.example.com,resources=memcacheds/finalizers,verbs=update
// +kubebuilder:rbac:groups=events.k8s.io,resources=events,verbs=create;patch
// +kubebuilder:rbac:groups=apps,resources=deployments,verbs=get;list;watch;create;update;patch;delete
// +kubebuilder:rbac:groups=core,resources=pods,verbs=get;list;watch

// Reconcile is part of the main kubernetes reconciliation loop which aims to
// move the current state of the cluster closer to the desired state.
// It is essential for the controller's reconciliation loop to be idempotent. By following the Operator
// pattern you will create Controllers which provide a reconcile function
// responsible for synchronizing resources until the desired state is reached on the cluster.
// Breaking this recommendation goes against the design principles of controller-runtime.
// and may lead to unforeseen consequences such as resources becoming stuck and requiring manual intervention.
// For further info:
// - About Operator Pattern: https://kubernetes.io/docs/concepts/extend-kubernetes/operator/
// - About Controllers: https://kubernetes.io/docs/concepts/architecture/controller/
//
// For more details, check Reconcile and its Result here:
// - https://pkg.go.dev/sigs.k8s.io/controller-runtime@v0.24.1/pkg/reconcile
func (r *MemcachedReconciler) Reconcile(ctx context.Context, req ctrl.Request) (ctrl.Result, error) {
	log := logf.FromContext(ctx)

	// Fetch the Memcached instance
	// The purpose is check if the Custom Resource for the Kind Memcached
	// is applied on the cluster if not we return nil to stop the reconciliation
	memcached := &cachev1alpha1.Memcached{}
	err := r.Get(ctx, req.NamespacedName, memcached)
	if err != nil {
		if apierrors.IsNotFound(err) {
			// If the custom resource is not found then it usually means that it was deleted or not created
			// In this way, we will stop the reconciliation
			log.Info("Memcached resource not found. Ignoring since object must be deleted")
			return ctrl.Result{}, nil
		}
		// Error reading the object - requeue the request.
		log.Error(err, "Failed to get memcached")
		return ctrl.Result{}, err
	}

	// Let's just set the status as Unknown when no status is available
	if len(memcached.Status.Conditions) == 0 {
		meta.SetStatusCondition(&memcached.Status.Conditions, metav1.Condition{Type: typeAvailableMemcached, Status: metav1.ConditionUnknown, Reason: reasonReconciling, Message: "Starting reconciliation"})
		if err = r.Status().Update(ctx, memcached); err != nil {
			log.Error(err, "Failed to update Memcached status")
			return ctrl.Result{}, err
		}

		// Let's re-fetch the memcached Custom Resource after updating the status
		// so that we have the latest state of the resource on the cluster and we will avoid
		// raising the error "the object has been modified, please apply
		// your changes to the latest version and try again" which would re-trigger the reconciliation
		// if we try to update it again in the following operations
		if err := r.Get(ctx, req.NamespacedName, memcached); err != nil {
			log.Error(err, "Failed to re-fetch memcached")
			return ctrl.Result{}, err
		}
	}

	// Check if the deployment already exists, if not create a new one
	found := &appsv1.Deployment{}
	err = r.Get(ctx, types.NamespacedName{Name: memcached.Name, Namespace: memcached.Namespace}, found)
	if err != nil && apierrors.IsNotFound(err) {
		// Define a new deployment
		dep, err := r.deploymentForMemcached(memcached)
		if err != nil {
			log.Error(err, "Failed to define new Deployment resource for Memcached")

			// The following implementation will update the status
			meta.SetStatusCondition(&memcached.Status.Conditions, metav1.Condition{Type: typeAvailableMemcached,
				Status: metav1.ConditionFalse, Reason: reasonReconciling,
				Message: fmt.Sprintf("Failed to create Deployment for the custom resource (%s): (%s)", memcached.Name, err)})

			if err := r.Status().Update(ctx, memcached); err != nil {
				log.Error(err, "Failed to update Memcached status")
				return ctrl.Result{}, err
			}

			return ctrl.Result{}, err
		}

		log.Info("Creating a new Deployment",
			"Deployment.Namespace", dep.Namespace, "Deployment.Name", dep.Name)
		if err = r.Create(ctx, dep); err != nil {
			log.Error(err, "Failed to create new Deployment",
				"Deployment.Namespace", dep.Namespace, "Deployment.Name", dep.Name)
			return ctrl.Result{}, err
		}

		// Deployment created successfully
		// We will requeue the reconciliation so that we can ensure the state
		// and move forward for the next operations
		return ctrl.Result{RequeueAfter: time.Minute}, nil
	} else if err != nil {
		log.Error(err, "Failed to get Deployment")
		// Let's return the error for the reconciliation be re-trigged again
		return ctrl.Result{}, err
	}

	// If the size is not defined in the Custom Resource then we will set the desired replicas to 0
	var desiredReplicas int32 = 0
	if memcached.Spec.Size != nil {
		desiredReplicas = *memcached.Spec.Size
	}

	// The CRD API defines that the Memcached type have a MemcachedSpec.Size field
	// to set the quantity of Deployment instances to the desired state on the cluster.
	// Therefore, the following code will ensure the Deployment size is the same as defined
	// via the Size spec of the Custom Resource which we are reconciling.
	if found.Spec.Replicas == nil || *found.Spec.Replicas != desiredReplicas {
		found.Spec.Replicas = new(desiredReplicas)
		if err = r.Update(ctx, found); err != nil {
			log.Error(err, "Failed to update Deployment",
				"Deployment.Namespace", found.Namespace, "Deployment.Name", found.Name)

			// Re-fetch the memcached Custom Resource before updating the status
			// so that we have the latest state of the resource on the cluster and we will avoid
			// raising the error "the object has been modified, please apply
			// your changes to the latest version and try again" which would re-trigger the reconciliation
			if err := r.Get(ctx, req.NamespacedName, memcached); err != nil {
				log.Error(err, "Failed to re-fetch memcached")
				return ctrl.Result{}, err
			}

			// The following implementation will update the status
			meta.SetStatusCondition(&memcached.Status.Conditions, metav1.Condition{Type: typeAvailableMemcached,
				Status: metav1.ConditionFalse, Reason: "Resizing",
				Message: fmt.Sprintf("Failed to update the size for the custom resource (%s): (%s)", memcached.Name, err)})

			if err := r.Status().Update(ctx, memcached); err != nil {
				log.Error(err, "Failed to update Memcached status")
				return ctrl.Result{}, err
			}

			return ctrl.Result{}, err
		}

		// Now, that we update the size we want to requeue the reconciliation
		// so that we can ensure that we have the latest state of the resource before
		// update. Also, it will help ensure the desired state on the cluster
		return ctrl.Result{Requeue: true}, nil
	}

	// The following implementation will update the status
	meta.SetStatusCondition(&memcached.Status.Conditions, metav1.Condition{Type: typeAvailableMemcached,
		Status: metav1.ConditionTrue, Reason: reasonReconciling,
		Message: fmt.Sprintf("Deployment for custom resource (%s) with %d replicas created successfully", memcached.Name, desiredReplicas)})

	if err := r.Status().Update(ctx, memcached); err != nil {
		log.Error(err, "Failed to update Memcached status")
		return ctrl.Result{}, err
	}

	return ctrl.Result{}, nil
}

// SetupWithManager sets up the controller with the Manager.
func (r *MemcachedReconciler) SetupWithManager(mgr ctrl.Manager) error {
	return ctrl.NewControllerManagedBy(mgr).
		For(&cachev1alpha1.Memcached{}).
		Owns(&appsv1.Deployment{}).
		Named("memcached").
		Complete(r)
}

// deploymentForMemcached returns a Memcached Deployment object
func (r *MemcachedReconciler) deploymentForMemcached(
	memcached *cachev1alpha1.Memcached) (*appsv1.Deployment, error) {
	image := "memcached:1.6.26-alpine3.19"

	dep := &appsv1.Deployment{
		ObjectMeta: metav1.ObjectMeta{
			Name:      memcached.Name,
			Namespace: memcached.Namespace,
		},
		Spec: appsv1.DeploymentSpec{
			Replicas: memcached.Spec.Size,
			Selector: &metav1.LabelSelector{
				MatchLabels: map[string]string{"app.kubernetes.io/name": "project"},
			},
			Template: corev1.PodTemplateSpec{
				ObjectMeta: metav1.ObjectMeta{
					Labels: map[string]string{"app.kubernetes.io/name": "project"},
				},
				Spec: corev1.PodSpec{
					SecurityContext: &corev1.PodSecurityContext{
						RunAsNonRoot: new(true),
						SeccompProfile: &corev1.SeccompProfile{
							Type: corev1.SeccompProfileTypeRuntimeDefault,
						},
					},
					Containers: []corev1.Container{{
						Image:           image,
						Name:            memcachedContainerName,
						ImagePullPolicy: corev1.PullIfNotPresent,
						// Ensure restrictive context for the container
						// More info: https://kubernetes.io/docs/concepts/security/pod-security-standards/#restricted
						SecurityContext: &corev1.SecurityContext{
							RunAsNonRoot:             new(true),
							RunAsUser:                new(int64(1001)),
							AllowPrivilegeEscalation: new(false),
							Capabilities: &corev1.Capabilities{
								Drop: []corev1.Capability{
									"ALL",
								},
							},
						},
						Ports: []corev1.ContainerPort{{
							ContainerPort: 11211,
							Name:          memcachedContainerName,
						}},
						Command: []string{"memcached", "--memory-limit=64", "-o", "modern", "-v"},
					}},
				},
			},
		},
	}

	// Set the ownerRef for the Deployment
	// More info: https://kubernetes.io/docs/concepts/overview/working-with-objects/owners-dependents/
	if err := ctrl.SetControllerReference(memcached, dep, r.Scheme); err != nil {
		return nil, err
	}
	return dep, nil
}
Diving into the controller implementation
Setting manager to watching resources
The whole idea is to be Watching the resources that matter for the controller. When a resource that the controller is interested in changes, the Watch triggers the controller’s reconciliation loop, ensuring that the actual state of the resource matches the desired state as defined in the controller’s logic.
Notice how you configure the Manager to monitor events such as the creation, update, or deletion of a Custom Resource (CR) of the Memcached kind, as well as any changes to the Deployment that the controller manages and owns:
// SetupWithManager sets up the controller with the Manager.
// The Deployment is also watched to ensure its
// desired state in the cluster.
func (r *MemcachedReconciler) SetupWithManager(mgr ctrl.Manager) error {
    return ctrl.NewControllerManagedBy(mgr).
		// Watch the Memcached Custom Resource and trigger reconciliation whenever it
		//when you create, update, or delete it
		For(&cachev1alpha1.Memcached{}).
		// Watch the Deployment managed by the Memcached controller. If any changes occur to the Deployment
        // owned and managed by this controller, it triggers reconciliation, ensuring that the cluster
        // state aligns with the desired state.
		Owns(&appsv1.Deployment{}).
		Complete(r)
    }
But, how does the manager know which resources are owned by it?
The Controller should not watch any Deployment on the cluster and trigger the reconciliation loop. Instead, trigger reconciliation only when the specific Deployment running the Memcached instance is changed. For example, if someone accidentally deletes the Deployment or changes the number of replicas, trigger the reconciliation to ensure that it returns to the desired state.
The Manager knows which Deployment to observe because you set the ownerRef (Owner Reference):
if err := ctrl.SetControllerReference(memcached, dep, r.Scheme); err != nil {
    return nil, err
}
Granting permissions
It’s important to ensure that the Controller has the necessary permissions(i.e. to create, get, update, and list) the resources it manages.
You configure the RBAC permissions via RBAC markers, which controller-gen uses to generate and update the
manifest files in config/rbac/. You can find these markers (and should define them) on the Reconcile() method of each controller, see
how the example implements them:
// +kubebuilder:rbac:groups=cache.example.com,resources=memcacheds,verbs=get;list;watch;create;update;patch;delete
// +kubebuilder:rbac:groups=cache.example.com,resources=memcacheds/status,verbs=get;update;patch
// +kubebuilder:rbac:groups=cache.example.com,resources=memcacheds/finalizers,verbs=update
// +kubebuilder:rbac:groups=events.k8s.io,resources=events,verbs=create;patch
// +kubebuilder:rbac:groups=apps,resources=deployments,verbs=get;list;watch;create;update;patch;delete
// +kubebuilder:rbac:groups=core,resources=pods,verbs=get;list;watch
After making changes to the controller, run the make manifests command. This will prompt controller-gen
to refresh the files located under config/rbac.
config/rbac/role.yaml: Our RBAC Role generated
---
apiVersion: rbac.authorization.k8s.io/v1
kind: ClusterRole
metadata:
  name: manager-role
rules:
- apiGroups:
  - ""
  resources:
  - pods
  verbs:
  - get
  - list
  - watch
- apiGroups:
  - apps
  resources:
  - deployments
  verbs:
  - create
  - delete
  - get
  - list
  - patch
  - update
  - watch
- apiGroups:
  - cache.example.com
  resources:
  - memcacheds
  verbs:
  - create
  - delete
  - get
  - list
  - patch
  - update
  - watch
- apiGroups:
  - cache.example.com
  resources:
  - memcacheds/finalizers
  verbs:
  - update
- apiGroups:
  - cache.example.com
  resources:
  - memcacheds/status
  verbs:
  - get
  - patch
  - update
- apiGroups:
  - events.k8s.io
  resources:
  - events
  verbs:
  - create
  - patch
Manager (main.go)
The Manager in the cmd/main.go file is responsible for managing the controllers in your application.
cmd/main.go: Our main.go
/*
Copyright 2026 The Kubernetes authors.

Licensed under the Apache License, Version 2.0 (the "License");
you may not use this file except in compliance with the License.
You may obtain a copy of the License at

    http://www.apache.org/licenses/LICENSE-2.0

Unless required by applicable law or agreed to in writing, software
distributed under the License is distributed on an "AS IS" BASIS,
WITHOUT WARRANTIES OR CONDITIONS OF ANY KIND, either express or implied.
See the License for the specific language governing permissions and
limitations under the License.
*/

package main

import (
	"crypto/tls"
	"flag"
	"os"

	// Import all Kubernetes client auth plugins (e.g. Azure, GCP, OIDC, etc.)
	// to ensure that exec-entrypoint and run can make use of them.
	_ "k8s.io/client-go/plugin/pkg/client/auth"

	"k8s.io/apimachinery/pkg/runtime"
	utilruntime "k8s.io/apimachinery/pkg/util/runtime"
	clientgoscheme "k8s.io/client-go/kubernetes/scheme"
	ctrl "sigs.k8s.io/controller-runtime"
	"sigs.k8s.io/controller-runtime/pkg/healthz"
	"sigs.k8s.io/controller-runtime/pkg/log/zap"
	"sigs.k8s.io/controller-runtime/pkg/metrics/filters"
	metricsserver "sigs.k8s.io/controller-runtime/pkg/metrics/server"
	"sigs.k8s.io/controller-runtime/pkg/webhook"

	cachev1alpha1 "example.com/memcached/api/v1alpha1"
	"example.com/memcached/internal/controller"
	// +kubebuilder:scaffold:imports
)

var (
	scheme   = runtime.NewScheme()
	setupLog = ctrl.Log.WithName("setup")
)

func init() {
	utilruntime.Must(clientgoscheme.AddToScheme(scheme))

	utilruntime.Must(cachev1alpha1.AddToScheme(scheme))
	// +kubebuilder:scaffold:scheme
}

// nolint:gocyclo
func main() {
	var metricsAddr string
	var metricsCertPath, metricsCertName, metricsCertKey string
	var webhookCertPath, webhookCertName, webhookCertKey string
	var webhookPort int
	var enableLeaderElection bool
	var probeAddr string
	var secureMetrics bool
	var enableHTTP2 bool
	var tlsOpts []func(*tls.Config)
	flag.StringVar(&metricsAddr, "metrics-bind-address", "0", "The address the metrics endpoint binds to. "+
		"Use :8443 for HTTPS or :8080 for HTTP, or leave as 0 to disable the metrics service.")
	flag.StringVar(&probeAddr, "health-probe-bind-address", ":8081", "The address the probe endpoint binds to.")
	flag.BoolVar(&enableLeaderElection, "leader-elect", false,
		"Enable leader election for controller manager. "+
			"Enabling this will ensure there is only one active controller manager.")
	flag.BoolVar(&secureMetrics, "metrics-secure", true,
		"If set, the metrics endpoint is served securely via HTTPS. Use --metrics-secure=false to use HTTP instead.")
	flag.StringVar(&webhookCertPath, "webhook-cert-path", "", "The directory that contains the webhook certificate.")
	flag.StringVar(&webhookCertName, "webhook-cert-name", "tls.crt", "The name of the webhook certificate file.")
	flag.StringVar(&webhookCertKey, "webhook-cert-key", "tls.key", "The name of the webhook key file.")
	flag.IntVar(&webhookPort, "webhook-port", 9443, "Port the webhook server listens on. Defaults to 9443.")
	flag.StringVar(&metricsCertPath, "metrics-cert-path", "",
		"The directory that contains the metrics server certificate.")
	flag.StringVar(&metricsCertName, "metrics-cert-name", "tls.crt", "The name of the metrics server certificate file.")
	flag.StringVar(&metricsCertKey, "metrics-cert-key", "tls.key", "The name of the metrics server key file.")
	flag.BoolVar(&enableHTTP2, "enable-http2", false,
		"If set, HTTP/2 will be enabled for the metrics and webhook servers")
	opts := zap.Options{
		Development: true,
	}
	opts.BindFlags(flag.CommandLine)
	flag.Parse()

	ctrl.SetLogger(zap.New(zap.UseFlagOptions(&opts)))

	// if the enable-http2 flag is false (the default), http/2 should be disabled
	// due to its vulnerabilities. More specifically, disabling http/2 will
	// prevent from being vulnerable to the HTTP/2 Stream Cancellation and
	// Rapid Reset CVEs. For more information see:
	// - https://github.com/advisories/GHSA-qppj-fm5r-hxr3
	// - https://github.com/advisories/GHSA-4374-p667-p6c8
	disableHTTP2 := func(c *tls.Config) {
		setupLog.Info("Disabling HTTP/2")
		c.NextProtos = []string{"http/1.1"}
	}

	if !enableHTTP2 {
		tlsOpts = append(tlsOpts, disableHTTP2)
	}

	// Initial webhook TLS options
	webhookTLSOpts := tlsOpts
	webhookServerOptions := webhook.Options{
		TLSOpts: webhookTLSOpts,
		Port:    webhookPort,
	}

	if len(webhookCertPath) > 0 {
		setupLog.Info("Initializing webhook certificate watcher using provided certificates",
			"webhook-cert-path", webhookCertPath, "webhook-cert-name", webhookCertName, "webhook-cert-key", webhookCertKey)

		webhookServerOptions.CertDir = webhookCertPath
		webhookServerOptions.CertName = webhookCertName
		webhookServerOptions.KeyName = webhookCertKey
	}

	webhookServer := webhook.NewServer(webhookServerOptions)

	// Metrics endpoint is enabled in 'config/default/kustomization.yaml'. The Metrics options configure the server.
	// More info:
	// - https://pkg.go.dev/sigs.k8s.io/controller-runtime@v0.24.1/pkg/metrics/server
	// - https://book.kubebuilder.io/reference/metrics.html
	metricsServerOptions := metricsserver.Options{
		BindAddress:   metricsAddr,
		SecureServing: secureMetrics,
		TLSOpts:       tlsOpts,
	}

	if secureMetrics {
		// FilterProvider is used to protect the metrics endpoint with authn/authz.
		// These configurations ensure that only authorized users and service accounts
		// can access the metrics endpoint. The RBAC are configured in 'config/rbac/kustomization.yaml'. More info:
		// https://pkg.go.dev/sigs.k8s.io/controller-runtime@v0.24.1/pkg/metrics/filters#WithAuthenticationAndAuthorization
		metricsServerOptions.FilterProvider = filters.WithAuthenticationAndAuthorization
	}

	// If the certificate is not specified, controller-runtime will automatically
	// generate self-signed certificates for the metrics server. While convenient for development and testing,
	// this setup is not recommended for production.
	//
	// TODO(user): If you enable certManager, uncomment the following lines:
	// - [METRICS-WITH-CERTS] at config/default/kustomization.yaml to generate and use certificates
	// managed by cert-manager for the metrics server.
	// - [PROMETHEUS-WITH-CERTS] at config/prometheus/kustomization.yaml for TLS certification.
	if len(metricsCertPath) > 0 {
		setupLog.Info("Initializing metrics certificate watcher using provided certificates",
			"metrics-cert-path", metricsCertPath, "metrics-cert-name", metricsCertName, "metrics-cert-key", metricsCertKey)

		metricsServerOptions.CertDir = metricsCertPath
		metricsServerOptions.CertName = metricsCertName
		metricsServerOptions.KeyName = metricsCertKey
	}

	mgr, err := ctrl.NewManager(ctrl.GetConfigOrDie(), ctrl.Options{
		Scheme:                 scheme,
		Metrics:                metricsServerOptions,
		WebhookServer:          webhookServer,
		HealthProbeBindAddress: probeAddr,
		LeaderElection:         enableLeaderElection,
		LeaderElectionID:       "4b13cc52.example.com",
		// LeaderElectionReleaseOnCancel defines if the leader should step down voluntarily
		// when the Manager ends. This requires the binary to immediately end when the
		// Manager is stopped, otherwise, this setting is unsafe. Setting this significantly
		// speeds up voluntary leader transitions as the new leader don't have to wait
		// LeaseDuration time first.
		//
		// In the default scaffold provided, the program ends immediately after
		// the manager stops, so would be fine to enable this option. However,
		// if you are doing or is intended to do any operation such as perform cleanups
		// after the manager stops then its usage might be unsafe.
		// LeaderElectionReleaseOnCancel: true,
	})
	if err != nil {
		setupLog.Error(err, "Failed to start manager")
		os.Exit(1)
	}

	if err := (&controller.MemcachedReconciler{
		Client: mgr.GetClient(),
		Scheme: mgr.GetScheme(),
	}).SetupWithManager(mgr); err != nil {
		setupLog.Error(err, "Failed to create controller", "controller", "memcached")
		os.Exit(1)
	}
	// +kubebuilder:scaffold:builder

	if err := mgr.AddHealthzCheck("healthz", healthz.Ping); err != nil {
		setupLog.Error(err, "Failed to set up health check")
		os.Exit(1)
	}
	if err := mgr.AddReadyzCheck("readyz", healthz.Ping); err != nil {
		setupLog.Error(err, "Failed to set up ready check")
		os.Exit(1)
	}

	setupLog.Info("Starting manager")
	if err := mgr.Start(ctrl.SetupSignalHandler()); err != nil {
		setupLog.Error(err, "Failed to run manager")
		os.Exit(1)
	}
}
Use Kubebuilder plugins to scaffold additional options
Now that you have a better understanding of how to create your own API and controller,
let’s scaffold in this project the plugin autoupdate.kubebuilder.io/v1-alpha
so that your project can be kept up to date with the latest Kubebuilder releases scaffolding changes
and consequently adopt improvements from the ecosystem.
kubebuilder edit --plugins="autoupdate/v1-alpha"
Inspect the file .github/workflows/auto-update.yml to see how it works.
Checking the project running in the cluster
At this point you can check the steps to validate the project on the cluster by looking the steps defined in the Quick Start, see: Run It On the Cluster
Next steps
- To delve deeper into developing your solution, consider going through the CronJob Tutorial
- For insights on optimizing your approach, refer to the Best Practices documentation.
Tutorial: Building CronJob
Too many tutorials start out with some really contrived setup, or some toy application that gets the basics across, and then stalls out on the more complicated stuff. Instead, this tutorial should take you through (almost) the full gamut of complexity with Kubebuilder, starting off simple and building up to something pretty full-featured.
Pretend (and sure, this is a teensy bit contrived) that you have finally gotten tired of the maintenance burden of the non-Kubebuilder implementation of the CronJob controller in Kubernetes, and you’d like to rewrite it using Kubebuilder.
The job (no pun intended) of the CronJob controller is to run one-off tasks on the Kubernetes cluster at regular intervals. It does this by building on top of the Job controller, whose task is to run one-off tasks once, seeing them to completion.
Instead of trying to tackle rewriting the Job controller as well, use this as an opportunity to see how to interact with external types.
Scaffolding out our project
As covered in the quick start, scaffold out a new project. Make sure you have installed Kubebuilder, then scaffold out a new project:
# create a project directory, and then run the init command.
mkdir project
cd project
# This example uses a domain of tutorial.kubebuilder.io,
# so all API groups is <group>.tutorial.kubebuilder.io.
kubebuilder init --domain tutorial.kubebuilder.io --repo tutorial.kubebuilder.io/project
Now that you have a project in place, take a look at what Kubebuilder has scaffolded so far…
What’s in a basic project?
When scaffolding out a new project, Kubebuilder provides us with a few basic pieces of boilerplate.
Build infrastructure
First up, basic infrastructure for building your project:
go.mod: A new Go module matching our project, with
basic dependencies
module tutorial.kubebuilder.io/project

go 1.26.0

require (
	github.com/onsi/ginkgo/v2 v2.27.4
	github.com/onsi/gomega v1.39.0
	github.com/robfig/cron v1.2.0
	k8s.io/api v0.36.0
	k8s.io/apimachinery v0.36.0
	k8s.io/client-go v0.36.0
	sigs.k8s.io/controller-runtime v0.24.1
)

require (
	cel.dev/expr v0.25.1 // indirect
	github.com/Masterminds/semver/v3 v3.4.0 // indirect
	github.com/antlr4-go/antlr/v4 v4.13.0 // indirect
	github.com/beorn7/perks v1.0.1 // indirect
	github.com/blang/semver/v4 v4.0.0 // indirect
	github.com/cenkalti/backoff/v5 v5.0.3 // indirect
	github.com/cespare/xxhash/v2 v2.3.0 // indirect
	github.com/davecgh/go-spew v1.1.2-0.20180830191138-d8f796af33cc // indirect
	github.com/emicklei/go-restful/v3 v3.13.0 // indirect
	github.com/evanphx/json-patch/v5 v5.9.11 // indirect
	github.com/felixge/httpsnoop v1.0.4 // indirect
	github.com/fsnotify/fsnotify v1.9.0 // indirect
	github.com/fxamacker/cbor/v2 v2.9.0 // indirect
	github.com/go-logr/logr v1.4.3 // indirect
	github.com/go-logr/stdr v1.2.2 // indirect
	github.com/go-logr/zapr v1.3.0 // indirect
	github.com/go-openapi/jsonpointer v0.21.0 // indirect
	github.com/go-openapi/jsonreference v0.20.2 // indirect
	github.com/go-openapi/swag v0.23.0 // indirect
	github.com/go-task/slim-sprig/v3 v3.0.0 // indirect
	github.com/google/cel-go v0.26.0 // indirect
	github.com/google/gnostic-models v0.7.0 // indirect
	github.com/google/go-cmp v0.7.0 // indirect
	github.com/google/pprof v0.0.0-20250403155104-27863c87afa6 // indirect
	github.com/google/uuid v1.6.0 // indirect
	github.com/grpc-ecosystem/grpc-gateway/v2 v2.27.7 // indirect
	github.com/inconshreveable/mousetrap v1.1.0 // indirect
	github.com/josharian/intern v1.0.0 // indirect
	github.com/json-iterator/go v1.1.12 // indirect
	github.com/mailru/easyjson v0.7.7 // indirect
	github.com/modern-go/concurrent v0.0.0-20180306012644-bacd9c7ef1dd // indirect
	github.com/modern-go/reflect2 v1.0.3-0.20250322232337-35a7c28c31ee // indirect
	github.com/munnerz/goautoneg v0.0.0-20191010083416-a7dc8b61c822 // indirect
	github.com/pmezard/go-difflib v1.0.1-0.20181226105442-5d4384ee4fb2 // indirect
	github.com/prometheus/client_golang v1.23.2 // indirect
	github.com/prometheus/client_model v0.6.2 // indirect
	github.com/prometheus/common v0.67.5 // indirect
	github.com/prometheus/procfs v0.19.2 // indirect
	github.com/spf13/cobra v1.10.2 // indirect
	github.com/spf13/pflag v1.0.9 // indirect
	github.com/stoewer/go-strcase v1.3.0 // indirect
	github.com/x448/float16 v0.8.4 // indirect
	go.opentelemetry.io/auto/sdk v1.2.1 // indirect
	go.opentelemetry.io/contrib/instrumentation/net/http/otelhttp v0.65.0 // indirect
	go.opentelemetry.io/otel v1.41.0 // indirect
	go.opentelemetry.io/otel/exporters/otlp/otlptrace v1.40.0 // indirect
	go.opentelemetry.io/otel/exporters/otlp/otlptrace/otlptracegrpc v1.40.0 // indirect
	go.opentelemetry.io/otel/metric v1.41.0 // indirect
	go.opentelemetry.io/otel/sdk v1.40.0 // indirect
	go.opentelemetry.io/otel/trace v1.41.0 // indirect
	go.opentelemetry.io/proto/otlp v1.9.0 // indirect
	go.uber.org/multierr v1.11.0 // indirect
	go.uber.org/zap v1.27.1 // indirect
	go.yaml.in/yaml/v2 v2.4.3 // indirect
	go.yaml.in/yaml/v3 v3.0.4 // indirect
	golang.org/x/exp v0.0.0-20251219203646-944ab1f22d93 // indirect
	golang.org/x/mod v0.32.0 // indirect
	golang.org/x/net v0.49.0 // indirect
	golang.org/x/oauth2 v0.34.0 // indirect
	golang.org/x/sync v0.19.0 // indirect
	golang.org/x/sys v0.40.0 // indirect
	golang.org/x/term v0.39.0 // indirect
	golang.org/x/text v0.33.0 // indirect
	golang.org/x/time v0.14.0 // indirect
	golang.org/x/tools v0.41.0 // indirect
	gomodules.xyz/jsonpatch/v2 v2.4.0 // indirect
	google.golang.org/genproto/googleapis/api v0.0.0-20260128011058-8636f8732409 // indirect
	google.golang.org/genproto/googleapis/rpc v0.0.0-20260128011058-8636f8732409 // indirect
	google.golang.org/grpc v1.79.3 // indirect
	google.golang.org/protobuf v1.36.12-0.20260120151049-f2248ac996af // indirect
	gopkg.in/evanphx/json-patch.v4 v4.13.0 // indirect
	gopkg.in/inf.v0 v0.9.1 // indirect
	gopkg.in/yaml.v3 v3.0.1 // indirect
	k8s.io/apiextensions-apiserver v0.36.0 // indirect
	k8s.io/apiserver v0.36.0 // indirect
	k8s.io/component-base v0.36.0 // indirect
	k8s.io/klog/v2 v2.140.0 // indirect
	k8s.io/kube-openapi v0.0.0-20260317180543-43fb72c5454a // indirect
	k8s.io/streaming v0.36.0 // indirect
	k8s.io/utils v0.0.0-20260210185600-b8788abfbbc2 // indirect
	sigs.k8s.io/apiserver-network-proxy/konnectivity-client v0.34.0 // indirect
	sigs.k8s.io/json v0.0.0-20250730193827-2d320260d730 // indirect
	sigs.k8s.io/randfill v1.0.0 // indirect
	sigs.k8s.io/structured-merge-diff/v6 v6.3.2 // indirect
	sigs.k8s.io/yaml v1.6.0 // indirect
)
Makefile: Make targets for building and deploying your controller
# Image URL to use all building/pushing image targets
IMG ?= controller:latest
# YEAR defines the year value used for substituting the YEAR placeholder in the boilerplate header.
YEAR ?= $(shell date +%Y)

# Get the currently used golang install path (in GOPATH/bin, unless GOBIN is set)
ifeq (,$(shell go env GOBIN))
GOBIN=$(shell go env GOPATH)/bin
else
GOBIN=$(shell go env GOBIN)
endif

# CONTAINER_TOOL defines the container tool to be used for building images.
# Be aware that the target commands are only tested with Docker which is
# scaffolded by default. However, you might want to replace it to use other
# tools. (i.e. podman)
CONTAINER_TOOL ?= docker

# Setting SHELL to bash allows bash commands to be executed by recipes.
# Options are set to exit when a recipe line exits non-zero or a piped command fails.
SHELL = /usr/bin/env bash -o pipefail
.SHELLFLAGS = -ec

.PHONY: all
all: build

##@ General

# The help target prints out all targets with their descriptions organized
# beneath their categories. The categories are represented by '##@' and the
# target descriptions by '##'. The awk command is responsible for reading the
# entire set of makefiles included in this invocation, looking for lines of the
# file as xyz: ## something, and then pretty-format the target and help. Then,
# if there's a line with ##@ something, that gets pretty-printed as a category.
# More info on the usage of ANSI control characters for terminal formatting:
# https://en.wikipedia.org/wiki/ANSI_escape_code#SGR_parameters
# More info on the awk command:
# http://linuxcommand.org/lc3_adv_awk.php

.PHONY: help
help: ## Display this help.
	@awk 'BEGIN {FS = ":.*##"; printf "\nUsage:\n  make \033[36m<target>\033[0m\n"} /^[a-zA-Z_0-9-]+:.*?##/ { printf "  \033[36m%-15s\033[0m %s\n", $$1, $$2 } /^##@/ { printf "\n\033[1m%s\033[0m\n", substr($$0, 5) } ' $(MAKEFILE_LIST)

##@ Development

.PHONY: manifests
manifests: controller-gen ## Generate WebhookConfiguration, ClusterRole and CustomResourceDefinition objects.
	# Note that the option maxDescLen=0 was added in the default scaffold in order to sort out the issue
	# Too long: must have at most 262144 bytes. By using kubectl apply to create / update resources an annotation
	# is created by K8s API to store the latest version of the resource ( kubectl.kubernetes.io/last-applied-configuration).
	# However, it has a size limit and if the CRD is too big with so many long descriptions as this one it will cause the failure.
	"$(CONTROLLER_GEN)" rbac:roleName=manager-role crd:maxDescLen=0 webhook paths="./..." output:crd:artifacts:config=config/crd/bases

.PHONY: generate
generate: controller-gen ## Generate code containing DeepCopy, DeepCopyInto, and DeepCopyObject method implementations.
	"$(CONTROLLER_GEN)" object:headerFile="hack/boilerplate.go.txt",year=$(YEAR) paths="./..."

.PHONY: fmt
fmt: ## Run go fmt against code.
	go fmt ./...

.PHONY: vet
vet: ## Run go vet against code.
	go vet ./...

.PHONY: test
test: manifests generate fmt vet setup-envtest ## Run tests.
	KUBEBUILDER_ASSETS="$(shell "$(ENVTEST)" use $(ENVTEST_K8S_VERSION) --bin-dir "$(LOCALBIN)" -p path)" go test $$(go list ./... | grep -v /e2e) -coverprofile cover.out

# TODO(user): To use a different vendor for e2e tests, modify the setup under 'tests/e2e'.
# The default setup assumes Kind is pre-installed and builds/loads the Manager Docker image locally.
# kubectl kuberc is disabled by default for test isolation; enable with:
# - KUBECTL_KUBERC=true
# CertManager is installed by default; skip with:
# - CERT_MANAGER_INSTALL_SKIP=true
KIND_CLUSTER ?= project-test-e2e

.PHONY: setup-test-e2e
setup-test-e2e: ## Set up a Kind cluster for e2e tests if it does not exist
	@command -v $(KIND) >/dev/null 2>&1 || { \
		echo "Kind is not installed. Please install Kind manually."; \
		exit 1; \
	}
	@case "$$($(KIND) get clusters)" in \
		*"$(KIND_CLUSTER)"*) \
			echo "Kind cluster '$(KIND_CLUSTER)' already exists. Skipping creation." ;; \
		*) \
			echo "Creating Kind cluster '$(KIND_CLUSTER)'..."; \
			$(KIND) create cluster --name $(KIND_CLUSTER) ;; \
	esac

.PHONY: test-e2e
test-e2e: setup-test-e2e manifests generate fmt vet ## Run the e2e tests. Expected an isolated environment using Kind.
	KIND=$(KIND) KIND_CLUSTER=$(KIND_CLUSTER) go test -tags=e2e ./test/e2e/ -v -ginkgo.v
	$(MAKE) cleanup-test-e2e

.PHONY: cleanup-test-e2e
cleanup-test-e2e: ## Tear down the Kind cluster used for e2e tests
	@$(KIND) delete cluster --name $(KIND_CLUSTER)

.PHONY: lint
lint: golangci-lint ## Run golangci-lint linter
	"$(GOLANGCI_LINT)" run

.PHONY: lint-fix
lint-fix: golangci-lint ## Run golangci-lint linter and perform fixes
	"$(GOLANGCI_LINT)" run --fix

.PHONY: lint-config
lint-config: golangci-lint ## Verify golangci-lint linter configuration
	"$(GOLANGCI_LINT)" config verify

##@ Build

.PHONY: build
build: manifests generate fmt vet ## Build manager binary.
	go build -o bin/manager cmd/main.go

.PHONY: run
run: manifests generate fmt vet ## Run a controller from your host.
	go run ./cmd/main.go

# If you wish to build the manager image targeting other platforms you can use the --platform flag.
# (i.e. docker build --platform linux/arm64). However, you must enable docker buildKit for it.
# More info: https://docs.docker.com/develop/develop-images/build_enhancements/
# Override BASE_IMAGE to build from another registry, e.g.
# make docker-build IMG=<img> BASE_IMAGE=docker.io/library/golang:1.26
.PHONY: docker-build
docker-build: ## Build docker image with the manager.
	$(CONTAINER_TOOL) build $(if $(BASE_IMAGE),--build-arg BASE_IMAGE=$(BASE_IMAGE)) -t ${IMG} .

.PHONY: docker-push
docker-push: ## Push docker image with the manager.
	$(CONTAINER_TOOL) push ${IMG}

# PLATFORMS defines the target platforms for the manager image be built to provide support to multiple
# architectures. (i.e. make docker-buildx IMG=myregistry/mypoperator:0.0.1). To use this option you need to:
# - be able to use docker buildx. More info: https://docs.docker.com/build/buildx/
# - have enabled BuildKit. More info: https://docs.docker.com/develop/develop-images/build_enhancements/
# - be able to push the image to your registry (i.e. if you do not set a valid value via IMG=<myregistry/image:<tag>> then the export will fail)
# To adequately provide solutions that are compatible with multiple platforms, you should consider using this option.
PLATFORMS ?= linux/arm64,linux/amd64,linux/s390x,linux/ppc64le
.PHONY: docker-buildx
docker-buildx: ## Build and push docker image for the manager for cross-platform support
	# copy existing Dockerfile and insert --platform=${BUILDPLATFORM} into Dockerfile.cross, and preserve the original Dockerfile
	sed -e '1 s/\(^FROM\)/FROM --platform=\$$\{BUILDPLATFORM\}/; t' -e ' 1,// s//FROM --platform=\$$\{BUILDPLATFORM\}/' Dockerfile > Dockerfile.cross
	- $(CONTAINER_TOOL) buildx create --name project-builder
	$(CONTAINER_TOOL) buildx use project-builder
	- $(CONTAINER_TOOL) buildx build --push --platform=$(PLATFORMS) $(if $(BASE_IMAGE),--build-arg BASE_IMAGE=$(BASE_IMAGE)) --tag ${IMG} -f Dockerfile.cross .
	- $(CONTAINER_TOOL) buildx rm project-builder
	rm Dockerfile.cross

.PHONY: build-installer
build-installer: manifests generate kustomize ## Generate a consolidated YAML with CRDs and deployment.
	mkdir -p dist
	cd config/manager && "$(KUSTOMIZE)" edit set image controller=${IMG}
	"$(KUSTOMIZE)" build config/default > dist/install.yaml

##@ Deployment

ifndef ignore-not-found
  ignore-not-found = false
endif

.PHONY: install
install: manifests kustomize ## Install CRDs into the K8s cluster specified in ~/.kube/config.
	@out="$$( "$(KUSTOMIZE)" build config/crd 2>/dev/null || true )"; \
	if [ -n "$$out" ]; then echo "$$out" | "$(KUBECTL)" apply -f -; else echo "No CRDs to install; skipping."; fi

.PHONY: uninstall
uninstall: manifests kustomize ## Uninstall CRDs from the K8s cluster specified in ~/.kube/config. Call with ignore-not-found=true to ignore resource not found errors during deletion.
	@out="$$( "$(KUSTOMIZE)" build config/crd 2>/dev/null || true )"; \
	if [ -n "$$out" ]; then echo "$$out" | "$(KUBECTL)" delete --ignore-not-found=$(ignore-not-found) -f -; else echo "No CRDs to delete; skipping."; fi

.PHONY: deploy
deploy: manifests kustomize ## Deploy controller to the K8s cluster specified in ~/.kube/config.
	cd config/manager && "$(KUSTOMIZE)" edit set image controller=${IMG}
	"$(KUSTOMIZE)" build config/default | "$(KUBECTL)" apply -f -

.PHONY: undeploy
undeploy: kustomize ## Undeploy controller from the K8s cluster specified in ~/.kube/config. Call with ignore-not-found=true to ignore resource not found errors during deletion.
	"$(KUSTOMIZE)" build config/default | "$(KUBECTL)" delete --ignore-not-found=$(ignore-not-found) -f -

##@ Dependencies

## Location to install dependencies to
LOCALBIN ?= $(shell pwd)/bin
$(LOCALBIN):
	mkdir -p "$(LOCALBIN)"

## Tool Binaries
KUBECTL ?= kubectl
KIND ?= kind
KUSTOMIZE ?= $(LOCALBIN)/kustomize
CONTROLLER_GEN ?= $(LOCALBIN)/controller-gen
ENVTEST ?= $(LOCALBIN)/setup-envtest
GOLANGCI_LINT = $(LOCALBIN)/golangci-lint

## Tool Versions
KUSTOMIZE_VERSION ?= v5.8.1
CONTROLLER_TOOLS_VERSION ?= v0.21.0

#ENVTEST_VERSION is the controller-runtime version to use for setup-envtest, derived from go.mod
ENVTEST_VERSION ?= $(shell v='$(call gomodver,sigs.k8s.io/controller-runtime)'; \
  [ -n "$$v" ] || { echo "Set ENVTEST_VERSION manually (controller-runtime replace has no tag)" >&2; exit 1; }; \
  printf '%s\n' "$$v")

#ENVTEST_K8S_VERSION is the version of Kubernetes to use for setting up ENVTEST binaries (i.e. 1.31)
ENVTEST_K8S_VERSION ?= $(shell v='$(call gomodver,k8s.io/api)'; \
  [ -n "$$v" ] || { echo "Set ENVTEST_K8S_VERSION manually (k8s.io/api replace has no tag)" >&2; exit 1; }; \
  printf '%s\n' "$$v" | sed -E 's/^v?[0-9]+\.([0-9]+).*/1.\1/')

GOLANGCI_LINT_VERSION ?= v2.12.2
.PHONY: kustomize
kustomize: $(KUSTOMIZE) ## Download kustomize locally if necessary.
$(KUSTOMIZE): $(LOCALBIN)
	$(call go-install-tool,$(KUSTOMIZE),sigs.k8s.io/kustomize/kustomize/v5,$(KUSTOMIZE_VERSION))

.PHONY: controller-gen
controller-gen: $(CONTROLLER_GEN) ## Download controller-gen locally if necessary.
$(CONTROLLER_GEN): $(LOCALBIN)
	$(call go-install-tool,$(CONTROLLER_GEN),sigs.k8s.io/controller-tools/cmd/controller-gen,$(CONTROLLER_TOOLS_VERSION))

.PHONY: setup-envtest
setup-envtest: envtest ## Download the binaries required for ENVTEST in the local bin directory.
	@echo "Setting up envtest binaries for Kubernetes version $(ENVTEST_K8S_VERSION)..."
	@"$(ENVTEST)" use $(ENVTEST_K8S_VERSION) --bin-dir "$(LOCALBIN)" -p path || { \
		echo "Error: Failed to set up envtest binaries for version $(ENVTEST_K8S_VERSION)."; \
		exit 1; \
	}

.PHONY: envtest
envtest: $(ENVTEST) ## Download setup-envtest locally if necessary.
$(ENVTEST): $(LOCALBIN)
	$(call go-install-tool,$(ENVTEST),sigs.k8s.io/controller-runtime/tools/setup-envtest,$(ENVTEST_VERSION))

.PHONY: golangci-lint
golangci-lint: $(GOLANGCI_LINT) ## Download golangci-lint locally if necessary.
$(GOLANGCI_LINT): $(LOCALBIN)
	$(call go-install-tool,$(GOLANGCI_LINT),github.com/golangci/golangci-lint/v2/cmd/golangci-lint,$(GOLANGCI_LINT_VERSION))
	@test -f .custom-gcl.yml && { \
		echo "Building custom golangci-lint with plugins..." && \
		$(GOLANGCI_LINT) custom --destination $(LOCALBIN) --name golangci-lint-custom && \
		mv -f $(LOCALBIN)/golangci-lint-custom $(GOLANGCI_LINT); \
	} || true

# go-install-tool will 'go install' any package with custom target and name of binary, if it doesn't exist
# $1 - target path with name of binary
# $2 - package url which can be installed
# $3 - specific version of package
define go-install-tool
@[ -f "$(1)-$(3)" ] && [ "$$(readlink -- "$(1)" 2>/dev/null)" = "$(1)-$(3)" ] || { \
set -e; \
package=$(2)@$(3) ;\
echo "Downloading $${package}" ;\
rm -f "$(1)" ;\
GOBIN="$(LOCALBIN)" go install $${package} ;\
mv "$(LOCALBIN)/$$(basename "$(1)")" "$(1)-$(3)" ;\
} ;\
ln -sf "$$(realpath "$(1)-$(3)")" "$(1)"
endef

define gomodver
$(shell go list -m -f '{{if .Replace}}{{.Replace.Version}}{{else}}{{.Version}}{{end}}' $(1) 2>/dev/null)
endef

##@ Helm Deployment

## Helm binary to use for deploying the chart
HELM ?= helm
## Namespace to deploy the Helm release
HELM_NAMESPACE ?= project-system
## Name of the Helm release
HELM_RELEASE ?= project
## Path to the Helm chart directory
HELM_CHART_DIR ?= dist/chart
## Additional arguments to pass to helm commands
HELM_EXTRA_ARGS ?=

.PHONY: install-helm
install-helm: ## Install the latest version of Helm.
	@command -v $(HELM) >/dev/null 2>&1 || { \
		echo "Installing Helm..." && \
		curl -fsSL https://raw.githubusercontent.com/helm/helm/main/scripts/get-helm-4 | bash; \
	}

.PHONY: helm-deploy
helm-deploy: install-helm ## Deploy manager to the K8s cluster via Helm. Specify an image with IMG.
	IMG="$(IMG)"; $(HELM) upgrade --install $(HELM_RELEASE) $(HELM_CHART_DIR) \
		--namespace $(HELM_NAMESPACE) \
		--create-namespace \
		--set manager.image.repository=$${IMG%:*} \
		--set manager.image.tag=$${IMG##*:} \
		--wait \
		--timeout 5m \
		$(HELM_EXTRA_ARGS)

.PHONY: helm-uninstall
helm-uninstall: ## Uninstall the Helm release from the K8s cluster.
	$(HELM) uninstall $(HELM_RELEASE) --namespace $(HELM_NAMESPACE)

.PHONY: helm-status
helm-status: ## Show Helm release status.
	$(HELM) status $(HELM_RELEASE) --namespace $(HELM_NAMESPACE)

.PHONY: helm-history
helm-history: ## Show Helm release history.
	$(HELM) history $(HELM_RELEASE) --namespace $(HELM_NAMESPACE)

.PHONY: helm-rollback
helm-rollback: ## Rollback to previous Helm release.
	$(HELM) rollback $(HELM_RELEASE) --namespace $(HELM_NAMESPACE)
PROJECT: Kubebuilder metadata for scaffolding new components
# Code generated by tool. DO NOT EDIT.
# This file is used to track the info used to scaffold your project
# and allow the plugins properly work.
# More info: https://book.kubebuilder.io/reference/project-config.html
cliVersion: (devel)
domain: tutorial.kubebuilder.io
layout:
- go.kubebuilder.io/v4
plugins:
  helm.kubebuilder.io/v2-alpha:
    manifests: dist/install.yaml
    output: dist
projectName: project
repo: tutorial.kubebuilder.io/project
resources:
- api:
    crdVersion: v1
    namespaced: true
  controller: true
  domain: tutorial.kubebuilder.io
  group: batch
  kind: CronJob
  path: tutorial.kubebuilder.io/project/api/v1
  version: v1
  webhooks:
    defaulting: true
    validation: true
    webhookVersion: v1
version: "3"
Launch configuration
We also get launch configurations under the
config/
directory. Right now, it just contains
Kustomize YAML definitions required to
launch our controller on a cluster, but once we get started writing our
controller, it’ll also hold our CustomResourceDefinitions, RBAC
configuration, and WebhookConfigurations.
config/default contains a Kustomize base for launching
the controller in a standard configuration.
Each other directory contains a different piece of configuration, refactored out into its own base:
-
config/manager: launch your controllers as pods in the cluster -
config/rbac: permissions required to run your controllers under their own service account
The entrypoint
Last, but certainly not least, Kubebuilder scaffolds out the basic
entrypoint of our project: main.go. Let’s take a look at that next…
Every journey needs a start, every program needs a main
Apache License
Copyright 2022 The Kubernetes authors.
Licensed under the Apache License, Version 2.0 (the “License”); you may not use this file except in compliance with the License. You may obtain a copy of the License at
http://www.apache.org/licenses/LICENSE-2.0
Unless required by applicable law or agreed to in writing, software distributed under the License is distributed on an “AS IS” BASIS, WITHOUT WARRANTIES OR CONDITIONS OF ANY KIND, either express or implied. See the License for the specific language governing permissions and limitations under the License.
Our package starts out with some basic imports. Particularly:
- The core controller-runtime library
- The default controller-runtime logging, Zap (more on that a bit later)
package main

import (
	"flag"
	"os"

	// Import all Kubernetes client auth plugins (e.g. Azure, GCP, OIDC, etc.)
	// to ensure that exec-entrypoint and run can make use of them.
	_ "k8s.io/client-go/plugin/pkg/client/auth"

	"k8s.io/apimachinery/pkg/runtime"
	utilruntime "k8s.io/apimachinery/pkg/util/runtime"
	clientgoscheme "k8s.io/client-go/kubernetes/scheme"
	_ "k8s.io/client-go/plugin/pkg/client/auth/gcp"
	ctrl "sigs.k8s.io/controller-runtime"
	"sigs.k8s.io/controller-runtime/pkg/cache"
	"sigs.k8s.io/controller-runtime/pkg/healthz"
	"sigs.k8s.io/controller-runtime/pkg/log/zap"
	"sigs.k8s.io/controller-runtime/pkg/metrics/server"
	"sigs.k8s.io/controller-runtime/pkg/webhook"
	// +kubebuilder:scaffold:imports
)
Every set of controllers needs a Scheme, which provides mappings between Kinds and their corresponding Go types. We’ll talk a bit more about Kinds when we write our API definition, so just keep this in mind for later.
var (
	scheme   = runtime.NewScheme()
	setupLog = ctrl.Log.WithName("setup")
)

func init() {
	utilruntime.Must(clientgoscheme.AddToScheme(scheme))

	// +kubebuilder:scaffold:scheme
}
At this point, our main function is fairly simple:
-
We set up some basic flags for metrics.
-
We instantiate a manager, which keeps track of running all of our controllers, as well as setting up shared caches and clients to the API server (notice we tell the manager about our Scheme).
-
We run our manager, which in turn runs all of our controllers and webhooks. The manager is set up to run until it receives a graceful shutdown signal. This way, when we’re running on Kubernetes, we behave nicely with graceful pod termination.
While we don’t have anything to run just yet, remember where that
+kubebuilder:scaffold:builder comment is – things’ll get interesting there
soon.
func main() {
	var metricsAddr string
	var enableLeaderElection bool
	var probeAddr string
	flag.StringVar(&metricsAddr, "metrics-bind-address", ":8080", "The address the metric endpoint binds to.")
	flag.StringVar(&probeAddr, "health-probe-bind-address", ":8081", "The address the probe endpoint binds to.")
	flag.BoolVar(&enableLeaderElection, "leader-elect", false,
		"Enable leader election for controller manager. "+
			"Enabling this will ensure there is only one active controller manager.")
	opts := zap.Options{
		Development: true,
	}
	opts.BindFlags(flag.CommandLine)
	flag.Parse()

	ctrl.SetLogger(zap.New(zap.UseFlagOptions(&opts)))

	mgr, err := ctrl.NewManager(ctrl.GetConfigOrDie(), ctrl.Options{
		Scheme: scheme,
		Metrics: server.Options{
			BindAddress: metricsAddr,
		},
		WebhookServer:          webhook.NewServer(webhook.Options{Port: 9443}),
		HealthProbeBindAddress: probeAddr,
		LeaderElection:         enableLeaderElection,
		LeaderElectionID:       "80807133.tutorial.kubebuilder.io",
	})
	if err != nil {
		setupLog.Error(err, "unable to start manager")
		os.Exit(1)
	}
Note that the Manager can restrict the namespace that all controllers will watch for resources by:
	mgr, err := ctrl.NewManager(ctrl.GetConfigOrDie(), ctrl.Options{
		Scheme: scheme,
		Cache: cache.Options{
			DefaultNamespaces: map[string]cache.Config{
				namespace: {},
			},
		},
		Metrics: server.Options{
			BindAddress: metricsAddr,
		},
		WebhookServer:          webhook.NewServer(webhook.Options{Port: 9443}),
		HealthProbeBindAddress: probeAddr,
		LeaderElection:         enableLeaderElection,
		LeaderElectionID:       "80807133.tutorial.kubebuilder.io",
	})
The above example will change the scope of your project to a single Namespace. In this scenario,
it is also suggested to restrict the provided authorization to this namespace by replacing the default
ClusterRole and ClusterRoleBinding to Role and RoleBinding respectively.
For further information see the Kubernetes documentation about Using RBAC Authorization.
Also, it is possible to use the DefaultNamespaces
from cache.Options{} to cache objects in a specific set of namespaces:
	var namespaces []string // List of Namespaces
	defaultNamespaces := make(map[string]cache.Config)

	for _, ns := range namespaces {
		defaultNamespaces[ns] = cache.Config{}
	}

	mgr, err := ctrl.NewManager(ctrl.GetConfigOrDie(), ctrl.Options{
		Scheme: scheme,
		Cache: cache.Options{
			DefaultNamespaces: defaultNamespaces,
		},
		Metrics: server.Options{
			BindAddress: metricsAddr,
		},
		WebhookServer:          webhook.NewServer(webhook.Options{Port: 9443}),
		HealthProbeBindAddress: probeAddr,
		LeaderElection:         enableLeaderElection,
		LeaderElectionID:       "80807133.tutorial.kubebuilder.io",
	})
For further information see cache.Options{}
	// +kubebuilder:scaffold:builder

	if err := mgr.AddHealthzCheck("healthz", healthz.Ping); err != nil {
		setupLog.Error(err, "unable to set up health check")
		os.Exit(1)
	}
	if err := mgr.AddReadyzCheck("readyz", healthz.Ping); err != nil {
		setupLog.Error(err, "unable to set up ready check")
		os.Exit(1)
	}

	setupLog.Info("starting manager")
	if err := mgr.Start(ctrl.SetupSignalHandler()); err != nil {
		setupLog.Error(err, "problem running manager")
		os.Exit(1)
	}
}
With that out of the way, get on to scaffolding the API!
Groups and versions and kinds, oh my!
Before getting started with the API, talk about terminology a bit.
When discussing APIs in Kubernetes, 4 terms are often used: groups, versions, kinds, and resources.
Groups and versions
An API Group in Kubernetes is simply a collection of related functionality. Each group has one or more versions, which, as the name suggests, allow you to change how an API works over time.
Kinds and resources
Each API group-version contains one or more API types, called Kinds. While a Kind may change forms between versions, each form must be able to store all the data of the other forms, somehow (you can store the data in fields, or in annotations). This means that using an older API version will not cause newer data to be lost or corrupted. See the Kubernetes API guidelines for more information.
You’ll also hear mention of resources on occasion. A resource is simply
a use of a Kind in the API. Often, there is a one-to-one mapping between
Kinds and resources. For instance, the pods resource corresponds to the
Pod Kind. However, sometimes, the same Kind may be returned by multiple
resources. For instance, the Scale Kind is returned by all scale
subresources, like deployments/scale or replicasets/scale. This is
what allows the Kubernetes HorizontalPodAutoscaler to interact with
different resources. With CRDs, however, each Kind will correspond to
a single resource.
Notice that resources are always lowercase, and by convention are the lowercase form of the Kind.
So, how does that correspond to Go?
When referring to a kind in a particular group version, it is called a GroupVersionKind, or GVK for short. Same with resources and GVR. As you’ll see shortly, each GVK corresponds to a given root Go type in a package.
Now that the terminology is clear, actually create the API!
So, how can you create an API?
In the next section, Adding a new API, check how the tool helps you
create your APIs with the command kubebuilder create api.
The goal of this command is to create a Custom Resource (CR) and Custom Resource Definition (CRD) for your Kind(s). To check it further see; Extend the Kubernetes API with CustomResourceDefinitions.
But, why create APIs at all?
New APIs are how you teach Kubernetes about your custom objects. Controller-gen uses the Go structs to generate a CRD which includes the schema for your data as well as tracking data like what the new type is called. You can then create instances of your custom objects which your controllers manage.
Your APIs and resources represent your solutions on the clusters. Basically, the CRDs are a definition of your customized Objects, and the CRs are an instance of it.
Ah, do you have an example?
Think about the classic scenario where the goal is to have an application and its database running on the platform with Kubernetes. Then, one CRD could represent the App, and another one could represent the DB. By having one CRD to describe the App and another one for the DB, you avoid hurting concepts such as encapsulation, the single responsibility principle, and cohesion. Damaging these concepts could cause unexpected side effects, such as difficulty in extending, reuse, or maintenance, just to mention a few.
In this way, you can create the App CRD which has its controller and which would be responsible for things like creating Deployments that contain the App and creating Services to access it and etc. Similarly, you could create a CRD to represent the DB, and deploy a controller that would manage DB instances.
Err, but what is that Scheme thing?
The Scheme you saw before is simply a way to keep track of what Go type
corresponds to a given GVK (do not be overwhelmed by its
godocs).
For instance, suppose you mark the
"tutorial.kubebuilder.io/api/v1".CronJob{} type as being in the
batch.tutorial.kubebuilder.io/v1 API group (implicitly saying it has the
Kind CronJob).
Then, you can later construct a new &CronJob{} given some JSON from the
API server that says
{
    "kind": "CronJob",
    "apiVersion": "batch.tutorial.kubebuilder.io/v1",
    ...
}
or properly look up the group version when you go to submit a &CronJob{}
in an update.
Adding a new API
To scaffold out a new Kind (you were paying attention to the last
chapter, right?) and corresponding
controller, use kubebuilder create api:
kubebuilder create api --group batch --version v1 --kind CronJob
Press y for “Create Resource” and “Create Controller”.
The first time you call this command for each group-version, it creates a directory for the new group-version.
In this case, the command creates the
api/v1/
directory, corresponding to the
batch.tutorial.kubebuilder.io/v1 (remember our --domain
setting from the
beginning?).
It has also added a file for the CronJob Kind,
api/v1/cronjob_types.go. Each time you call the command with a different
kind, it adds a corresponding new file.
Take a look at what you have been given out of the box, then move on to filling it out.
Apache License
Copyright 2022.
Licensed under the Apache License, Version 2.0 (the “License”); you may not use this file except in compliance with the License. You may obtain a copy of the License at
http://www.apache.org/licenses/LICENSE-2.0
Unless required by applicable law or agreed to in writing, software distributed under the License is distributed on an “AS IS” BASIS, WITHOUT WARRANTIES OR CONDITIONS OF ANY KIND, either express or implied. See the License for the specific language governing permissions and limitations under the License.
We start out simply enough: we import the meta/v1 API group, which is not
normally exposed by itself, but instead contains metadata common to all
Kubernetes Kinds.
package v1

import (
	metav1 "k8s.io/apimachinery/pkg/apis/meta/v1"
)
Next, we define types for the Spec and Status of our Kind. Kubernetes functions
by reconciling desired state (Spec) with actual cluster state (other objects’
Status) and external state, and then recording what it observed (Status).
Thus, every functional object includes spec and status. A few types, like
ConfigMap don’t follow this pattern, since they don’t encode desired state,
but most types do.
// EDIT THIS FILE!  THIS IS SCAFFOLDING FOR YOU TO OWN!
// NOTE: json tags are required.  Any new fields you add must have json tags for the fields to be serialized.

// CronJobSpec defines the desired state of CronJob
type CronJobSpec struct {
	// INSERT ADDITIONAL SPEC FIELDS - desired state of cluster
	// Important: Run "make" to regenerate code after modifying this file
}

// CronJobStatus defines the observed state of CronJob
type CronJobStatus struct {
	// INSERT ADDITIONAL STATUS FIELD - define observed state of cluster
	// Important: Run "make" to regenerate code after modifying this file
}
Next, we define the types corresponding to actual Kinds, CronJob and CronJobList.
CronJob is our root type, and describes the CronJob kind. Like all Kubernetes objects, it contains
TypeMeta (which describes API version and Kind), and also contains ObjectMeta, which holds things
like name, namespace, and labels.
CronJobList is simply a container for multiple CronJobs. It’s the Kind used in bulk operations,
like LIST.
In general, we never modify either of these – all modifications go in either Spec or Status.
That little +kubebuilder:object:root comment is called a marker. We’ll see
more of them in a bit, but know that they act as extra metadata, telling
controller-tools (our code and YAML generator) extra information.
This particular one tells the object generator that this type represents
a Kind. Then, the object generator generates an implementation of the
runtime.Object interface for us, which is the standard
interface that all types representing Kinds must implement.
// +kubebuilder:object:root=true
// +kubebuilder:subresource:status

// CronJob is the Schema for the cronjobs API
type CronJob struct {
	metav1.TypeMeta   `json:",inline"`
	metav1.ObjectMeta `json:"metadata,omitempty"`

	Spec   CronJobSpec   `json:"spec,omitempty"`
	Status CronJobStatus `json:"status,omitempty"`
}

// +kubebuilder:object:root=true

// CronJobList contains a list of CronJob
type CronJobList struct {
	metav1.TypeMeta `json:",inline"`
	metav1.ListMeta `json:"metadata,omitempty"`
	Items           []CronJob `json:"items"`
}
Finally, we add the Go types to the API group. This allows us to add the types in this API group to any Scheme.
func init() {
	SchemeBuilder.Register(&CronJob{}, &CronJobList{})
}
Now that you have seen the basic structure, fill it out!
Designing an API
In Kubernetes, there are a few rules for how you design APIs. Namely, all
serialized fields must be camelCase, so use JSON struct tags to
specify this. You can also use the omitempty struct tag to mark that
a field should be omitted from serialization when empty.
Fields may use most of the primitive types. Numbers are the exception:
for API compatibility purposes, accept three forms of numbers: int32
and int64 for integers, and resource.Quantity for decimals.
Hold up, what is a Quantity?
Quantities are a special notation for decimal numbers that have an explicitly fixed representation that makes them more portable across machines. You’ve probably noticed them when specifying resources requests and limits on pods in Kubernetes.
They conceptually work similar to floating point numbers: they have a significant, base, and exponent. Their serializable and human readable format uses whole numbers and suffixes to specify values much the way you would describe computer storage.
For instance, the value 2m means 0.002 in decimal notation. 2Ki
means 2048 in decimal, while 2K means 2000 in decimal. To
specify fractions, switch to a suffix that lets you use a whole
number: 2.5 is 2500m.
There are two supported bases: 10 and 2 (called decimal and binary,
respectively). Decimal base is indicated with “normal” SI suffixes (e.g.
M and K), while Binary base is specified in “mebi” notation (e.g. Mi
and Ki). Think megabytes vs
mebibytes.
There is one other special type to use: metav1.Time. This functions
identically to time.Time, except that it has a fixed, portable
serialization format.
With that out of the way, take a look at what the CronJob object looks like!
Apache License
Copyright 2026 The Kubernetes authors.
Licensed under the Apache License, Version 2.0 (the “License”); you may not use this file except in compliance with the License. You may obtain a copy of the License at
http://www.apache.org/licenses/LICENSE-2.0
Unless required by applicable law or agreed to in writing, software distributed under the License is distributed on an “AS IS” BASIS, WITHOUT WARRANTIES OR CONDITIONS OF ANY KIND, either express or implied. See the License for the specific language governing permissions and limitations under the License.
package v1
Imports
import (
	batchv1 "k8s.io/api/batch/v1"
	corev1 "k8s.io/api/core/v1"
	metav1 "k8s.io/apimachinery/pkg/apis/meta/v1"
	"k8s.io/apimachinery/pkg/runtime"
)

// EDIT THIS FILE!  THIS IS SCAFFOLDING FOR YOU TO OWN!
// NOTE: json tags are required.  Any new fields you add must have json tags for the fields to be serialized.
First, let’s take a look at our spec. As we discussed before, spec holds desired state, so any “inputs” to our controller go here.
Fundamentally a CronJob needs the following pieces:
- A schedule (the cron in CronJob)
- A template for the Job to run (the job in CronJob)
We’ll also want a few extras, which will make our users’ lives easier:
- A deadline for starting jobs (if we miss this deadline, we’ll just wait till the next scheduled time)
- What to do if multiple jobs would run at once (do we wait? stop the old one? run both?)
- A way to pause the running of a CronJob, in case something’s wrong with it
- Limits on old job history
Remember, since we never read our own status, we need to have some other way to keep track of whether a job has run. We can use at least one old job to do this.
We’ll use several markers (// +comment) to specify additional metadata. These
will be used by controller-tools when generating our CRD manifest.
As we’ll see in a bit, controller-tools will also use GoDoc to form descriptions for
the fields.
// CronJobSpec defines the desired state of CronJob
type CronJobSpec struct {
	// schedule in Cron format, see https://en.wikipedia.org/wiki/Cron.
	// +kubebuilder:validation:MinLength=0
	// +required
	Schedule string `json:"schedule"`

	// startingDeadlineSeconds defines in seconds for starting the job if it misses scheduled
	// time for any reason.  Missed jobs executions will be counted as failed ones.
	// +optional
	// +kubebuilder:validation:Minimum=0
	StartingDeadlineSeconds *int64 `json:"startingDeadlineSeconds,omitempty"`

	// concurrencyPolicy specifies how to treat concurrent executions of a Job.
	// Valid values are:
	// - "Allow" (default): allows CronJobs to run concurrently;
	// - "Forbid": forbids concurrent runs, skipping next run if previous run hasn't finished yet;
	// - "Replace": cancels currently running job and replaces it with a new one
	// +optional
	// +kubebuilder:default:=Allow
	ConcurrencyPolicy ConcurrencyPolicy `json:"concurrencyPolicy,omitempty"`

	// suspend tells the controller to suspend subsequent executions, it does
	// not apply to already started executions.  Defaults to false.
	// +optional
	Suspend *bool `json:"suspend,omitempty"`

	// jobTemplate defines the job that will be created when executing a CronJob.
	// +required
	JobTemplate batchv1.JobTemplateSpec `json:"jobTemplate"`

	// successfulJobsHistoryLimit defines the number of successful finished jobs to retain.
	// This is a pointer to distinguish between explicit zero and not specified.
	// +optional
	// +kubebuilder:validation:Minimum=0
	SuccessfulJobsHistoryLimit *int32 `json:"successfulJobsHistoryLimit,omitempty"`

	// failedJobsHistoryLimit defines the number of failed finished jobs to retain.
	// This is a pointer to distinguish between explicit zero and not specified.
	// +optional
	// +kubebuilder:validation:Minimum=0
	FailedJobsHistoryLimit *int32 `json:"failedJobsHistoryLimit,omitempty"`
}
We define a custom type to hold our concurrency policy. It’s actually just a string under the hood, but the type gives extra documentation, and allows us to attach validation on the type instead of the field, making the validation more easily reusable.
// ConcurrencyPolicy describes how the job will be handled.
// Only one of the following concurrent policies may be specified.
// If none of the following policies is specified, the default one
// is AllowConcurrent.
// +kubebuilder:validation:Enum=Allow;Forbid;Replace
type ConcurrencyPolicy string

const (
	// AllowConcurrent allows CronJobs to run concurrently.
	AllowConcurrent ConcurrencyPolicy = "Allow"

	// ForbidConcurrent forbids concurrent runs, skipping next run if previous
	// hasn't finished yet.
	ForbidConcurrent ConcurrencyPolicy = "Forbid"

	// ReplaceConcurrent cancels currently running job and replaces it with a new one.
	ReplaceConcurrent ConcurrencyPolicy = "Replace"
)
Next, let’s design our status, which holds observed state. It contains any information we want users or other controllers to be able to easily obtain.
We’ll keep a list of actively running jobs, as well as the last time that we successfully
ran our job. Notice that we use metav1.Time instead of time.Time to get the stable
serialization, as mentioned above.
// CronJobStatus defines the observed state of CronJob.
type CronJobStatus struct {
	// INSERT ADDITIONAL STATUS FIELD - define observed state of cluster
	// Important: Run "make" to regenerate code after modifying this file

	// active defines a list of pointers to currently running jobs.
	// +optional
	// +listType=atomic
	// +kubebuilder:validation:MinItems=1
	// +kubebuilder:validation:MaxItems=10
	Active []corev1.ObjectReference `json:"active,omitempty"`

	// lastScheduleTime defines when was the last time the job was successfully scheduled.
	// +optional
	LastScheduleTime *metav1.Time `json:"lastScheduleTime,omitempty"`

	// For Kubernetes API conventions, see:
	// https://github.com/kubernetes/community/blob/master/contributors/devel/sig-architecture/api-conventions.md#typical-status-properties

	// conditions represent the current state of the CronJob resource.
	// Each condition has a unique type and reflects the status of a specific aspect of the resource.
	//
	// Standard condition types include:
	// - "Available": the resource is fully functional
	// - "Progressing": the resource is being created or updated
	// - "Degraded": the resource failed to reach or maintain its desired state
	//
	// The status of each condition is one of True, False, or Unknown.
	// +listType=map
	// +listMapKey=type
	// +optional
	Conditions []metav1.Condition `json:"conditions,omitempty"`
}
Finally, we have the rest of the boilerplate that we’ve already discussed. As previously noted, we don’t need to change this, except to mark that we want a status subresource, so that we behave like built-in kubernetes types.
// +kubebuilder:object:root=true
// +kubebuilder:subresource:status

// CronJob is the Schema for the cronjobs API
type CronJob struct {
Root Object Definitions
	metav1.TypeMeta `json:",inline"`

	// metadata is a standard object metadata
	// +optional
	metav1.ObjectMeta `json:"metadata,omitzero"`

	// spec defines the desired state of CronJob
	// +required
	Spec CronJobSpec `json:"spec"`

	// status defines the observed state of CronJob
	// +optional
	Status CronJobStatus `json:"status,omitzero"`
}

// +kubebuilder:object:root=true

// CronJobList contains a list of CronJob
type CronJobList struct {
	metav1.TypeMeta `json:",inline"`
	metav1.ListMeta `json:"metadata,omitzero"`
	Items           []CronJob `json:"items"`
}

func init() {
	SchemeBuilder.Register(func(s *runtime.Scheme) error {
		s.AddKnownTypes(SchemeGroupVersion, &CronJob{}, &CronJobList{})
		return nil
	})
}
Now that you have an API, write a controller to actually implement the functionality.
A Brief Aside: What’s the rest of this stuff?
If you have taken a peek at the rest of the files in the
api/v1/
directory, you might have noticed two additional files beyond
cronjob_types.go: groupversion_info.go and zz_generated.deepcopy.go.
Neither of these files ever needs to be edited (the former stays the same and the latter is autogenerated), but it is useful to know what is in them.
groupversion_info.go
groupversion_info.go contains common metadata about the group-version:
Apache License
Copyright 2026 The Kubernetes authors.
Licensed under the Apache License, Version 2.0 (the “License”); you may not use this file except in compliance with the License. You may obtain a copy of the License at
http://www.apache.org/licenses/LICENSE-2.0
Unless required by applicable law or agreed to in writing, software distributed under the License is distributed on an “AS IS” BASIS, WITHOUT WARRANTIES OR CONDITIONS OF ANY KIND, either express or implied. See the License for the specific language governing permissions and limitations under the License.
First, we have some package-level markers that denote that there are
Kubernetes objects in this package, and that this package represents the group
batch.tutorial.kubebuilder.io. The object generator makes use of the
former, while the latter is used by the CRD generator to generate the right
metadata for the CRDs it creates from this package.
// Package v1 contains API Schema definitions for the batch v1 API group.
// +kubebuilder:object:generate=true
// +groupName=batch.tutorial.kubebuilder.io
package v1

import (
	metav1 "k8s.io/apimachinery/pkg/apis/meta/v1"
	"k8s.io/apimachinery/pkg/runtime"
	"k8s.io/apimachinery/pkg/runtime/schema"
)
Then, we have the commonly useful variables that help us set up our Scheme.
Since we need to use all the types in this package in our controller, it’s
helpful (and the convention) to have a convenient method to add all the types to
some other Scheme. SchemeBuilder makes this easy for us.
var (
	// SchemeGroupVersion is group version used to register these objects.
	// This name is used by applyconfiguration generators (e.g. controller-gen).
	SchemeGroupVersion = schema.GroupVersion{Group: "batch.tutorial.kubebuilder.io", Version: "v1"}

	// GroupVersion is an alias for SchemeGroupVersion, for backward compatibility.
	GroupVersion = SchemeGroupVersion

	// SchemeBuilder is used to add go types to the GroupVersionKind scheme.
	SchemeBuilder = runtime.NewSchemeBuilder(func(scheme *runtime.Scheme) error {
		metav1.AddToGroupVersion(scheme, SchemeGroupVersion)
		return nil
	})

	// AddToScheme adds the types in this group-version to the given scheme.
	AddToScheme = SchemeBuilder.AddToScheme
)
zz_generated.deepcopy.go
zz_generated.deepcopy.go contains the autogenerated implementation of
the aforementioned runtime.Object interface, which marks all of our root
types as representing Kinds.
The core of the runtime.Object interface is a deep-copy method,
DeepCopyObject.
The object generator in controller-tools also generates two other handy
methods for each root type and all its sub-types: DeepCopy and
DeepCopyInto.
What’s in a controller?
Controllers are the core of Kubernetes, and of any operator.
It’s a controller’s job to ensure that, for any given object, the actual state of the world (both the cluster state, and potentially external state like running containers for Kubelet or loadbalancers for a cloud provider) matches the desired state in the object. Each controller focuses on one root Kind, but may interact with other Kinds.
We call this process reconciling.
In controller-runtime, the logic that implements the reconciling for a specific kind is a Reconciler. A reconciler takes the name of an object, and returns whether or not to try again (e.g. in case of errors or periodic controllers, like the HorizontalPodAutoscaler).
Apache License
Copyright 2022.
Licensed under the Apache License, Version 2.0 (the “License”); you may not use this file except in compliance with the License. You may obtain a copy of the License at
http://www.apache.org/licenses/LICENSE-2.0
Unless required by applicable law or agreed to in writing, software distributed under the License is distributed on an “AS IS” BASIS, WITHOUT WARRANTIES OR CONDITIONS OF ANY KIND, either express or implied. See the License for the specific language governing permissions and limitations under the License.
First, we start out with some standard imports. As before, we need the core controller-runtime library, as well as the client package, and the package for our API types.
package controllers

import (
	"context"

	"k8s.io/apimachinery/pkg/runtime"
	ctrl "sigs.k8s.io/controller-runtime"
	"sigs.k8s.io/controller-runtime/pkg/client"
	logf "sigs.k8s.io/controller-runtime/pkg/log"

	batchv1 "tutorial.kubebuilder.io/project/api/v1"
)
Next, kubebuilder has scaffolded a basic reconciler struct for us. Pretty much every reconciler needs to log, and needs to be able to fetch objects, so these are added out of the box.
// CronJobReconciler reconciles a CronJob object
type CronJobReconciler struct {
	client.Client
	Scheme *runtime.Scheme
}
Most controllers eventually end up running on the cluster, so they need RBAC permissions, which we specify using controller-tools RBAC markers. These are the bare minimum permissions needed to run. As we add more functionality, we’ll need to revisit these.
// +kubebuilder:rbac:groups=batch.tutorial.kubebuilder.io,resources=cronjobs,verbs=get;list;watch;create;update;patch;delete
// +kubebuilder:rbac:groups=batch.tutorial.kubebuilder.io,resources=cronjobs/status,verbs=get;update;patch
The ClusterRole manifest at config/rbac/role.yaml is generated from the above markers via controller-gen with the following command:
make manifests
NOTE: If you receive an error, please run the specified command in the error and re-run make manifests.
Reconcile actually performs the reconciling for a single named object.
Our Request just has a name, but we can use the client to fetch
that object from the cache.
We return an empty result and no error, which indicates to controller-runtime that we’ve successfully reconciled this object and don’t need to try again until there’s some changes.
Most controllers need a logging handle and a context, so we set them up here.
The context is used to allow cancellation of
requests, and potentially things like tracing. It’s the first argument to all
client methods. The Background context is just a basic context without any
extra data or timing restrictions.
The logging handle lets us log. controller-runtime uses structured logging through a library called logr. As we’ll see shortly, logging works by attaching key-value pairs to a static message. We can pre-assign some pairs at the top of our reconcile method to have those attached to all log lines in this reconciler.
func (r *CronJobReconciler) Reconcile(ctx context.Context, req ctrl.Request) (ctrl.Result, error) {
	_ = logf.FromContext(ctx)

	// your logic here

	return ctrl.Result{}, nil
}
Finally, we add this reconciler to the manager, so that it gets started when the manager is started.
For now, we just note that this reconciler operates on CronJobs. Later,
we’ll use this to mark that we care about related objects as well.
func (r *CronJobReconciler) SetupWithManager(mgr ctrl.Manager) error {
	return ctrl.NewControllerManagedBy(mgr).
		For(&batchv1.CronJob{}).
		Complete(r)
}
Now that you have seen the basic structure of a reconciler, fill out
the logic for CronJobs.
Implementing a controller
The basic logic of the CronJob controller is this:
-
Load the named CronJob
-
List all active jobs, and update the status
-
Clean up old jobs according to the history limits
-
Check if suspended (and do not do anything else if it is)
-
Get the next scheduled run
-
Run a new job if it is on schedule, not past the deadline, and not blocked by the concurrency policy
-
Requeue when either seeing a running job (done automatically) or it is time for the next scheduled run.
Apache License
Copyright 2026 The Kubernetes authors.
Licensed under the Apache License, Version 2.0 (the “License”); you may not use this file except in compliance with the License. You may obtain a copy of the License at
http://www.apache.org/licenses/LICENSE-2.0
Unless required by applicable law or agreed to in writing, software distributed under the License is distributed on an “AS IS” BASIS, WITHOUT WARRANTIES OR CONDITIONS OF ANY KIND, either express or implied. See the License for the specific language governing permissions and limitations under the License.
We’ll start out with some imports. You’ll see below that we’ll need a few more imports than those scaffolded for us. We’ll talk about each one when we use it.
package controller

import (
	"context"
	"fmt"
	"maps"
	"slices"
	"time"

	"github.com/robfig/cron"
	kbatch "k8s.io/api/batch/v1"
	corev1 "k8s.io/api/core/v1"
	apierrors "k8s.io/apimachinery/pkg/api/errors"
	"k8s.io/apimachinery/pkg/api/meta"
	metav1 "k8s.io/apimachinery/pkg/apis/meta/v1"
	"k8s.io/apimachinery/pkg/runtime"
	ref "k8s.io/client-go/tools/reference"
	ctrl "sigs.k8s.io/controller-runtime"
	"sigs.k8s.io/controller-runtime/pkg/client"
	logf "sigs.k8s.io/controller-runtime/pkg/log"

	batchv1 "tutorial.kubebuilder.io/project/api/v1"
)
Next, we’ll need a Clock, which will allow us to fake timing in our tests.
// CronJobReconciler reconciles a CronJob object
type CronJobReconciler struct {
	client.Client
	Scheme *runtime.Scheme
	Clock
}
Clock Code Implementation
We’ll mock out the clock to make it easier to jump around in time while testing,
the “real” clock just calls time.Now.
type realClock struct{}

func (_ realClock) Now() time.Time { return time.Now() } //nolint:staticcheck

// Clock knows how to get the current time.
// It can be used to fake out timing for testing.
type Clock interface {
	Now() time.Time
}
// Definitions to manage status conditions
const (
	// typeAvailableCronJob represents the status of the CronJob reconciliation
	typeAvailableCronJob = "Available"
	// typeProgressingCronJob represents the status used when the CronJob is being reconciled
	typeProgressingCronJob = "Progressing"
	// typeDegradedCronJob represents the status used when the CronJob has encountered an error
	typeDegradedCronJob = "Degraded"
)
Notice that we need a few more RBAC permissions – since we’re creating and managing jobs now, we’ll need permissions for those, which means adding a couple more markers.
// +kubebuilder:rbac:groups=batch.tutorial.kubebuilder.io,resources=cronjobs,verbs=get;list;watch;create;update;patch;delete
// +kubebuilder:rbac:groups=batch.tutorial.kubebuilder.io,resources=cronjobs/status,verbs=get;update;patch
// +kubebuilder:rbac:groups=batch.tutorial.kubebuilder.io,resources=cronjobs/finalizers,verbs=update
// +kubebuilder:rbac:groups=batch,resources=jobs,verbs=get;list;watch;create;update;patch;delete
// +kubebuilder:rbac:groups=batch,resources=jobs/status,verbs=get
Now, we get to the heart of the controller – the reconciler logic.
var (
	scheduledTimeAnnotation = "batch.tutorial.kubebuilder.io/scheduled-at"
)

// Reconcile is part of the main kubernetes reconciliation loop which aims to
// move the current state of the cluster closer to the desired state.
// TODO(user): Modify the Reconcile function to compare the state specified by
// the CronJob object against the actual cluster state, and then
// perform operations to make the cluster state reflect the state specified by
// the user.
//
// For more details, check Reconcile and its Result here:
// - https://pkg.go.dev/sigs.k8s.io/controller-runtime@v0.24.1/pkg/reconcile
// nolint:gocyclo
func (r *CronJobReconciler) Reconcile(ctx context.Context, req ctrl.Request) (ctrl.Result, error) {
	log := logf.FromContext(ctx)
1: Load the CronJob by name
We’ll fetch the CronJob using our client. All client methods take a
context (to allow for cancellation) as their first argument, and the object
in question as their last. Get is a bit special, in that it takes a
NamespacedName
as the middle argument (most don’t have a middle argument, as we’ll see
below).
Many client methods also take variadic options at the end.
	var cronJob batchv1.CronJob
	if err := r.Get(ctx, req.NamespacedName, &cronJob); err != nil {
		if apierrors.IsNotFound(err) {
			// If the custom resource is not found then it usually means that it was deleted or not created
			// In this way, we will stop the reconciliation
			log.Info("CronJob resource not found. Ignoring since object must be deleted")
			return ctrl.Result{}, nil
		}
		// Error reading the object - requeue the request.
		log.Error(err, "Failed to get CronJob")
		return ctrl.Result{}, err
	}

	// Initialize status conditions if not yet present
	if len(cronJob.Status.Conditions) == 0 {
		meta.SetStatusCondition(&cronJob.Status.Conditions, metav1.Condition{
			Type:    typeProgressingCronJob,
			Status:  metav1.ConditionUnknown,
			Reason:  "Reconciling",
			Message: "Starting reconciliation",
		})
		if err := r.Status().Update(ctx, &cronJob); err != nil {
			log.Error(err, "Failed to update CronJob status")
			return ctrl.Result{}, err
		}
After updating the status, we re-fetch the CronJob to ensure we are working with the latest version of the object from the API server.
Kubernetes uses optimistic concurrency, meaning that any update (including a status update) may change the resource version. If we continue reconciliation with a stale copy, subsequent updates may fail with a conflict such as: “the object has been modified; please apply your changes to the latest version and try again”.
By re-fetching here, we keep our reconciliation logic in sync with the actual cluster state and avoid unnecessary conflicts and requeues.
		if err := r.Get(ctx, req.NamespacedName, &cronJob); err != nil {
			log.Error(err, "Failed to re-fetch CronJob")
			return ctrl.Result{}, err
		}
	}
2: List all active jobs, and update the status
To fully update our status, we’ll need to list all child jobs in this namespace that belong to this CronJob. Similarly to Get, we can use the List method to list the child jobs. Notice that we use variadic options to set the namespace and field match (which is actually an index lookup that we set up below).
	var childJobs kbatch.JobList
	if err := r.List(ctx, &childJobs, client.InNamespace(req.Namespace), client.MatchingFields{jobOwnerKey: req.Name}); err != nil {
		log.Error(err, "unable to list child Jobs")
Before updating, ensure we have the latest state of the resource to avoid conflict errors (e.g. “the object has been modified”) that would re-trigger the reconcile loop.
		if fetchErr := r.Get(ctx, req.NamespacedName, &cronJob); fetchErr != nil {
			log.Error(fetchErr, "Failed to re-fetch CronJob")
			return ctrl.Result{}, fetchErr
		}
		// Update status condition to reflect the error
		meta.SetStatusCondition(&cronJob.Status.Conditions, metav1.Condition{
			Type:    typeDegradedCronJob,
			Status:  metav1.ConditionTrue,
			Reason:  "ReconciliationError",
			Message: fmt.Sprintf("Failed to list child jobs: %v", err),
		})
		if statusErr := r.Status().Update(ctx, &cronJob); statusErr != nil {
			log.Error(statusErr, "Failed to update CronJob status")
		}
		return ctrl.Result{}, err
	}
Once we have all the jobs we own, we’ll split them into active, successful, and failed jobs, keeping track of the most recent run so that we can record it in status. Remember, status should be able to be reconstituted from the state of the world, so it’s generally not a good idea to read from the status of the root object. Instead, you should reconstruct it every run. That’s what we’ll do here.
We can check if a job is “finished” and whether it succeeded or failed using status conditions. We’ll put that logic in a helper to make our code cleaner.
	// find the active list of jobs
	var activeJobs []*kbatch.Job
	var successfulJobs []*kbatch.Job
	var failedJobs []*kbatch.Job
	var mostRecentTime *time.Time // find the last run so we can update the status
isJobFinished
We consider a job “finished” if it has a “Complete” or “Failed” condition marked as true. Status conditions allow us to add extensible status information to our objects that other humans and controllers can examine to check things like completion and health.
	isJobFinished := func(job *kbatch.Job) (bool, kbatch.JobConditionType) {
		for _, c := range job.Status.Conditions {
			if (c.Type == kbatch.JobComplete || c.Type == kbatch.JobFailed) && c.Status == corev1.ConditionTrue {
				return true, c.Type
			}
		}

		return false, ""
	}
getScheduledTimeForJob
We’ll use a helper to extract the scheduled time from the annotation that we added during job creation.
	getScheduledTimeForJob := func(job *kbatch.Job) (*time.Time, error) {
		timeRaw := job.Annotations[scheduledTimeAnnotation]
		if len(timeRaw) == 0 {
			return nil, nil
		}

		timeParsed, err := time.Parse(time.RFC3339, timeRaw)
		if err != nil {
			return nil, err
		}
		return &timeParsed, nil
	}
	for i, job := range childJobs.Items {
		_, finishedType := isJobFinished(&job)
		switch finishedType {
		case "": // ongoing
			activeJobs = append(activeJobs, &childJobs.Items[i])
		case kbatch.JobFailed:
			failedJobs = append(failedJobs, &childJobs.Items[i])
		case kbatch.JobComplete:
			successfulJobs = append(successfulJobs, &childJobs.Items[i])
		}

		// We'll store the launch time in an annotation, so we'll reconstitute that from
		// the active jobs themselves.
		scheduledTimeForJob, err := getScheduledTimeForJob(&job)
		if err != nil {
			log.Error(err, "unable to parse schedule time for child job", "job", &job)
			continue
		}
		if scheduledTimeForJob != nil {
			if mostRecentTime == nil || mostRecentTime.Before(*scheduledTimeForJob) {
				mostRecentTime = scheduledTimeForJob
			}
		}
	}

	if mostRecentTime != nil {
		cronJob.Status.LastScheduleTime = &metav1.Time{Time: *mostRecentTime}
	} else {
		cronJob.Status.LastScheduleTime = nil
	}
	cronJob.Status.Active = nil
	for _, activeJob := range activeJobs {
		jobRef, err := ref.GetReference(r.Scheme, activeJob)
		if err != nil {
			log.Error(err, "unable to make reference to active job", "job", activeJob)
			continue
		}
		cronJob.Status.Active = append(cronJob.Status.Active, *jobRef)
	}
Here, we’ll log how many jobs we observed at a slightly higher logging level, for debugging. Notice how instead of using a format string, we use a fixed message, and attach key-value pairs with the extra information. This makes it easier to filter and query log lines.
	log.V(1).Info("job count", "active jobs", len(activeJobs), "successful jobs", len(successfulJobs), "failed jobs", len(failedJobs))

	// Check if CronJob is suspended
	isSuspended := cronJob.Spec.Suspend != nil && *cronJob.Spec.Suspend

	// Update status conditions based on current state
	if isSuspended {
		meta.SetStatusCondition(&cronJob.Status.Conditions, metav1.Condition{
			Type:    typeAvailableCronJob,
			Status:  metav1.ConditionFalse,
			Reason:  "Suspended",
			Message: "CronJob is suspended",
		})
	} else if len(failedJobs) > 0 {
		meta.SetStatusCondition(&cronJob.Status.Conditions, metav1.Condition{
			Type:    typeDegradedCronJob,
			Status:  metav1.ConditionTrue,
			Reason:  "JobsFailed",
			Message: fmt.Sprintf("%d job(s) have failed", len(failedJobs)),
		})
		meta.SetStatusCondition(&cronJob.Status.Conditions, metav1.Condition{
			Type:    typeAvailableCronJob,
			Status:  metav1.ConditionFalse,
			Reason:  "JobsFailed",
			Message: fmt.Sprintf("%d job(s) have failed", len(failedJobs)),
		})
	} else if len(activeJobs) > 0 {
		meta.SetStatusCondition(&cronJob.Status.Conditions, metav1.Condition{
			Type:    typeProgressingCronJob,
			Status:  metav1.ConditionTrue,
			Reason:  "JobsActive",
			Message: fmt.Sprintf("%d job(s) are currently active", len(activeJobs)),
		})
		meta.SetStatusCondition(&cronJob.Status.Conditions, metav1.Condition{
			Type:    typeAvailableCronJob,
			Status:  metav1.ConditionTrue,
			Reason:  "JobsActive",
			Message: fmt.Sprintf("CronJob is progressing with %d active job(s)", len(activeJobs)),
		})
	} else {
		meta.SetStatusCondition(&cronJob.Status.Conditions, metav1.Condition{
			Type:    typeAvailableCronJob,
			Status:  metav1.ConditionTrue,
			Reason:  "AllJobsCompleted",
			Message: "All jobs have completed successfully",
		})
		meta.SetStatusCondition(&cronJob.Status.Conditions, metav1.Condition{
			Type:    typeProgressingCronJob,
			Status:  metav1.ConditionFalse,
			Reason:  "NoJobsActive",
			Message: "No jobs are currently active",
		})
	}
Using the data we’ve gathered, we’ll update the status of our CRD.
Just like before, we use our client. To specifically update the status
subresource, we’ll use the Status part of the client, with the Update
method.
The status subresource ignores changes to spec, so it’s less likely to conflict with any other updates, and can have separate permissions.
	if err := r.Status().Update(ctx, &cronJob); err != nil {
		log.Error(err, "unable to update CronJob status")
		return ctrl.Result{}, err
	}
Once we’ve updated our status, we can move on to ensuring that the status of the world matches what we want in our spec.
3: Clean up old jobs according to the history limit
First, we’ll try to clean up old jobs, so that we don’t leave too many lying around.
	// NB: deleting these are "best effort" -- if we fail on a particular one,
	// we won't requeue just to finish the deleting.
	if cronJob.Spec.FailedJobsHistoryLimit != nil {
		slices.SortStableFunc(failedJobs, func(a, b *kbatch.Job) int {
			aStartTime := a.Status.StartTime
			bStartTime := b.Status.StartTime
			switch {
			case aStartTime == nil && bStartTime == nil:
				return 0
			case aStartTime == nil:
				return -1
			case bStartTime == nil:
				return 1
			case aStartTime.Before(bStartTime):
				return -1
			case bStartTime.Before(aStartTime):
				return 1
			default:
				return 0
			}
		})
		for i, job := range failedJobs {
			if int32(i) >= int32(len(failedJobs))-*cronJob.Spec.FailedJobsHistoryLimit {
				break
			}
			if err := r.Delete(ctx, job, client.PropagationPolicy(metav1.DeletePropagationBackground)); client.IgnoreNotFound(err) != nil {
				log.Error(err, "unable to delete old failed job", "job", job)
			} else {
				log.V(1).Info("deleted old failed job", "job", job)
			}
		}
	}

	if cronJob.Spec.SuccessfulJobsHistoryLimit != nil {
		slices.SortStableFunc(successfulJobs, func(a, b *kbatch.Job) int {
			aStartTime := a.Status.StartTime
			bStartTime := b.Status.StartTime
			switch {
			case aStartTime == nil && bStartTime == nil:
				return 0
			case aStartTime == nil:
				return -1
			case bStartTime == nil:
				return 1
			case aStartTime.Before(bStartTime):
				return -1
			case bStartTime.Before(aStartTime):
				return 1
			default:
				return 0
			}
		})
		for i, job := range successfulJobs {
			if int32(i) >= int32(len(successfulJobs))-*cronJob.Spec.SuccessfulJobsHistoryLimit {
				break
			}
			if err := r.Delete(ctx, job, client.PropagationPolicy(metav1.DeletePropagationBackground)); err != nil {
				log.Error(err, "unable to delete old successful job", "job", job)
			} else {
				log.V(1).Info("deleted old successful job", "job", job)
			}
		}
	}
4: Check if we’re suspended
If this object is suspended, we don’t want to run any jobs, so we’ll stop now. This is useful if something’s broken with the job we’re running and we want to pause runs to investigate or putz with the cluster, without deleting the object.
	if cronJob.Spec.Suspend != nil && *cronJob.Spec.Suspend {
		log.V(1).Info("cronjob suspended, skipping")
		return ctrl.Result{}, nil
	}
5: Get the next scheduled run
If we’re not paused, we’ll need to calculate the next scheduled run, and whether or not we’ve got a run that we haven’t processed yet.
getNextSchedule
We’ll calculate the next scheduled time using our helpful cron library. We’ll start calculating appropriate times from our last run, or the creation of the CronJob if we can’t find a last run.
If there are too many missed runs and we don’t have any deadlines set, we’ll bail so that we don’t cause issues on controller restarts or wedges.
Otherwise, we’ll just return the missed runs (of which we’ll just use the latest), and the next run, so that we can know when it’s time to reconcile again.
	getNextSchedule := func(cronJob *batchv1.CronJob, now time.Time) (lastMissed time.Time, next time.Time, err error) {
		sched, err := cron.ParseStandard(cronJob.Spec.Schedule)
		if err != nil {
			return time.Time{}, time.Time{}, fmt.Errorf("unparseable schedule %q: %w", cronJob.Spec.Schedule, err)
		}

		// for optimization purposes, cheat a bit and start from our last observed run time
		// we could reconstitute this here, but there's not much point, since we've
		// just updated it.
		var earliestTime time.Time
		if cronJob.Status.LastScheduleTime != nil {
			earliestTime = cronJob.Status.LastScheduleTime.Time
		} else {
			earliestTime = cronJob.CreationTimestamp.Time
		}
		if cronJob.Spec.StartingDeadlineSeconds != nil {
			// controller is not going to schedule anything below this point
			schedulingDeadline := now.Add(-time.Second * time.Duration(*cronJob.Spec.StartingDeadlineSeconds))

			if schedulingDeadline.After(earliestTime) {
				earliestTime = schedulingDeadline
			}
		}
		if earliestTime.After(now) {
			return time.Time{}, sched.Next(now), nil
		}

		starts := 0
		for t := sched.Next(earliestTime); !t.After(now); t = sched.Next(t) {
			lastMissed = t
			// An object might miss several starts. For example, if
			// controller gets wedged on Friday at 5:01pm when everyone has
			// gone home, and someone comes in on Tuesday AM and discovers
			// the problem and restarts the controller, then all the hourly
			// jobs, more than 80 of them for one hourly scheduledJob, should
			// all start running with no further intervention (if the scheduledJob
			// allows concurrency and late starts).
			//
			// However, if there is a bug somewhere, or incorrect clock
			// on controller's server or apiservers (for setting creationTimestamp)
			// then there could be so many missed start times (it could be off
			// by decades or more), that it would eat up all the CPU and memory
			// of this controller. In that case, we want to not try to list
			// all the missed start times.
			starts++
			if starts > 100 {
				// We can't get the most recent times so just return an empty slice
				return time.Time{}, time.Time{}, fmt.Errorf("Too many missed start times (> 100). Set or decrease .spec.startingDeadlineSeconds or check clock skew.") //nolint:staticcheck
			}
		}
		return lastMissed, sched.Next(now), nil
	}
	// figure out the next times that we need to create
	// jobs at (or anything we missed).
	missedRun, nextRun, err := getNextSchedule(&cronJob, r.Now())
	if err != nil {
		log.Error(err, "unable to figure out CronJob schedule")
		if fetchErr := r.Get(ctx, req.NamespacedName, &cronJob); fetchErr != nil {
			log.Error(fetchErr, "Failed to re-fetch CronJob")
			return ctrl.Result{}, fetchErr
		}
		// Update status condition to reflect the schedule error
		meta.SetStatusCondition(&cronJob.Status.Conditions, metav1.Condition{
			Type:    typeDegradedCronJob,
			Status:  metav1.ConditionTrue,
			Reason:  "InvalidSchedule",
			Message: fmt.Sprintf("Failed to parse schedule: %v", err),
		})
		if statusErr := r.Status().Update(ctx, &cronJob); statusErr != nil {
			log.Error(statusErr, "Failed to update CronJob status")
		}
		// we don't really care about requeuing until we get an update that
		// fixes the schedule, so don't return an error
		return ctrl.Result{}, nil
	}
We’ll prep our eventual request to requeue until the next job, and then figure out if we actually need to run.
	scheduledResult := ctrl.Result{RequeueAfter: nextRun.Sub(r.Now())} // save this so we can re-use it elsewhere
	log = log.WithValues("now", r.Now(), "next run", nextRun)
6: Run a new job if it’s on schedule, not past the deadline, and not blocked by our concurrency policy
If we’ve missed a run, and we’re still within the deadline to start it, we’ll need to run a job.
	if missedRun.IsZero() {
		log.V(1).Info("no upcoming scheduled times, sleeping until next")
		return scheduledResult, nil
	}

	// make sure we're not too late to start the run
	log = log.WithValues("current run", missedRun)
	tooLate := false
	if cronJob.Spec.StartingDeadlineSeconds != nil {
		tooLate = missedRun.Add(time.Duration(*cronJob.Spec.StartingDeadlineSeconds) * time.Second).Before(r.Now())
	}
	if tooLate {
		log.V(1).Info("missed starting deadline for last run, sleeping till next")
		if fetchErr := r.Get(ctx, req.NamespacedName, &cronJob); fetchErr != nil {
			log.Error(fetchErr, "Failed to re-fetch CronJob")
			return ctrl.Result{}, fetchErr
		}
		// Update status condition to reflect missed deadline
		meta.SetStatusCondition(&cronJob.Status.Conditions, metav1.Condition{
			Type:    typeDegradedCronJob,
			Status:  metav1.ConditionTrue,
			Reason:  "MissedSchedule",
			Message: fmt.Sprintf("Missed starting deadline for run at %v", missedRun),
		})
		if statusErr := r.Status().Update(ctx, &cronJob); statusErr != nil {
			log.Error(statusErr, "Failed to update CronJob status")
		}
		return scheduledResult, nil
	}
If we actually have to run a job, we’ll need to either wait till existing ones finish, replace the existing ones, or just add new ones. If our information is out of date due to cache delay, we’ll get a requeue when we get up-to-date information.
	// figure out how to run this job -- concurrency policy might forbid us from running
	// multiple at the same time...
	if cronJob.Spec.ConcurrencyPolicy == batchv1.ForbidConcurrent && len(activeJobs) > 0 {
		log.V(1).Info("concurrency policy blocks concurrent runs, skipping", "num active", len(activeJobs))
		return scheduledResult, nil
	}

	// ...or instruct us to replace existing ones...
	if cronJob.Spec.ConcurrencyPolicy == batchv1.ReplaceConcurrent {
		for _, activeJob := range activeJobs {
			// we don't care if the job was already deleted
			if err := r.Delete(ctx, activeJob, client.PropagationPolicy(metav1.DeletePropagationBackground)); client.IgnoreNotFound(err) != nil {
				log.Error(err, "unable to delete active job", "job", activeJob)
				return ctrl.Result{}, err
			}
		}
	}
Once we’ve figured out what to do with existing jobs, we’ll actually create our desired job
constructJobForCronJob
We need to construct a job based on our CronJob’s template. We’ll copy over the spec from the template and copy some basic object meta.
Then, we’ll set the “scheduled time” annotation so that we can reconstitute our
LastScheduleTime field each reconcile.
Finally, we’ll need to set an owner reference. This allows the Kubernetes garbage collector to clean up jobs when we delete the CronJob, and allows controller-runtime to figure out which cronjob needs to be reconciled when a given job changes (is added, deleted, completes, etc).
	constructJobForCronJob := func(cronJob *batchv1.CronJob, scheduledTime time.Time) (*kbatch.Job, error) {
		// We want job names for a given nominal start time to have a deterministic name to avoid the same job being created twice
		name := fmt.Sprintf("%s-%d", cronJob.Name, scheduledTime.Unix())

		job := &kbatch.Job{
			ObjectMeta: metav1.ObjectMeta{
				Labels:      make(map[string]string),
				Annotations: make(map[string]string),
				Name:        name,
				Namespace:   cronJob.Namespace,
			},
			Spec: *cronJob.Spec.JobTemplate.Spec.DeepCopy(),
		}
		maps.Copy(job.Annotations, cronJob.Spec.JobTemplate.Annotations)
		job.Annotations[scheduledTimeAnnotation] = scheduledTime.Format(time.RFC3339)
		maps.Copy(job.Labels, cronJob.Spec.JobTemplate.Labels)
		if err := ctrl.SetControllerReference(cronJob, job, r.Scheme); err != nil {
			return nil, err
		}

		return job, nil
	}
	// actually make the job...
	job, err := constructJobForCronJob(&cronJob, missedRun)
	if err != nil {
		log.Error(err, "unable to construct job from template")
		// don't retry immediately; this failure occurred while constructing the Job.
		// we'll reconcile again at the next scheduled run, and updates to the CronJob
		// can also trigger reconciliation sooner
		return scheduledResult, nil
	}

	// ...and create it on the cluster
	if err := r.Create(ctx, job); err != nil {
		log.Error(err, "unable to create Job for CronJob", "job", job)
		if fetchErr := r.Get(ctx, req.NamespacedName, &cronJob); fetchErr != nil {
			log.Error(fetchErr, "Failed to re-fetch CronJob")
			return ctrl.Result{}, fetchErr
		}
		// Update status condition to reflect the error
		meta.SetStatusCondition(&cronJob.Status.Conditions, metav1.Condition{
			Type:    typeDegradedCronJob,
			Status:  metav1.ConditionTrue,
			Reason:  "JobCreationFailed",
			Message: fmt.Sprintf("Failed to create job: %v", err),
		})
		if statusErr := r.Status().Update(ctx, &cronJob); statusErr != nil {
			log.Error(statusErr, "Failed to update CronJob status")
		}
		return ctrl.Result{}, err
	}

	log.V(1).Info("created Job for CronJob run", "job", job)

	if fetchErr := r.Get(ctx, req.NamespacedName, &cronJob); fetchErr != nil {
		log.Error(fetchErr, "Failed to re-fetch CronJob")
		return ctrl.Result{}, fetchErr
	}
	// Update status condition to reflect successful job creation
	meta.SetStatusCondition(&cronJob.Status.Conditions, metav1.Condition{
		Type:    typeProgressingCronJob,
		Status:  metav1.ConditionTrue,
		Reason:  "JobCreated",
		Message: fmt.Sprintf("Created job %s", job.Name),
	})
	if statusErr := r.Status().Update(ctx, &cronJob); statusErr != nil {
		log.Error(statusErr, "Failed to update CronJob status")
	}
7: Requeue when we either see a running job or it’s time for the next scheduled run
Finally, we’ll return the result that we prepped above, that says we want to requeue when our next run would need to occur. This is taken as a maximum deadline – if something else changes in between, like our job starts or finishes, we get modified, etc, we might reconcile again sooner.
	// we'll requeue once we see the running job, and update our status
	return scheduledResult, nil
}
Setup
Finally, we’ll update our setup. In order to allow our reconciler to quickly look up Jobs by their owner, we’ll need an index. We declare an index key that we can later use with the client as a pseudo-field name, and then describe how to extract the indexed value from the Job object. The indexer will automatically take care of namespaces for us, so we just have to extract the owner name if the Job has a CronJob owner.
Additionally, we’ll inform the manager that this controller owns some Jobs, so that it will automatically call Reconcile on the underlying CronJob when a Job changes, is deleted, etc.
var (
	jobOwnerKey = ".metadata.controller"
	apiGVStr    = batchv1.GroupVersion.String()
)

// SetupWithManager sets up the controller with the Manager.
func (r *CronJobReconciler) SetupWithManager(mgr ctrl.Manager) error {
	// set up a real clock, since we're not in a test
	if r.Clock == nil {
		r.Clock = realClock{}
	}

	if err := mgr.GetFieldIndexer().IndexField(context.Background(), &kbatch.Job{}, jobOwnerKey, func(rawObj client.Object) []string {
		// grab the job object, extract the owner...
		job := rawObj.(*kbatch.Job)
		owner := metav1.GetControllerOf(job)
		if owner == nil {
			return nil
		}
		// ...make sure it's a CronJob...
		if owner.APIVersion != apiGVStr || owner.Kind != "CronJob" {
			return nil
		}

		// ...and if so, return it
		return []string{owner.Name}
	}); err != nil {
		return err
	}

	return ctrl.NewControllerManagedBy(mgr).
		For(&batchv1.CronJob{}).
		Owns(&kbatch.Job{}).
		Named("cronjob").
		Complete(r)
}
That was a doozy, but now you have a working controller. Test against the cluster, then, if there are no issues, deploy it!
You said something about main?
But first, remember how the guide said to come back to main.go
again? Take a look and see what has
changed, and what to add.
Apache License
Copyright 2026 The Kubernetes authors.
Licensed under the Apache License, Version 2.0 (the “License”); you may not use this file except in compliance with the License. You may obtain a copy of the License at
http://www.apache.org/licenses/LICENSE-2.0
Unless required by applicable law or agreed to in writing, software distributed under the License is distributed on an “AS IS” BASIS, WITHOUT WARRANTIES OR CONDITIONS OF ANY KIND, either express or implied. See the License for the specific language governing permissions and limitations under the License.
Imports
package main

import (
	"crypto/tls"
	"flag"
	"os"

	// Import all Kubernetes client auth plugins (e.g. Azure, GCP, OIDC, etc.)
	// to ensure that exec-entrypoint and run can make use of them.
	_ "k8s.io/client-go/plugin/pkg/client/auth"

	"k8s.io/apimachinery/pkg/runtime"
	utilruntime "k8s.io/apimachinery/pkg/util/runtime"
	clientgoscheme "k8s.io/client-go/kubernetes/scheme"
	ctrl "sigs.k8s.io/controller-runtime"
	"sigs.k8s.io/controller-runtime/pkg/healthz"
	"sigs.k8s.io/controller-runtime/pkg/log/zap"
	"sigs.k8s.io/controller-runtime/pkg/metrics/filters"
	metricsserver "sigs.k8s.io/controller-runtime/pkg/metrics/server"
	"sigs.k8s.io/controller-runtime/pkg/webhook"

	batchv1 "tutorial.kubebuilder.io/project/api/v1"
	"tutorial.kubebuilder.io/project/internal/controller"
	webhookv1 "tutorial.kubebuilder.io/project/internal/webhook/v1"
	// +kubebuilder:scaffold:imports
)
The first difference to notice is that kubebuilder has added the new API
group’s package (batchv1) to our scheme. This means that we can use those
objects in our controller.
If we would be using any other CRD we would have to add their scheme the same way.
Builtin types such as Job have their scheme added by clientgoscheme.
var (
	scheme   = runtime.NewScheme()
	setupLog = ctrl.Log.WithName("setup")
)

func init() {
	utilruntime.Must(clientgoscheme.AddToScheme(scheme))

	utilruntime.Must(batchv1.AddToScheme(scheme))
	// +kubebuilder:scaffold:scheme
}
The other thing that’s changed is that kubebuilder has added a block calling our
CronJob controller’s SetupWithManager method.
// nolint:gocyclo
func main() {
Remaining code from main.go
	var metricsAddr string
	var metricsCertPath, metricsCertName, metricsCertKey string
	var webhookCertPath, webhookCertName, webhookCertKey string
	var webhookPort int
	var enableLeaderElection bool
	var probeAddr string
	var secureMetrics bool
	var enableHTTP2 bool
	var tlsOpts []func(*tls.Config)
	flag.StringVar(&metricsAddr, "metrics-bind-address", "0", "The address the metrics endpoint binds to. "+
		"Use :8443 for HTTPS or :8080 for HTTP, or leave as 0 to disable the metrics service.")
	flag.StringVar(&probeAddr, "health-probe-bind-address", ":8081", "The address the probe endpoint binds to.")
	flag.BoolVar(&enableLeaderElection, "leader-elect", false,
		"Enable leader election for controller manager. "+
			"Enabling this will ensure there is only one active controller manager.")
	flag.BoolVar(&secureMetrics, "metrics-secure", true,
		"If set, the metrics endpoint is served securely via HTTPS. Use --metrics-secure=false to use HTTP instead.")
	flag.StringVar(&webhookCertPath, "webhook-cert-path", "", "The directory that contains the webhook certificate.")
	flag.StringVar(&webhookCertName, "webhook-cert-name", "tls.crt", "The name of the webhook certificate file.")
	flag.StringVar(&webhookCertKey, "webhook-cert-key", "tls.key", "The name of the webhook key file.")
	flag.IntVar(&webhookPort, "webhook-port", 9443, "Port the webhook server listens on. Defaults to 9443.")
	flag.StringVar(&metricsCertPath, "metrics-cert-path", "",
		"The directory that contains the metrics server certificate.")
	flag.StringVar(&metricsCertName, "metrics-cert-name", "tls.crt", "The name of the metrics server certificate file.")
	flag.StringVar(&metricsCertKey, "metrics-cert-key", "tls.key", "The name of the metrics server key file.")
	flag.BoolVar(&enableHTTP2, "enable-http2", false,
		"If set, HTTP/2 will be enabled for the metrics and webhook servers")
	opts := zap.Options{
		Development: true,
	}
	opts.BindFlags(flag.CommandLine)
	flag.Parse()

	ctrl.SetLogger(zap.New(zap.UseFlagOptions(&opts)))

	// if the enable-http2 flag is false (the default), http/2 should be disabled
	// due to its vulnerabilities. More specifically, disabling http/2 will
	// prevent from being vulnerable to the HTTP/2 Stream Cancellation and
	// Rapid Reset CVEs. For more information see:
	// - https://github.com/advisories/GHSA-qppj-fm5r-hxr3
	// - https://github.com/advisories/GHSA-4374-p667-p6c8
	disableHTTP2 := func(c *tls.Config) {
		setupLog.Info("Disabling HTTP/2")
		c.NextProtos = []string{"http/1.1"}
	}

	if !enableHTTP2 {
		tlsOpts = append(tlsOpts, disableHTTP2)
	}

	// Initial webhook TLS options
	webhookTLSOpts := tlsOpts
	webhookServerOptions := webhook.Options{
		TLSOpts: webhookTLSOpts,
		Port:    webhookPort,
	}

	if len(webhookCertPath) > 0 {
		setupLog.Info("Initializing webhook certificate watcher using provided certificates",
			"webhook-cert-path", webhookCertPath, "webhook-cert-name", webhookCertName, "webhook-cert-key", webhookCertKey)

		webhookServerOptions.CertDir = webhookCertPath
		webhookServerOptions.CertName = webhookCertName
		webhookServerOptions.KeyName = webhookCertKey
	}

	webhookServer := webhook.NewServer(webhookServerOptions)

	// Metrics endpoint is enabled in 'config/default/kustomization.yaml'. The Metrics options configure the server.
	// More info:
	// - https://pkg.go.dev/sigs.k8s.io/controller-runtime@v0.24.1/pkg/metrics/server
	// - https://book.kubebuilder.io/reference/metrics.html
	metricsServerOptions := metricsserver.Options{
		BindAddress:   metricsAddr,
		SecureServing: secureMetrics,
		TLSOpts:       tlsOpts,
	}

	if secureMetrics {
		// FilterProvider is used to protect the metrics endpoint with authn/authz.
		// These configurations ensure that only authorized users and service accounts
		// can access the metrics endpoint. The RBAC are configured in 'config/rbac/kustomization.yaml'. More info:
		// https://pkg.go.dev/sigs.k8s.io/controller-runtime@v0.24.1/pkg/metrics/filters#WithAuthenticationAndAuthorization
		metricsServerOptions.FilterProvider = filters.WithAuthenticationAndAuthorization
	}

	// If the certificate is not specified, controller-runtime will automatically
	// generate self-signed certificates for the metrics server. While convenient for development and testing,
	// this setup is not recommended for production.
	//
	// TODO(user): If you enable certManager, uncomment the following lines:
	// - [METRICS-WITH-CERTS] at config/default/kustomization.yaml to generate and use certificates
	// managed by cert-manager for the metrics server.
	// - [PROMETHEUS-WITH-CERTS] at config/prometheus/kustomization.yaml for TLS certification.
	if len(metricsCertPath) > 0 {
		setupLog.Info("Initializing metrics certificate watcher using provided certificates",
			"metrics-cert-path", metricsCertPath, "metrics-cert-name", metricsCertName, "metrics-cert-key", metricsCertKey)

		metricsServerOptions.CertDir = metricsCertPath
		metricsServerOptions.CertName = metricsCertName
		metricsServerOptions.KeyName = metricsCertKey
	}

	mgr, err := ctrl.NewManager(ctrl.GetConfigOrDie(), ctrl.Options{
		Scheme:                 scheme,
		Metrics:                metricsServerOptions,
		WebhookServer:          webhookServer,
		HealthProbeBindAddress: probeAddr,
		LeaderElection:         enableLeaderElection,
		LeaderElectionID:       "80807133.tutorial.kubebuilder.io",
		// LeaderElectionReleaseOnCancel defines if the leader should step down voluntarily
		// when the Manager ends. This requires the binary to immediately end when the
		// Manager is stopped, otherwise, this setting is unsafe. Setting this significantly
		// speeds up voluntary leader transitions as the new leader don't have to wait
		// LeaseDuration time first.
		//
		// In the default scaffold provided, the program ends immediately after
		// the manager stops, so would be fine to enable this option. However,
		// if you are doing or is intended to do any operation such as perform cleanups
		// after the manager stops then its usage might be unsafe.
		// LeaderElectionReleaseOnCancel: true,
	})
	if err != nil {
		setupLog.Error(err, "Failed to start manager")
		os.Exit(1)
	}
	if err := (&controller.CronJobReconciler{
		Client: mgr.GetClient(),
		Scheme: mgr.GetScheme(),
	}).SetupWithManager(mgr); err != nil {
		setupLog.Error(err, "Failed to create controller", "controller", "cronjob")
		os.Exit(1)
	}
We’ll also set up webhooks for our type, which we’ll talk about next. We just need to add them to the manager. Since we might want to run the webhooks separately, or not run them when testing our controller locally, we’ll put them behind an environment variable.
We’ll just make sure to set ENABLE_WEBHOOKS=false when we run locally.
	// nolint:goconst
	if os.Getenv("ENABLE_WEBHOOKS") != "false" {
		if err := webhookv1.SetupCronJobWebhookWithManager(mgr); err != nil {
			setupLog.Error(err, "Failed to create webhook", "webhook", "CronJob")
			os.Exit(1)
		}
	}
	// +kubebuilder:scaffold:builder

	if err := mgr.AddHealthzCheck("healthz", healthz.Ping); err != nil {
		setupLog.Error(err, "Failed to set up health check")
		os.Exit(1)
	}
	if err := mgr.AddReadyzCheck("readyz", healthz.Ping); err != nil {
		setupLog.Error(err, "Failed to set up ready check")
		os.Exit(1)
	}

	setupLog.Info("Starting manager")
	if err := mgr.Start(ctrl.SetupSignalHandler()); err != nil {
		setupLog.Error(err, "Failed to run manager")
		os.Exit(1)
	}
}
Now implement the controller.
Implementing defaulting/validating webhooks
If you want to implement admission webhooks
for your CRD, the only thing you need to do is to implement the admission.Defaulter
and (or) the admission.Validator interface.
Kubebuilder takes care of the rest for you, such as
- Creating the webhook server.
- Ensuring the server has been added in the manager.
- Creating handlers for your webhooks.
- Registering each handler with a path in your server.
First, scaffold the webhooks for the CRD (CronJob). Run the following command with the --defaulting and --programmatic-validation flags (since the test project uses defaulting and validating webhooks):
kubebuilder create webhook --group batch --version v1 --kind CronJob --defaulting --programmatic-validation
This scaffolds the webhook functions and register your webhook with the manager in your main.go for you.
Custom webhook paths
You can specify custom HTTP paths for your webhooks using the --defaulting-path and --validation-path flags:
# Custom path for defaulting webhook
kubebuilder create webhook --group batch --version v1 --kind CronJob --defaulting --defaulting-path=/my-custom-mutate-path

# Custom path for validation webhook
kubebuilder create webhook --group batch --version v1 --kind CronJob --programmatic-validation --validation-path=/my-custom-validate-path

# Both webhooks with different custom paths
kubebuilder create webhook --group batch --version v1 --kind CronJob --defaulting --programmatic-validation \
  --defaulting-path=/custom-mutate --validation-path=/custom-validate
This changes the path in the webhook marker annotation but does not change where the webhook files are scaffolded. The webhook files will still be created in internal/webhook/v1/.
Apache License
Copyright 2026 The Kubernetes authors.
Licensed under the Apache License, Version 2.0 (the “License”); you may not use this file except in compliance with the License. You may obtain a copy of the License at
http://www.apache.org/licenses/LICENSE-2.0
Unless required by applicable law or agreed to in writing, software distributed under the License is distributed on an “AS IS” BASIS, WITHOUT WARRANTIES OR CONDITIONS OF ANY KIND, either express or implied. See the License for the specific language governing permissions and limitations under the License.
Imports
package v1

import (
	"context"

	"github.com/robfig/cron"
	apierrors "k8s.io/apimachinery/pkg/api/errors"
	"k8s.io/apimachinery/pkg/runtime/schema"
	validationutils "k8s.io/apimachinery/pkg/util/validation"
	"k8s.io/apimachinery/pkg/util/validation/field"

	ctrl "sigs.k8s.io/controller-runtime"
	logf "sigs.k8s.io/controller-runtime/pkg/log"
	"sigs.k8s.io/controller-runtime/pkg/webhook/admission"

	batchv1 "tutorial.kubebuilder.io/project/api/v1"
)
Next, we’ll setup a logger for the webhooks.
var cronjoblog = logf.Log.WithName("cronjob-resource")
Then, we set up the webhook with the manager.
// SetupCronJobWebhookWithManager registers the webhook for CronJob in the manager.
func SetupCronJobWebhookWithManager(mgr ctrl.Manager) error {
	return ctrl.NewWebhookManagedBy(mgr, &batchv1.CronJob{}).
		WithValidator(&CronJobValidator{}).
		WithDefaulter(&CronJobDefaulter{
			DefaultConcurrencyPolicy:          batchv1.AllowConcurrent,
			DefaultSuspend:                    false,
			DefaultSuccessfulJobsHistoryLimit: 3,
			DefaultFailedJobsHistoryLimit:     1,
		}).
		Complete()
}
Notice that we use kubebuilder markers to generate webhook manifests. This marker is responsible for generating a mutating webhook manifest.
The meaning of each marker can be found here.
This marker is responsible for generating a mutation webhook manifest.
// +kubebuilder:webhook:path=/mutate-batch-tutorial-kubebuilder-io-v1-cronjob,mutating=true,failurePolicy=fail,sideEffects=None,groups=batch.tutorial.kubebuilder.io,resources=cronjobs,verbs=create;update,versions=v1,name=mcronjob-v1.kb.io,admissionReviewVersions=v1

// CronJobDefaulter struct is responsible for setting default values on the custom resource of the
// Kind CronJob when those are created or updated.
//
// NOTE: The +kubebuilder:object:generate=false marker prevents controller-gen from generating DeepCopy methods,
// as it is used only for temporary operations and does not need to be deeply copied.
type CronJobDefaulter struct {

	// Default values for various CronJob fields
	DefaultConcurrencyPolicy          batchv1.ConcurrencyPolicy
	DefaultSuspend                    bool
	DefaultSuccessfulJobsHistoryLimit int32
	DefaultFailedJobsHistoryLimit     int32
}
We use the admission.Defaulterinterface to set defaults to our CRD.
A webhook will automatically be served that calls this defaulting.
The Defaultmethod is expected to mutate the receiver, setting the defaults.
// Default implements admission.Defaulter so a webhook will be registered for the Kind CronJob.
func (d *CronJobDefaulter) Default(_ context.Context, obj *batchv1.CronJob) error {
	cronjoblog.Info("Defaulting for CronJob", "name", obj.GetName())

	// Set default values
	d.applyDefaults(obj)
	return nil
}

// applyDefaults applies default values to CronJob fields.
func (d *CronJobDefaulter) applyDefaults(cronJob *batchv1.CronJob) {
	if cronJob.Spec.ConcurrencyPolicy == "" {
		cronJob.Spec.ConcurrencyPolicy = d.DefaultConcurrencyPolicy
	}
	if cronJob.Spec.Suspend == nil {
		cronJob.Spec.Suspend = new(bool)
		*cronJob.Spec.Suspend = d.DefaultSuspend
	}
	if cronJob.Spec.SuccessfulJobsHistoryLimit == nil {
		cronJob.Spec.SuccessfulJobsHistoryLimit = new(int32)
		*cronJob.Spec.SuccessfulJobsHistoryLimit = d.DefaultSuccessfulJobsHistoryLimit
	}
	if cronJob.Spec.FailedJobsHistoryLimit == nil {
		cronJob.Spec.FailedJobsHistoryLimit = new(int32)
		*cronJob.Spec.FailedJobsHistoryLimit = d.DefaultFailedJobsHistoryLimit
	}
}
We can validate our CRD beyond what’s possible with declarative validation. Generally, declarative validation should be sufficient, but sometimes more advanced use cases call for complex validation.
For instance, we’ll see below that we use this to validate a well-formed cron schedule without making up a long regular expression.
If admission.Validator interface is implemented, a webhook will automatically be
served that calls the validation.
The ValidateCreate, ValidateUpdate and ValidateDelete methods are expected
to validate its receiver upon creation, update and deletion respectively.
We separate out ValidateCreate from ValidateUpdate to allow behavior like making
certain fields immutable, so that they can only be set on creation.
ValidateDelete is also separated from ValidateUpdate to allow different
validation behavior on deletion.
Here, however, we just use the same shared validation for ValidateCreate and
ValidateUpdate. And we do nothing in ValidateDelete, since we don’t need to
validate anything on deletion.
This marker is responsible for generating a validation webhook manifest.
// NOTE: If you want to customise the 'path', use the flags '--defaulting-path' or '--validation-path'.
// +kubebuilder:webhook:path=/validate-batch-tutorial-kubebuilder-io-v1-cronjob,mutating=false,failurePolicy=fail,sideEffects=None,groups=batch.tutorial.kubebuilder.io,resources=cronjobs,verbs=create;update,versions=v1,name=vcronjob-v1.kb.io,admissionReviewVersions=v1

// CronJobValidator struct is responsible for validating the CronJob resource
// when it is created, updated, or deleted.
//
// NOTE: The +kubebuilder:object:generate=false marker prevents controller-gen from generating DeepCopy methods,
// as this struct is used only for temporary operations and does not need to be deeply copied.
type CronJobValidator struct {
	// TODO(user): Add more fields as needed for validation
}

// ValidateCreate implements admission.Validator so a webhook will be registered for the type CronJob.
func (v *CronJobValidator) ValidateCreate(_ context.Context, obj *batchv1.CronJob) (admission.Warnings, error) {
	cronjoblog.Info("Validation for CronJob upon creation", "name", obj.GetName())

	return nil, validateCronJob(obj)
}

// ValidateUpdate implements admission.Validator so a webhook will be registered for the type CronJob.
func (v *CronJobValidator) ValidateUpdate(_ context.Context, oldObj, newObj *batchv1.CronJob) (admission.Warnings, error) {
	cronjoblog.Info("Validation for CronJob upon update", "name", newObj.GetName())

	return nil, validateCronJob(newObj)
}

// ValidateDelete implements admission.Validator so a webhook will be registered for the type CronJob.
func (v *CronJobValidator) ValidateDelete(_ context.Context, obj *batchv1.CronJob) (admission.Warnings, error) {
	cronjoblog.Info("Validation for CronJob upon deletion", "name", obj.GetName())

	// TODO(user): fill in your validation logic upon object deletion.

	return nil, nil
}
We validate the name and the spec of the CronJob.
// validateCronJob validates the fields of a CronJob object.
func validateCronJob(cronjob *batchv1.CronJob) error {
	var allErrs field.ErrorList
	if err := validateCronJobName(cronjob); err != nil {
		allErrs = append(allErrs, err)
	}
	if err := validateCronJobSpec(cronjob); err != nil {
		allErrs = append(allErrs, err)
	}
	if len(allErrs) == 0 {
		return nil
	}

	return apierrors.NewInvalid(
		schema.GroupKind{Group: "batch.tutorial.kubebuilder.io", Kind: "CronJob"},
		cronjob.Name, allErrs)
}
Some fields are declaratively validated by OpenAPI schema.
You can find kubebuilder validation markers (prefixed
with // +kubebuilder:validation) in the
Designing an API section.
You can find all of the kubebuilder supported markers for
declaring validation by running controller-gen crd -w,
or here.
func validateCronJobSpec(cronjob *batchv1.CronJob) *field.Error {
	// The field helpers from the kubernetes API machinery help us return nicely
	// structured validation errors.
	return validateScheduleFormat(
		cronjob.Spec.Schedule,
		field.NewPath("spec").Child("schedule"))
}
We’ll need to validate the cron schedule is well-formatted.
func validateScheduleFormat(schedule string, fldPath *field.Path) *field.Error {
	if _, err := cron.ParseStandard(schedule); err != nil {
		return field.Invalid(fldPath, schedule, err.Error())
	}
	return nil
}
validateCronJobName() Code Implementation
Validating the length of a string field can be done declaratively by the validation schema.
But the ObjectMeta.Name field is defined in a shared package under
the apimachinery repo, so we can’t declaratively validate it using
the validation schema.
func validateCronJobName(cronjob *batchv1.CronJob) *field.Error {
	if len(cronjob.Name) > validationutils.DNS1035LabelMaxLength-11 {
		// The job name length is 63 characters like all Kubernetes objects
		// (which must fit in a DNS subdomain). The cronjob controller appends
		// a 11-character suffix to the cronjob (`-$TIMESTAMP`) when creating
		// a job. The job name length limit is 63 characters. Therefore cronjob
		// names must have length <= 63-11=52. If we don't validate this here,
		// then job creation will fail later.
		return field.Invalid(field.NewPath("metadata").Child("name"), cronjob.Name, "must be no more than 52 characters")
	}
	return nil
}
Running and deploying the controller
Optional
If opting to make any changes to the API definitions, then before proceeding, generate the manifests like CRs or CRDs with
make manifests
To test out the controller, run it locally against the cluster. Before doing so, install the CRDs, as per the quick start. This will automatically update the YAML manifests using controller-tools, if needed:
make install
Now that you have installed the CRDs, run the controller against the cluster. This uses whatever credentials you use to connect to the cluster, so you do not need to worry about RBAC just yet.
In a separate terminal, run
export ENABLE_WEBHOOKS=false
make run
You should see logs from the controller about starting up, but it will not do anything just yet.
At this point, you need a CronJob to test with. Write a sample to
config/samples/batch_v1_cronjob.yaml, and use that:
apiVersion: batch.tutorial.kubebuilder.io/v1
kind: CronJob
metadata:
  labels:
    app.kubernetes.io/name: project
    app.kubernetes.io/managed-by: kustomize
  name: cronjob-sample
spec:
  schedule: "*/1 * * * *"
  startingDeadlineSeconds: 60
  concurrencyPolicy: Allow # explicitly specify, but Allow is also default.
  jobTemplate:
    spec:
      template:
        spec:
          securityContext:
            runAsNonRoot: true
            runAsUser: 1000
            seccompProfile:
              type: RuntimeDefault
          containers:
          - name: hello
            image: busybox
            args:
            - /bin/sh
            - -c
            - date; echo Hello from the Kubernetes cluster
            securityContext:
              allowPrivilegeEscalation: false
              capabilities:
                drop:
                - ALL
              readOnlyRootFilesystem: false
          restartPolicy: OnFailure
kubectl create -f config/samples/batch_v1_cronjob.yaml
At this point, you should see a flurry of activity. If you watch the changes, you should see your cronjob running, and updating status:
kubectl get cronjob.batch.tutorial.kubebuilder.io -o yaml
kubectl get job
Now that you know it is working, run it in the cluster. Stop the
make run invocation, and run
make docker-build docker-push IMG=<some-registry>/<project-name>:tag
make deploy IMG=<some-registry>/<project-name>:tag
If you list cronjobs again like before, you should see the controller functioning again!
Deploying cert-manager
Use cert-manager for provisioning the certificates for the webhook server. Other solutions should also work as long as they put the certificates in the desired location.
You can follow the cert-manager documentation to install it.
cert-manager also has a component called CA
Injector, which is responsible for
injecting the CA bundle into the MutatingWebhookConfiguration
/ ValidatingWebhookConfiguration.
To accomplish that, you need to use an annotation with key
cert-manager.io/inject-ca-from
in the MutatingWebhookConfiguration
/ ValidatingWebhookConfiguration objects.
The value of the annotation should point to an existing certificate request instance
in the format of <certificate-namespace>/<certificate-name>.
This is the kustomize patch
used for annotating the MutatingWebhookConfiguration
/ ValidatingWebhookConfiguration objects.
Deploying Admission Webhooks
cert-manager
Follow the cert-manager installation guide to install the cert-manager bundle.
Build your image
Run the following command to build your image locally.
make docker-build docker-push IMG=<some-registry>/<project-name>:tag
Deploy webhooks
You need to enable the webhook and cert manager configuration through kustomize.
config/default/kustomization.yaml should have the following webhook-related sections uncommented:
Resources - Add the webhook and cert-manager resources:
# [WEBHOOK] To enable webhook, uncomment all the sections with [WEBHOOK] prefix including the one in
# crd/kustomization.yaml
- ../webhook
# [CERTMANAGER] To enable cert-manager, uncomment all sections with 'CERTMANAGER'. 'WEBHOOK' components are required.
- ../certmanager
Patches - Add the webhook manager patch:
# [WEBHOOK] To enable webhook, uncomment all the sections with [WEBHOOK] prefix including the one in
# crd/kustomization.yaml
- path: manager_webhook_patch.yaml
  target:
    kind: Deployment
Replacements - Add the webhook certificate replacements:
 - source: # Uncomment the following block if you have any webhook
     kind: Service
     version: v1
     name: webhook-service
     fieldPath: .metadata.name # Name of the service
   targets:
     - select:
         kind: Certificate
         group: cert-manager.io
         version: v1
         name: serving-cert
       fieldPaths:
         - .spec.dnsNames.0
         - .spec.dnsNames.1
       options:
         delimiter: '.'
         index: 0
         create: true
 - source:
     kind: Service
     version: v1
     name: webhook-service
     fieldPath: .metadata.namespace # Namespace of the service
   targets:
     - select:
         kind: Certificate
         group: cert-manager.io
         version: v1
         name: serving-cert
       fieldPaths:
         - .spec.dnsNames.0
         - .spec.dnsNames.1
       options:
         delimiter: '.'
         index: 1
         create: true

 - source: # Uncomment the following block if you have a ValidatingWebhook (--programmatic-validation)
     kind: Certificate
     group: cert-manager.io
     version: v1
     name: serving-cert # This name should match the one in certificate.yaml
     fieldPath: .metadata.namespace # Namespace of the certificate CR
   targets:
     - select:
         kind: ValidatingWebhookConfiguration
       fieldPaths:
         - .metadata.annotations.[cert-manager.io/inject-ca-from]
       options:
         delimiter: '/'
         index: 0
         create: true
 - source:
     kind: Certificate
     group: cert-manager.io
     version: v1
     name: serving-cert
     fieldPath: .metadata.name
   targets:
     - select:
         kind: ValidatingWebhookConfiguration
       fieldPaths:
         - .metadata.annotations.[cert-manager.io/inject-ca-from]
       options:
         delimiter: '/'
         index: 1
         create: true

 - source: # Uncomment the following block if you have a DefaultingWebhook (--defaulting )
     kind: Certificate
     group: cert-manager.io
     version: v1
     name: serving-cert
     fieldPath: .metadata.namespace # Namespace of the certificate CR
   targets:
     - select:
         kind: MutatingWebhookConfiguration
       fieldPaths:
         - .metadata.annotations.[cert-manager.io/inject-ca-from]
       options:
         delimiter: '/'
         index: 0
         create: true
 - source:
     kind: Certificate
     group: cert-manager.io
     version: v1
     name: serving-cert
     fieldPath: .metadata.name
   targets:
     - select:
         kind: MutatingWebhookConfiguration
       fieldPaths:
         - .metadata.annotations.[cert-manager.io/inject-ca-from]
       options:
         delimiter: '/'
         index: 1
         create: true
And config/crd/kustomization.yaml should now look like the following:
# This kustomization.yaml is not intended to be run by itself,
# since it depends on service name and namespace that are out of this kustomize package.
# It should be run by config/default
resources:
- bases/batch.tutorial.kubebuilder.io_cronjobs.yaml
# +kubebuilder:scaffold:crdkustomizeresource

patches:
# [WEBHOOK] To enable webhook, uncomment all the sections with [WEBHOOK] prefix.
# patches here are for enabling the conversion webhook for each CRD
# +kubebuilder:scaffold:crdkustomizewebhookpatch

# [WEBHOOK] To enable webhook, uncomment the following section
# the following config is for teaching kustomize how to do kustomization for CRDs.
#configurations:
#- kustomizeconfig.yaml
Now you can deploy it to your cluster by
make deploy IMG=<some-registry>/<project-name>:tag
Wait a while till the webhook pod comes up and the certificates are provisioned. It usually completes within 1 minute.
Now you can create a valid CronJob to test your webhooks. The creation should successfully go through.
kubectl create -f config/samples/batch_v1_cronjob.yaml
You can also try to create an invalid CronJob (e.g. use an ill-formatted schedule field). You should see a creation failure with a validation error.
Writing controller tests
Testing Kubernetes controllers is a big subject, and the boilerplate testing files generated for you by kubebuilder are fairly minimal.
To walk you through integration testing patterns for Kubebuilder-generated controllers, this guide revisits the CronJob built in the first tutorial and writes a simple test for it.
The basic approach is that, in your generated suite_test.go file, you uses envtest to create a local Kubernetes API server, instantiate and run your controllers, and then write additional *_test.go files to test it using Ginkgo.
If you want to tinker with how your envtest cluster is configured, see section Configuring envtest for integration tests as well as the envtest docs.
Test environment setup
Apache License
Copyright 2026 The Kubernetes authors.
Licensed under the Apache License, Version 2.0 (the “License”); you may not use this file except in compliance with the License. You may obtain a copy of the License at
http://www.apache.org/licenses/LICENSE-2.0
Unless required by applicable law or agreed to in writing, software distributed under the License is distributed on an “AS IS” BASIS, WITHOUT WARRANTIES OR CONDITIONS OF ANY KIND, either express or implied. See the License for the specific language governing permissions and limitations under the License.
Imports
When we created the CronJob API with kubebuilder create api in a previous chapter, Kubebuilder already did some test work for you.
Kubebuilder scaffolded a internal/controller/suite_test.go file that does the bare bones of setting up a test environment.
First, it will contain the necessary imports.
package controller

import (
	"context"
	"os"
	"path/filepath"
	"testing"

	ctrl "sigs.k8s.io/controller-runtime"

	. "github.com/onsi/ginkgo/v2"
	. "github.com/onsi/gomega"

	"k8s.io/client-go/kubernetes/scheme"
	"k8s.io/client-go/rest"
	"sigs.k8s.io/controller-runtime/pkg/client"
	"sigs.k8s.io/controller-runtime/pkg/envtest"
	logf "sigs.k8s.io/controller-runtime/pkg/log"
	"sigs.k8s.io/controller-runtime/pkg/log/zap"

	batchv1 "tutorial.kubebuilder.io/project/api/v1"
	// +kubebuilder:scaffold:imports
)

// These tests use Ginkgo (BDD-style Go testing framework). Refer to
// http://onsi.github.io/ginkgo/ to learn more about Ginkgo.
Now, let’s go through the code generated.
var (
	ctx       context.Context
	cancel    context.CancelFunc
	testEnv   *envtest.Environment
	cfg       *rest.Config
	k8sClient client.Client // You'll be using this client in your tests.
)

func TestControllers(t *testing.T) {
	RegisterFailHandler(Fail)

	RunSpecs(t, "Controller Suite")
}

var _ = BeforeSuite(func() {
	logf.SetLogger(zap.New(zap.WriteTo(GinkgoWriter), zap.UseDevMode(true)))

	ctx, cancel = context.WithCancel(context.TODO())

	var err error
The CronJob Kind is added to the runtime scheme used by the test environment. This ensures that the CronJob API is registered with the scheme, allowing the test controller to recognize and interact with CronJob resources.
	err = batchv1.AddToScheme(scheme.Scheme)
	Expect(err).NotTo(HaveOccurred())
After the schemas, you will see the following marker. This marker is what allows new schemas to be added here automatically when a new API is added to the project.
// +kubebuilder:scaffold:scheme
The envtest environment is configured to load Custom Resource Definitions (CRDs) from the specified directory. This setup enables the test environment to recognize and interact with the custom resources defined by these CRDs.
	By("bootstrapping test environment")
	testEnv = &envtest.Environment{
		CRDDirectoryPaths:     []string{filepath.Join("..", "..", "config", "crd", "bases")},
		ErrorIfCRDPathMissing: true,
	}

	// Retrieve the first found binary directory to allow running tests from IDEs
	if getFirstFoundEnvTestBinaryDir() != "" {
		testEnv.BinaryAssetsDirectory = getFirstFoundEnvTestBinaryDir()
	}
Then, we start the envtest cluster.
	// cfg is defined in this file globally.
	cfg, err = testEnv.Start()
	Expect(err).NotTo(HaveOccurred())
	Expect(cfg).NotTo(BeNil())
A client is created for our test CRUD operations.
	k8sClient, err = client.New(cfg, client.Options{Scheme: scheme.Scheme})
	Expect(err).NotTo(HaveOccurred())
	Expect(k8sClient).NotTo(BeNil())
One thing that this autogenerated file is missing, however, is a way to actually start your controller. The code above will set up a client for interacting with your custom Kind, but will not be able to test your controller behavior. If you want to test your custom controller logic, you’ll need to add some familiar-looking manager logic to your BeforeSuite() function, so you can register your custom controller to run on this test cluster.
You may notice that the code below runs your controller with nearly identical logic to your CronJob project’s main.go! The only difference is that the manager is started in a separate goroutine so it does not block the cleanup of envtest when you’re done running your tests.
Note that we set up both a “live” k8s client and a separate client from the manager. This is because when making
assertions in tests, you generally want to assert against the live state of the API server. If you use the client
from the manager (k8sManager.GetClient), you’d end up asserting against the contents of the cache instead, which is
slower and can introduce flakiness into your tests. We could use the manager’s APIReader to accomplish the same
thing, but that would leave us with two clients in our test assertions and setup (one for reading, one for writing),
and it’d be easy to make mistakes.
Note that we keep the reconciler running against the manager’s cache client, though – we want our controller to behave as it would in production, and we use features of the cache (like indices) in our controller which aren’t available when talking directly to the API server.
	k8sManager, err := ctrl.NewManager(cfg, ctrl.Options{
		Scheme: scheme.Scheme,
	})
	Expect(err).ToNot(HaveOccurred())

	err = (&CronJobReconciler{
		Client: k8sManager.GetClient(),
		Scheme: k8sManager.GetScheme(),
	}).SetupWithManager(k8sManager)
	Expect(err).ToNot(HaveOccurred())

	go func() {
		defer GinkgoRecover()
		err = k8sManager.Start(ctx)
		Expect(err).ToNot(HaveOccurred(), "failed to run manager")
	}()
})
Kubebuilder also generates boilerplate functions for cleaning up envtest and actually running your test files in your controllers/ directory. You won’t need to touch these.
var _ = AfterSuite(func() {
	By("tearing down the test environment")
	cancel()
	err := testEnv.Stop()
	Expect(err).NotTo(HaveOccurred())
})
Now that you have your controller running on a test cluster and a client ready to perform operations on your CronJob, we can start writing integration tests!
// getFirstFoundEnvTestBinaryDir locates the first binary in the specified path.
// ENVTEST-based tests depend on specific binaries, usually located in paths set by
// controller-runtime. When running tests directly (e.g., via an IDE) without using
// Makefile targets, the 'BinaryAssetsDirectory' must be explicitly configured.
//
// This function streamlines the process by finding the required binaries, similar to
// setting the 'KUBEBUILDER_ASSETS' environment variable. To ensure the binaries are
// properly set up, run 'make setup-envtest' beforehand.
func getFirstFoundEnvTestBinaryDir() string {
	basePath := filepath.Join("..", "..", "bin", "k8s")
	entries, err := os.ReadDir(basePath)
	if err != nil {
		logf.Log.Error(err, "Failed to read directory", "path", basePath)
		return ""
	}
	for _, entry := range entries {
		if entry.IsDir() {
			return filepath.Join(basePath, entry.Name())
		}
	}
	return ""
}
Testing your Controller’s Behavior
Apache License
Licensed under the Apache License, Version 2.0 (the “License”); you may not use this file except in compliance with the License. You may obtain a copy of the License at
http://www.apache.org/licenses/LICENSE-2.0
Unless required by applicable law or agreed to in writing, software distributed under the License is distributed on an “AS IS” BASIS, WITHOUT WARRANTIES OR CONDITIONS OF ANY KIND, either express or implied. See the License for the specific language governing permissions and limitations under the License.
Ideally, we should have one <kind>_controller_test.go for each controller scaffolded and called in the suite_test.go.
So, let’s write our example test for the CronJob controller (cronjob_controller_test.go.)
Imports
As usual, we start with the necessary imports.
package controller

import (
	"context"
	"reflect"
	"time"

	. "github.com/onsi/ginkgo/v2"
	. "github.com/onsi/gomega"
	batchv1 "k8s.io/api/batch/v1"
	v1 "k8s.io/api/core/v1"
	"k8s.io/apimachinery/pkg/api/errors"
	metav1 "k8s.io/apimachinery/pkg/apis/meta/v1"
	"k8s.io/apimachinery/pkg/types"

	cronjobv1 "tutorial.kubebuilder.io/project/api/v1"
)
The first step to writing a simple integration test is to actually create an instance of CronJob you can run tests against. Note that to create a CronJob, you’ll need to create a stub CronJob struct that contains your CronJob’s specifications.
Note that when we create a stub CronJob, the CronJob also needs stubs of its required downstream objects. Without the stubbed Job template spec and the Pod template spec below, the Kubernetes API will not be able to create the CronJob.
var _ = Describe("CronJob controller", func() {
	Context("CronJob controller test", func() {

		const (
			CronjobName        = "test-cronjob"
			testContainerName  = "test-container"
			testContainerImage = "test-image"
		)

		ctx := context.Background()

		namespace := &v1.Namespace{
			ObjectMeta: metav1.ObjectMeta{
				Name:      CronjobName,
				Namespace: CronjobName,
			},
		}

		typeNamespacedName := types.NamespacedName{
			Name:      CronjobName,
			Namespace: CronjobName,
		}
		cronJob := &cronjobv1.CronJob{}

		SetDefaultEventuallyTimeout(2 * time.Minute)
		SetDefaultEventuallyPollingInterval(time.Second)

		BeforeEach(func() {
			By("Creating the Namespace to perform the tests")
			err := k8sClient.Get(ctx, types.NamespacedName{Name: CronjobName}, &v1.Namespace{})
			if err != nil && errors.IsNotFound(err) {
				err = k8sClient.Create(ctx, namespace)
				Expect(err).NotTo(HaveOccurred())
			}

			By("creating the custom resource for the Kind CronJob")
			cronJob = &cronjobv1.CronJob{}
			err = k8sClient.Get(ctx, typeNamespacedName, cronJob)
			if err != nil && errors.IsNotFound(err) {
Let’s mock our custom resource the same way we would apply it from the manifest under config/samples
				cronJob = &cronjobv1.CronJob{
					ObjectMeta: metav1.ObjectMeta{
						Name:      CronjobName,
						Namespace: namespace.Name,
					},
					Spec: cronjobv1.CronJobSpec{
						Schedule: "1 * * * *",
						JobTemplate: batchv1.JobTemplateSpec{
							Spec: batchv1.JobSpec{
								Template: v1.PodTemplateSpec{
									Spec: v1.PodSpec{
										Containers: []v1.Container{
											{
												Name:  testContainerName,
												Image: testContainerImage,
											},
										},
										RestartPolicy: v1.RestartPolicyOnFailure,
									},
								},
							},
						},
					},
				}

				err = k8sClient.Create(ctx, cronJob)
				Expect(err).NotTo(HaveOccurred())
			}
		})
After each test, we clean up the resources created above.
		AfterEach(func() {
			By("removing the custom resource for the Kind CronJob")
			found := &cronjobv1.CronJob{}
			err := k8sClient.Get(ctx, typeNamespacedName, found)
			Expect(err).NotTo(HaveOccurred())

			Eventually(func(g Gomega) {
				g.Expect(k8sClient.Delete(context.TODO(), found)).To(Succeed())
			}).Should(Succeed())

			// TODO(user): Attention if you improve this code by adding other context test you MUST
			// be aware of the current delete namespace limitations.
			// More info: https://book.kubebuilder.io/reference/envtest.html#testing-considerations
			By("Deleting the Namespace to perform the tests")
			_ = k8sClient.Delete(ctx, namespace)
		})
Now we can start implementing the test that validates the controller’s reconciliation behavior.
		It("should successfully reconcile a custom resource for CronJob", func() {
			By("Checking if the custom resource was successfully created")
			Eventually(func(g Gomega) {
				found := &cronjobv1.CronJob{}
				g.Expect(k8sClient.Get(ctx, typeNamespacedName, found)).To(Succeed())
			}).Should(Succeed())
After creating this CronJob, let’s verify that the controller properly initializes the status conditions. The controller runs in the background (started in suite_test.go), so it will automatically detect our CronJob and set initial conditions.
			By("Checking that status conditions are initialized")
			Eventually(func(g Gomega) {
				g.Expect(k8sClient.Get(ctx, typeNamespacedName, cronJob)).To(Succeed())
				g.Expect(cronJob.Status.Conditions).NotTo(BeEmpty())
			}).Should(Succeed())
Now let’s verify the CronJob has no active jobs initially.
We use Gomega’s Consistently() check here to ensure the status remains stable,
confirming the controller isn’t creating jobs prematurely.
			By("Checking that the CronJob has zero active Jobs")
			Consistently(func(g Gomega) {
				g.Expect(k8sClient.Get(ctx, typeNamespacedName, cronJob)).To(Succeed())
				g.Expect(cronJob.Status.Active).To(BeEmpty())
			}).WithTimeout(time.Second * 10).WithPolling(time.Millisecond * 250).Should(Succeed())
Next, we actually create a stubbed Job that will belong to our CronJob. We set the Job’s status Active count to 2 to simulate the Job running two pods, which means the Job is actively running.
We then set the Job’s owner reference to point to our test CronJob. This ensures that the test Job belongs to, and is tracked by, our test CronJob.
			By("Creating a new Job owned by the CronJob")
			testJob := &batchv1.Job{
				ObjectMeta: metav1.ObjectMeta{
					Name:      "test-job",
					Namespace: namespace.Name,
				},
				Spec: batchv1.JobSpec{
					Template: v1.PodTemplateSpec{
						Spec: v1.PodSpec{
							Containers: []v1.Container{
								{
									Name:  testContainerName,
									Image: testContainerImage,
								},
							},
							RestartPolicy: v1.RestartPolicyOnFailure,
						},
					},
				},
			}

			// Note that your CronJob’s GroupVersionKind is required to set up this owner reference.
			kind := reflect.TypeFor[cronjobv1.CronJob]().Name()
			gvk := cronjobv1.GroupVersion.WithKind(kind)

			controllerRef := metav1.NewControllerRef(cronJob, gvk)
			testJob.SetOwnerReferences([]metav1.OwnerReference{*controllerRef})
			Expect(k8sClient.Create(ctx, testJob)).To(Succeed())
			// Note that you can not manage the status values while creating the resource.
			// The status field is managed separately to reflect the current state of the resource.
			// Therefore, it should be updated using a PATCH or PUT operation after the resource has been created.
			// Additionally, it is recommended to use StatusConditions to manage the status. For further information see:
			// https://github.com/kubernetes/community/blob/master/contributors/devel/sig-architecture/api-conventions.md#spec-and-status
			testJob.Status.Active = 2
			Expect(k8sClient.Status().Update(ctx, testJob)).To(Succeed())
Adding this Job to our test CronJob should trigger our controller’s reconciler logic. After that, we can verify whether our controller eventually updates our CronJob’s Status field as expected!
			By("Checking that the CronJob has one active Job in status")
			Eventually(func(g Gomega) {
				g.Expect(k8sClient.Get(ctx, typeNamespacedName, cronJob)).To(Succeed())
				g.Expect(cronJob.Status.Active).To(HaveLen(1), "should have exactly one active job")
				g.Expect(cronJob.Status.Active[0].Name).To(Equal("test-job"), "the active job name should match")
			}).Should(Succeed())
Finally, let’s verify that the controller properly set status conditions. Status conditions are a key part of Kubernetes API conventions and allow users and other controllers to understand the resource state.
When there are active jobs, the Available condition should be True with reason JobsActive.
			By("Checking the latest Status Condition added to the CronJob instance")
			Expect(k8sClient.Get(ctx, typeNamespacedName, cronJob)).To(Succeed())
			var conditions []metav1.Condition
			Expect(cronJob.Status.Conditions).To(ContainElement(
				HaveField("Type", Equal("Available")), &conditions))
			Expect(conditions).To(HaveLen(1), "should have one Available condition")
			Expect(conditions[0].Status).To(Equal(metav1.ConditionTrue), "Available should be True")
			Expect(conditions[0].Reason).To(Equal("JobsActive"), "reason should be JobsActive")
Next, verify that the controller prunes old finished Jobs according to the history limits.
			By("Checking that old finished Jobs are pruned by history limits")
			failedJobsHistoryLimit := int32(1)
			successfulJobsHistoryLimit := int32(1)
			Eventually(func(g Gomega) {
				g.Expect(k8sClient.Get(ctx, typeNamespacedName, cronJob)).To(Succeed())
				cronJob.Spec.FailedJobsHistoryLimit = &failedJobsHistoryLimit
				cronJob.Spec.SuccessfulJobsHistoryLimit = &successfulJobsHistoryLimit
				g.Expect(k8sClient.Update(ctx, cronJob)).To(Succeed())
			}).Should(Succeed())

			createFinishedJob := func(name string, conditionType batchv1.JobConditionType, startTime *metav1.Time) *batchv1.Job {
				finishedJob := &batchv1.Job{
					ObjectMeta: metav1.ObjectMeta{
						Name:      name,
						Namespace: namespace.Name,
					},
					Spec: batchv1.JobSpec{
						Template: v1.PodTemplateSpec{
							Spec: v1.PodSpec{
								Containers: []v1.Container{
									{
										Name:  testContainerName,
										Image: testContainerImage,
									},
								},
								RestartPolicy: v1.RestartPolicyOnFailure,
							},
						},
					},
				}
				finishedJob.SetOwnerReferences([]metav1.OwnerReference{*controllerRef})
				Expect(k8sClient.Create(ctx, finishedJob)).To(Succeed())

				finishedJob.Status.StartTime = startTime
				finishedJob.Status.Conditions = []batchv1.JobCondition{{
					Type:   conditionType,
					Status: v1.ConditionTrue,
				}}
				if conditionType == batchv1.JobFailed {
					finishedJob.Status.Conditions = append([]batchv1.JobCondition{{
						Type:   batchv1.JobFailureTarget,
						Status: v1.ConditionTrue,
					}}, finishedJob.Status.Conditions...)
				}
				if conditionType == batchv1.JobComplete {
					finishedJob.Status.CompletionTime = startTime
					finishedJob.Status.Conditions = append([]batchv1.JobCondition{{
						Type:   batchv1.JobSuccessCriteriaMet,
						Status: v1.ConditionTrue,
					}}, finishedJob.Status.Conditions...)
				}
				Expect(k8sClient.Status().Update(ctx, finishedJob)).To(Succeed())

				return finishedJob
			}

			baseTime := time.Now()
			failedOldStartTime := metav1.NewTime(baseTime.Add(-time.Minute))
			failedNewStartTime := metav1.NewTime(baseTime.Add(time.Second))
			successfulOldStartTime := metav1.NewTime(baseTime.Add(-time.Minute))
			successfulNewStartTime := metav1.NewTime(baseTime.Add(time.Second))

			failedOldJob := createFinishedJob("test-failed-job-old", batchv1.JobFailed, &failedOldStartTime)
			failedNewJob := createFinishedJob("test-failed-job-new", batchv1.JobFailed, &failedNewStartTime)
			successfulOldJob := createFinishedJob("test-successful-job-old", batchv1.JobComplete, &successfulOldStartTime)
			successfulNewJob := createFinishedJob("test-successful-job-new", batchv1.JobComplete, &successfulNewStartTime)

			assertJobDeleted := func(g Gomega, job *batchv1.Job) {
				found := &batchv1.Job{}
				err := k8sClient.Get(ctx, types.NamespacedName{Name: job.Name, Namespace: job.Namespace}, found)
				g.Expect(errors.IsNotFound(err)).To(BeTrue())
			}
			assertJobExists := func(g Gomega, job *batchv1.Job) {
				found := &batchv1.Job{}
				g.Expect(k8sClient.Get(ctx, types.NamespacedName{Name: job.Name, Namespace: job.Namespace}, found)).To(Succeed())
			}

			Eventually(func(g Gomega) {
				assertJobDeleted(g, failedOldJob)
				assertJobDeleted(g, successfulOldJob)
				assertJobExists(g, failedNewJob)
				assertJobExists(g, successfulNewJob)
			}).Should(Succeed())
		})
	})
})
After writing all this code, you can run make test or go test ./... in your controllers/ directory again to run your new test!
This Status update example above demonstrates a general testing strategy for a custom Kind with downstream objects. By this point, you hopefully have learned the following methods for testing your controller behavior:
- Setting up your controller to run on an envtest cluster
- Writing stubs for creating test objects
- Isolating changes to an object to test specific controller behavior
Tutorial: Multi-Version API
Most projects start out with an alpha API that changes release to release. However, eventually, most projects needs to move to a more stable API. Once your API is stable though, you cannot make breaking changes to it. That’s where API versions come into play.
Make some changes to the CronJob API spec and make sure all the
different versions are supported by the CronJob project.
If you have not already, make sure you have gone through the base CronJob Tutorial.
Next, figure out what changes to make…
Changing things up
A fairly common change in a Kubernetes API is to take some data that used
to be unstructured or stored in some special string format, and change it
to structured data. Our schedule field fits the bill quite nicely for
this – right now, in v1, our schedules look like
schedule: "*/1 * * * *"
That is a pretty textbook example of a special string format (it is also pretty unreadable unless you are a Unix sysadmin).
Make it a bit more structured. According to the CronJob code, it supports “standard” Cron format.
In Kubernetes, all versions must be safely round-tripable through each other. This means that if you convert from version 1 to version 2, and then back to version 1, you must not lose information. Thus, any change you make to your API must be compatible with whatever you supported in v1, and you also need to make sure anything you add in v2 is supported in v1. In some cases, this means you need to add new fields to v1, but in this case, you will not have to, since you are not adding new functionality.
Keeping all that in mind, convert the example above to be slightly more structured:
schedule:
  minute: */1
Now, at least, there are labels for each of the fields, but you can still easily support all the different syntax for each field.
A new API version is needed for this change. Call it v2:
kubebuilder create api --group batch --version v2 --kind CronJob
Press y for “Create Resource” and n for “Create Controller”.
Now, copy over the existing types, and make the change:
Apache License
Copyright 2026 The Kubernetes authors.
Licensed under the Apache License, Version 2.0 (the “License”); you may not use this file except in compliance with the License. You may obtain a copy of the License at
http://www.apache.org/licenses/LICENSE-2.0
Unless required by applicable law or agreed to in writing, software distributed under the License is distributed on an “AS IS” BASIS, WITHOUT WARRANTIES OR CONDITIONS OF ANY KIND, either express or implied. See the License for the specific language governing permissions and limitations under the License.
Since we’re in a v2 package, controller-gen will assume this is for the v2
version automatically. We could override that with the +versionName
marker.
package v2
Imports
import (
	batchv1 "k8s.io/api/batch/v1"
	corev1 "k8s.io/api/core/v1"
	metav1 "k8s.io/apimachinery/pkg/apis/meta/v1"
	"k8s.io/apimachinery/pkg/runtime"
)

// EDIT THIS FILE!  THIS IS SCAFFOLDING FOR YOU TO OWN!
// NOTE: json tags are required.  Any new fields you add must have json tags for the fields to be serialized.
We’ll leave our spec largely unchanged, except to change the schedule field to a new type.
// CronJobSpec defines the desired state of CronJob
type CronJobSpec struct {
	// schedule in Cron format, see https://en.wikipedia.org/wiki/Cron.
	// +required
	Schedule CronSchedule `json:"schedule"`
CronJobSpec Full Code
	// startingDeadlineSeconds defines in seconds for starting the job if it misses scheduled
	// time for any reason.  Missed jobs executions will be counted as failed ones.
	// +optional
	// +kubebuilder:validation:Minimum=0
	StartingDeadlineSeconds *int64 `json:"startingDeadlineSeconds,omitempty"`

	// concurrencyPolicy defines how to treat concurrent executions of a Job.
	// Valid values are:
	// - "Allow" (default): allows CronJobs to run concurrently;
	// - "Forbid": forbids concurrent runs, skipping next run if previous run hasn't finished yet;
	// - "Replace": cancels currently running job and replaces it with a new one
	// +optional
	// +kubebuilder:default:=Allow
	ConcurrencyPolicy ConcurrencyPolicy `json:"concurrencyPolicy,omitempty"`

	// suspend tells the controller to suspend subsequent executions, it does
	// not apply to already started executions.  Defaults to false.
	// +optional
	Suspend *bool `json:"suspend,omitempty"`

	// jobTemplate defines the job that will be created when executing a CronJob.
	// +required
	JobTemplate batchv1.JobTemplateSpec `json:"jobTemplate"`

	// successfulJobsHistoryLimit defines the number of successful finished jobs to retain.
	// This is a pointer to distinguish between explicit zero and not specified.
	// +optional
	// +kubebuilder:validation:Minimum=0
	SuccessfulJobsHistoryLimit *int32 `json:"successfulJobsHistoryLimit,omitempty"`

	// failedJobsHistoryLimit defines the number of failed finished jobs to retain.
	// This is a pointer to distinguish between explicit zero and not specified.
	// +optional
	// +kubebuilder:validation:Minimum=0
	FailedJobsHistoryLimit *int32 `json:"failedJobsHistoryLimit,omitempty"`
}
Next, we’ll need to define a type to hold our schedule. Based on our proposed YAML above, it’ll have a field for each corresponding Cron “field”.
// describes a Cron schedule.
type CronSchedule struct {
	// minute specifies the minutes during which the job executes.
	// +optional
	Minute *CronField `json:"minute,omitempty"`
	// hour specifies the hour during which the job executes.
	// +optional
	Hour *CronField `json:"hour,omitempty"`
	// dayOfMonth specifies the day of the month during which the job executes.
	// +optional
	DayOfMonth *CronField `json:"dayOfMonth,omitempty"`
	// month specifies the month during which the job executes.
	// +optional
	Month *CronField `json:"month,omitempty"`
	// dayOfWeek specifies the day of the week during which the job executes.
	// +optional
	DayOfWeek *CronField `json:"dayOfWeek,omitempty"`
}
Finally, we’ll define a wrapper type to represent a field. We could attach additional validation to this field, but for now we’ll just use it for documentation purposes.
// represents a Cron field specifier.
type CronField string
Other Types
All the other types will stay the same as before.
// ConcurrencyPolicy describes how the job will be handled.
// Only one of the following concurrent policies may be specified.
// If none of the following policies is specified, the default one
// is AllowConcurrent.
// +kubebuilder:validation:Enum=Allow;Forbid;Replace
type ConcurrencyPolicy string

const (
	// AllowConcurrent allows CronJobs to run concurrently.
	AllowConcurrent ConcurrencyPolicy = "Allow"

	// ForbidConcurrent forbids concurrent runs, skipping next run if previous
	// hasn't finished yet.
	ForbidConcurrent ConcurrencyPolicy = "Forbid"

	// ReplaceConcurrent cancels currently running job and replaces it with a new one.
	ReplaceConcurrent ConcurrencyPolicy = "Replace"
)

// CronJobStatus defines the observed state of CronJob.
type CronJobStatus struct {
	// INSERT ADDITIONAL STATUS FIELD - define observed state of cluster
	// Important: Run "make" to regenerate code after modifying this file
	// active defines a list of pointers to currently running jobs.
	// +optional
	// +listType=atomic
	// +kubebuilder:validation:MinItems=1
	// +kubebuilder:validation:MaxItems=10
	Active []corev1.ObjectReference `json:"active,omitempty"`

	// lastScheduleTime defines the information when was the last time the job was successfully scheduled.
	// +optional
	LastScheduleTime *metav1.Time `json:"lastScheduleTime,omitempty"`

	// For Kubernetes API conventions, see:
	// https://github.com/kubernetes/community/blob/master/contributors/devel/sig-architecture/api-conventions.md#typical-status-properties

	// conditions represent the current state of the CronJob resource.
	// Each condition has a unique type and reflects the status of a specific aspect of the resource.
	//
	// Standard condition types include:
	// - "Available": the resource is fully functional
	// - "Progressing": the resource is being created or updated
	// - "Degraded": the resource failed to reach or maintain its desired state
	//
	// The status of each condition is one of True, False, or Unknown.
	// +listType=map
	// +listMapKey=type
	// +optional
	Conditions []metav1.Condition `json:"conditions,omitempty"`
}

// +kubebuilder:object:root=true
// +kubebuilder:subresource:status
// +versionName=v2
// CronJob is the Schema for the cronjobs API
type CronJob struct {
	metav1.TypeMeta `json:",inline"`

	// metadata is a standard object metadata
	// +optional
	metav1.ObjectMeta `json:"metadata,omitzero"`

	// spec defines the desired state of CronJob
	// +required
	Spec CronJobSpec `json:"spec"`

	// status defines the observed state of CronJob
	// +optional
	Status CronJobStatus `json:"status,omitzero"`
}

// +kubebuilder:object:root=true

// CronJobList contains a list of CronJob
type CronJobList struct {
	metav1.TypeMeta `json:",inline"`
	metav1.ListMeta `json:"metadata,omitzero"`
	Items           []CronJob `json:"items"`
}

func init() {
	SchemeBuilder.Register(func(s *runtime.Scheme) error {
		s.AddKnownTypes(SchemeGroupVersion, &CronJob{}, &CronJobList{})
		return nil
	})
}
Storage versions
Apache License
Copyright 2026 The Kubernetes authors.
Licensed under the Apache License, Version 2.0 (the “License”); you may not use this file except in compliance with the License. You may obtain a copy of the License at
http://www.apache.org/licenses/LICENSE-2.0
Unless required by applicable law or agreed to in writing, software distributed under the License is distributed on an “AS IS” BASIS, WITHOUT WARRANTIES OR CONDITIONS OF ANY KIND, either express or implied. See the License for the specific language governing permissions and limitations under the License.
package v1
Imports
import (
	batchv1 "k8s.io/api/batch/v1"
	corev1 "k8s.io/api/core/v1"
	metav1 "k8s.io/apimachinery/pkg/apis/meta/v1"
	"k8s.io/apimachinery/pkg/runtime"
)

// EDIT THIS FILE!  THIS IS SCAFFOLDING FOR YOU TO OWN!
// NOTE: json tags are required.  Any new fields you add must have json tags for the fields to be serialized.
Remaining code from cronjob_types.go
// CronJobSpec defines the desired state of CronJob
type CronJobSpec struct {
	// schedule in Cron format, see https://en.wikipedia.org/wiki/Cron.
	// +kubebuilder:validation:MinLength=0
	// +required
	Schedule string `json:"schedule"`

	// startingDeadlineSeconds defines in seconds for starting the job if it misses scheduled
	// time for any reason.  Missed jobs executions will be counted as failed ones.
	// +optional
	// +kubebuilder:validation:Minimum=0
	StartingDeadlineSeconds *int64 `json:"startingDeadlineSeconds,omitempty"`

	// concurrencyPolicy specifies how to treat concurrent executions of a Job.
	// Valid values are:
	// - "Allow" (default): allows CronJobs to run concurrently;
	// - "Forbid": forbids concurrent runs, skipping next run if previous run hasn't finished yet;
	// - "Replace": cancels currently running job and replaces it with a new one
	// +optional
	// +kubebuilder:default:=Allow
	ConcurrencyPolicy ConcurrencyPolicy `json:"concurrencyPolicy,omitempty"`

	// suspend tells the controller to suspend subsequent executions, it does
	// not apply to already started executions.  Defaults to false.
	// +optional
	Suspend *bool `json:"suspend,omitempty"`

	// jobTemplate defines the job that will be created when executing a CronJob.
	// +required
	JobTemplate batchv1.JobTemplateSpec `json:"jobTemplate"`

	// successfulJobsHistoryLimit defines the number of successful finished jobs to retain.
	// This is a pointer to distinguish between explicit zero and not specified.
	// +optional
	// +kubebuilder:validation:Minimum=0
	SuccessfulJobsHistoryLimit *int32 `json:"successfulJobsHistoryLimit,omitempty"`

	// failedJobsHistoryLimit defines the number of failed finished jobs to retain.
	// This is a pointer to distinguish between explicit zero and not specified.
	// +optional
	// +kubebuilder:validation:Minimum=0
	FailedJobsHistoryLimit *int32 `json:"failedJobsHistoryLimit,omitempty"`
}

// ConcurrencyPolicy describes how the job will be handled.
// Only one of the following concurrent policies may be specified.
// If none of the following policies is specified, the default one
// is AllowConcurrent.
// +kubebuilder:validation:Enum=Allow;Forbid;Replace
type ConcurrencyPolicy string

const (
	// AllowConcurrent allows CronJobs to run concurrently.
	AllowConcurrent ConcurrencyPolicy = "Allow"

	// ForbidConcurrent forbids concurrent runs, skipping next run if previous
	// hasn't finished yet.
	ForbidConcurrent ConcurrencyPolicy = "Forbid"

	// ReplaceConcurrent cancels currently running job and replaces it with a new one.
	ReplaceConcurrent ConcurrencyPolicy = "Replace"
)

// CronJobStatus defines the observed state of CronJob.
type CronJobStatus struct {
	// INSERT ADDITIONAL STATUS FIELD - define observed state of cluster
	// Important: Run "make" to regenerate code after modifying this file

	// active defines a list of pointers to currently running jobs.
	// +optional
	// +listType=atomic
	// +kubebuilder:validation:MinItems=1
	// +kubebuilder:validation:MaxItems=10
	Active []corev1.ObjectReference `json:"active,omitempty"`

	// lastScheduleTime defines when was the last time the job was successfully scheduled.
	// +optional
	LastScheduleTime *metav1.Time `json:"lastScheduleTime,omitempty"`

	// For Kubernetes API conventions, see:
	// https://github.com/kubernetes/community/blob/master/contributors/devel/sig-architecture/api-conventions.md#typical-status-properties

	// conditions represent the current state of the CronJob resource.
	// Each condition has a unique type and reflects the status of a specific aspect of the resource.
	//
	// Standard condition types include:
	// - "Available": the resource is fully functional
	// - "Progressing": the resource is being created or updated
	// - "Degraded": the resource failed to reach or maintain its desired state
	//
	// The status of each condition is one of True, False, or Unknown.
	// +listType=map
	// +listMapKey=type
	// +optional
	Conditions []metav1.Condition `json:"conditions,omitempty"`
}
Since we’ll have more than one version, we’ll need to mark a storage version. This is the version that the Kubernetes API server uses to store our data. We’ll chose the v1 version for our project.
We’ll use the +kubebuilder:storageversion to do this.
Note that multiple versions may exist in storage if they were written before the storage version changes – changing the storage version only affects how objects are created/updated after the change.
// +kubebuilder:object:root=true
// +kubebuilder:storageversion
// +kubebuilder:subresource:status
// +versionName=v1
// +kubebuilder:storageversion
// CronJob is the Schema for the cronjobs API
type CronJob struct {
	metav1.TypeMeta `json:",inline"`

	// metadata is a standard object metadata
	// +optional
	metav1.ObjectMeta `json:"metadata,omitzero"`

	// spec defines the desired state of CronJob
	// +required
	Spec CronJobSpec `json:"spec"`

	// status defines the observed state of CronJob
	// +optional
	Status CronJobStatus `json:"status,omitzero"`
}
Remaining code from cronjob_types.go
// +kubebuilder:object:root=true

// CronJobList contains a list of CronJob
type CronJobList struct {
	metav1.TypeMeta `json:",inline"`
	metav1.ListMeta `json:"metadata,omitzero"`
	Items           []CronJob `json:"items"`
}

func init() {
	SchemeBuilder.Register(func(s *runtime.Scheme) error {
		s.AddKnownTypes(SchemeGroupVersion, &CronJob{}, &CronJobList{})
		return nil
	})
}
Now that the types are in place, set up conversion…
Hubs, spokes, and other wheel metaphors
Since there are now two different versions, and users can request either version, define a way to convert between versions. For CRDs, this is done using a webhook, similar to the defaulting and validating webhooks defined in the base tutorial. Like before, controller-runtime will help wire together the nitty-gritty bits, you just have to implement the actual conversion.
Before doing that, understand how controller-runtime thinks about versions. Namely:
Complete graphs are insufficiently nautical
A simple approach to defining conversion might be to define conversion functions to convert between each of the versions. Then, whenever you need to convert, you’d look up the appropriate function, and call it to run the conversion.
This works fine when there are just two versions, but what if there were 4 types? 8 types? That’d be a lot of conversion functions.
Instead, controller-runtime models conversion in terms of a “hub and spoke” model – mark one version as the “hub”, and all other versions just define conversion to and from the hub:
Then, to convert between two non-hub versions, first convert to the hub version, and then to the desired version:
This cuts down on the number of conversion functions to define, and is modeled off of what Kubernetes does internally.
What does that have to do with webhooks?
When API clients, like kubectl or your controller, request a particular version of your resource, the Kubernetes API server needs to return a result that is of that version. However, that version might not match the version stored by the API server.
In that case, the API server needs to know how to convert between the desired version and the stored version. Since the conversions are not built in for CRDs, the Kubernetes API server calls out to a webhook to do the conversion instead. For Kubebuilder, this webhook is implemented by controller-runtime, and performs the hub-and-spoke conversions discussed above.
Now that the model for conversion is clear, actually implement the conversions.
Implementing conversion
With the model for conversion in place, it is time to actually implement
the conversion functions. Create a conversion webhook
for the CronJob API version v1 (Hub) to Spoke the CronJob API version
v2 see:
kubebuilder create webhook --group batch --version v1 --kind CronJob --conversion --spoke v2
The above command generates the cronjob_conversion.go next to the
cronjob_types.go file, to avoid
cluttering up the main types file with extra functions.
Hub…
First, implement the hub. Choose the v1 version as the hub:
Apache License
Copyright 2026 The Kubernetes authors.
Licensed under the Apache License, Version 2.0 (the “License”); you may not use this file except in compliance with the License. You may obtain a copy of the License at
http://www.apache.org/licenses/LICENSE-2.0
Unless required by applicable law or agreed to in writing, software distributed under the License is distributed on an “AS IS” BASIS, WITHOUT WARRANTIES OR CONDITIONS OF ANY KIND, either express or implied. See the License for the specific language governing permissions and limitations under the License.
package v1
Implementing the hub method is pretty easy – we just have to add an empty
method called Hub()to serve as a
marker.
We could also just put this inline in our cronjob_types.go file.
// Hub marks this type as a conversion hub.
func (*CronJob) Hub() {}
… and Spokes
Then, implement the spoke, the v2 version:
Apache License
Copyright 2026 The Kubernetes authors.
Licensed under the Apache License, Version 2.0 (the “License”); you may not use this file except in compliance with the License. You may obtain a copy of the License at
http://www.apache.org/licenses/LICENSE-2.0
Unless required by applicable law or agreed to in writing, software distributed under the License is distributed on an “AS IS” BASIS, WITHOUT WARRANTIES OR CONDITIONS OF ANY KIND, either express or implied. See the License for the specific language governing permissions and limitations under the License.
package v2
Imports
For imports, we’ll need the controller-runtime
conversion
package, plus the API version for our hub type (v1), and finally some of the
standard packages.
import (
	"fmt"
	"strings"

	"log"

	"sigs.k8s.io/controller-runtime/pkg/conversion"

	batchv1 "tutorial.kubebuilder.io/project/api/v1"
)
Our “spoke” versions need to implement the
Convertible
interface. Namely, they’ll need ConvertTo() and ConvertFrom()
methods to convert to/from the hub version.
ConvertTo is expected to modify its argument to contain the converted object. Most of the conversion is straightforward copying, except for converting our changed field.
// ConvertTo converts this CronJob (v2) to the Hub version (v1).
func (src *CronJob) ConvertTo(dstRaw conversion.Hub) error {
	dst := dstRaw.(*batchv1.CronJob)
	log.Printf("ConvertTo: Converting CronJob from Spoke version v2 to Hub version v1;"+
		"source: %s/%s, target: %s/%s", src.Namespace, src.Name, dst.Namespace, dst.Name)

	sched := src.Spec.Schedule
	scheduleParts := []string{"*", "*", "*", "*", "*"}
	if sched.Minute != nil {
		scheduleParts[0] = string(*sched.Minute)
	}
	if sched.Hour != nil {
		scheduleParts[1] = string(*sched.Hour)
	}
	if sched.DayOfMonth != nil {
		scheduleParts[2] = string(*sched.DayOfMonth)
	}
	if sched.Month != nil {
		scheduleParts[3] = string(*sched.Month)
	}
	if sched.DayOfWeek != nil {
		scheduleParts[4] = string(*sched.DayOfWeek)
	}
	dst.Spec.Schedule = strings.Join(scheduleParts, " ")
rote conversion
The rest of the conversion is pretty rote.
	// ObjectMeta
	dst.ObjectMeta = src.ObjectMeta

	// Spec
	dst.Spec.StartingDeadlineSeconds = src.Spec.StartingDeadlineSeconds
	dst.Spec.ConcurrencyPolicy = batchv1.ConcurrencyPolicy(src.Spec.ConcurrencyPolicy)
	dst.Spec.Suspend = src.Spec.Suspend
	dst.Spec.JobTemplate = src.Spec.JobTemplate
	dst.Spec.SuccessfulJobsHistoryLimit = src.Spec.SuccessfulJobsHistoryLimit
	dst.Spec.FailedJobsHistoryLimit = src.Spec.FailedJobsHistoryLimit

	// Status
	dst.Status.Active = src.Status.Active
	dst.Status.LastScheduleTime = src.Status.LastScheduleTime

	return nil
}
ConvertFrom is expected to modify its receiver to contain the converted object. Most of the conversion is straightforward copying, except for converting our changed field.
// ConvertFrom converts the Hub version (v1) to this CronJob (v2).
func (dst *CronJob) ConvertFrom(srcRaw conversion.Hub) error {
	src := srcRaw.(*batchv1.CronJob)
	log.Printf("ConvertFrom: Converting CronJob from Hub version v1 to Spoke version v2;"+
		"source: %s/%s, target: %s/%s", src.Namespace, src.Name, dst.Namespace, dst.Name)

	schedParts := strings.Split(src.Spec.Schedule, " ")
	if len(schedParts) != 5 {
		return fmt.Errorf("invalid schedule: not a standard 5-field schedule")
	}
	partIfNeeded := func(raw string) *CronField {
		if raw == "*" {
			return nil
		}
		part := CronField(raw)
		return &part
	}
	dst.Spec.Schedule.Minute = partIfNeeded(schedParts[0])
	dst.Spec.Schedule.Hour = partIfNeeded(schedParts[1])
	dst.Spec.Schedule.DayOfMonth = partIfNeeded(schedParts[2])
	dst.Spec.Schedule.Month = partIfNeeded(schedParts[3])
	dst.Spec.Schedule.DayOfWeek = partIfNeeded(schedParts[4])
rote conversion
The rest of the conversion is pretty rote.
	// ObjectMeta
	dst.ObjectMeta = src.ObjectMeta

	// Spec
	dst.Spec.StartingDeadlineSeconds = src.Spec.StartingDeadlineSeconds
	dst.Spec.ConcurrencyPolicy = ConcurrencyPolicy(src.Spec.ConcurrencyPolicy)
	dst.Spec.Suspend = src.Spec.Suspend
	dst.Spec.JobTemplate = src.Spec.JobTemplate
	dst.Spec.SuccessfulJobsHistoryLimit = src.Spec.SuccessfulJobsHistoryLimit
	dst.Spec.FailedJobsHistoryLimit = src.Spec.FailedJobsHistoryLimit

	// Status
	dst.Status.Active = src.Status.Active
	dst.Status.LastScheduleTime = src.Status.LastScheduleTime

	return nil
}
Now that the conversions are in place, all that is needed is to wire up main to serve the webhook!
Setting up the webhooks
Our conversion is in place, so all that is left is to tell controller-runtime about our conversion.
Webhook setup for v1
The v1 webhook handles conversion (as the hub) and provides validation/defaulting for the v1 CronJob format with a string-based schedule:
Apache License
Copyright 2026 The Kubernetes authors.
Licensed under the Apache License, Version 2.0 (the “License”); you may not use this file except in compliance with the License. You may obtain a copy of the License at
http://www.apache.org/licenses/LICENSE-2.0
Unless required by applicable law or agreed to in writing, software distributed under the License is distributed on an “AS IS” BASIS, WITHOUT WARRANTIES OR CONDITIONS OF ANY KIND, either express or implied. See the License for the specific language governing permissions and limitations under the License.
Imports
package v1

import (
	"context"

	"github.com/robfig/cron"
	apierrors "k8s.io/apimachinery/pkg/api/errors"
	"k8s.io/apimachinery/pkg/runtime/schema"
	validationutils "k8s.io/apimachinery/pkg/util/validation"
	"k8s.io/apimachinery/pkg/util/validation/field"

	ctrl "sigs.k8s.io/controller-runtime"
	logf "sigs.k8s.io/controller-runtime/pkg/log"
	"sigs.k8s.io/controller-runtime/pkg/webhook/admission"

	batchv1 "tutorial.kubebuilder.io/project/api/v1"
)
Next, we’ll setup a logger for the webhooks.
var cronjoblog = logf.Log.WithName("cronjob-resource")
This setup doubles as setup for our conversion webhooks: as long as our types implement the Hub and Convertible interfaces, a conversion webhook will be registered.
// SetupCronJobWebhookWithManager registers the webhook for CronJob in the manager.
func SetupCronJobWebhookWithManager(mgr ctrl.Manager) error {
	return ctrl.NewWebhookManagedBy(mgr, &batchv1.CronJob{}).
		WithValidator(&CronJobValidator{}).
		WithDefaulter(&CronJobDefaulter{
			DefaultConcurrencyPolicy:          batchv1.AllowConcurrent,
			DefaultSuspend:                    false,
			DefaultSuccessfulJobsHistoryLimit: 3,
			DefaultFailedJobsHistoryLimit:     1,
		}).
		Complete()
}
Notice that we use kubebuilder markers to generate webhook manifests. This marker is responsible for generating a mutating webhook manifest.
The meaning of each marker can be found here.
This marker is responsible for generating a mutation webhook manifest.
// +kubebuilder:webhook:path=/mutate-batch-tutorial-kubebuilder-io-v1-cronjob,mutating=true,failurePolicy=fail,sideEffects=None,groups=batch.tutorial.kubebuilder.io,resources=cronjobs,verbs=create;update,versions=v1,name=mcronjob-v1.kb.io,admissionReviewVersions=v1

// CronJobDefaulter struct is responsible for setting default values on the custom resource of the
// Kind CronJob when those are created or updated.
//
// NOTE: The +kubebuilder:object:generate=false marker prevents controller-gen from generating DeepCopy methods,
// as it is used only for temporary operations and does not need to be deeply copied.
type CronJobDefaulter struct {

	// Default values for various CronJob fields
	DefaultConcurrencyPolicy          batchv1.ConcurrencyPolicy
	DefaultSuspend                    bool
	DefaultSuccessfulJobsHistoryLimit int32
	DefaultFailedJobsHistoryLimit     int32
}
We use the admission.Defaulterinterface to set defaults to our CRD.
A webhook will automatically be served that calls this defaulting.
The Defaultmethod is expected to mutate the receiver, setting the defaults.
// Default implements admission.Defaulter so a webhook will be registered for the Kind CronJob.
func (d *CronJobDefaulter) Default(_ context.Context, obj *batchv1.CronJob) error {
	cronjoblog.Info("Defaulting for CronJob", "name", obj.GetName())

	// Set default values
	d.applyDefaults(obj)
	return nil
}

// applyDefaults applies default values to CronJob fields.
func (d *CronJobDefaulter) applyDefaults(cronJob *batchv1.CronJob) {
	if cronJob.Spec.ConcurrencyPolicy == "" {
		cronJob.Spec.ConcurrencyPolicy = d.DefaultConcurrencyPolicy
	}
	if cronJob.Spec.Suspend == nil {
		cronJob.Spec.Suspend = new(bool)
		*cronJob.Spec.Suspend = d.DefaultSuspend
	}
	if cronJob.Spec.SuccessfulJobsHistoryLimit == nil {
		cronJob.Spec.SuccessfulJobsHistoryLimit = new(int32)
		*cronJob.Spec.SuccessfulJobsHistoryLimit = d.DefaultSuccessfulJobsHistoryLimit
	}
	if cronJob.Spec.FailedJobsHistoryLimit == nil {
		cronJob.Spec.FailedJobsHistoryLimit = new(int32)
		*cronJob.Spec.FailedJobsHistoryLimit = d.DefaultFailedJobsHistoryLimit
	}
}
We can validate our CRD beyond what’s possible with declarative validation. Generally, declarative validation should be sufficient, but sometimes more advanced use cases call for complex validation.
For instance, we’ll see below that we use this to validate a well-formed cron schedule without making up a long regular expression.
If admission.Validator interface is implemented, a webhook will automatically be
served that calls the validation.
The ValidateCreate, ValidateUpdate and ValidateDelete methods are expected
to validate its receiver upon creation, update and deletion respectively.
We separate out ValidateCreate from ValidateUpdate to allow behavior like making
certain fields immutable, so that they can only be set on creation.
ValidateDelete is also separated from ValidateUpdate to allow different
validation behavior on deletion.
Here, however, we just use the same shared validation for ValidateCreate and
ValidateUpdate. And we do nothing in ValidateDelete, since we don’t need to
validate anything on deletion.
Remaining Webhook Code
This marker is responsible for generating a validation webhook manifest.
// NOTE: If you want to customise the 'path', use the flags '--defaulting-path' or '--validation-path'.
// +kubebuilder:webhook:path=/validate-batch-tutorial-kubebuilder-io-v1-cronjob,mutating=false,failurePolicy=fail,sideEffects=None,groups=batch.tutorial.kubebuilder.io,resources=cronjobs,verbs=create;update,versions=v1,name=vcronjob-v1.kb.io,admissionReviewVersions=v1

// CronJobValidator struct is responsible for validating the CronJob resource
// when it is created, updated, or deleted.
//
// NOTE: The +kubebuilder:object:generate=false marker prevents controller-gen from generating DeepCopy methods,
// as this struct is used only for temporary operations and does not need to be deeply copied.
type CronJobValidator struct {
	// TODO(user): Add more fields as needed for validation
}

// ValidateCreate implements admission.Validator so a webhook will be registered for the type CronJob.
func (v *CronJobValidator) ValidateCreate(_ context.Context, obj *batchv1.CronJob) (admission.Warnings, error) {
	cronjoblog.Info("Validation for CronJob upon creation", "name", obj.GetName())

	return nil, validateCronJob(obj)
}

// ValidateUpdate implements admission.Validator so a webhook will be registered for the type CronJob.
func (v *CronJobValidator) ValidateUpdate(_ context.Context, oldObj, newObj *batchv1.CronJob) (admission.Warnings, error) {
	cronjoblog.Info("Validation for CronJob upon update", "name", newObj.GetName())

	return nil, validateCronJob(newObj)
}

// ValidateDelete implements admission.Validator so a webhook will be registered for the type CronJob.
func (v *CronJobValidator) ValidateDelete(_ context.Context, obj *batchv1.CronJob) (admission.Warnings, error) {
	cronjoblog.Info("Validation for CronJob upon deletion", "name", obj.GetName())

	// TODO(user): fill in your validation logic upon object deletion.

	return nil, nil
}
We validate the name and the spec of the CronJob.
// validateCronJob validates the fields of a CronJob object.
func validateCronJob(cronjob *batchv1.CronJob) error {
	var allErrs field.ErrorList
	if err := validateCronJobName(cronjob); err != nil {
		allErrs = append(allErrs, err)
	}
	if err := validateCronJobSpec(cronjob); err != nil {
		allErrs = append(allErrs, err)
	}
	if len(allErrs) == 0 {
		return nil
	}

	return apierrors.NewInvalid(
		schema.GroupKind{Group: "batch.tutorial.kubebuilder.io", Kind: "CronJob"},
		cronjob.Name, allErrs)
}
Some fields are declaratively validated by OpenAPI schema.
You can find kubebuilder validation markers (prefixed
with // +kubebuilder:validation) in the
Designing an API section.
You can find all of the kubebuilder supported markers for
declaring validation by running controller-gen crd -w,
or here.
func validateCronJobSpec(cronjob *batchv1.CronJob) *field.Error {
	// The field helpers from the kubernetes API machinery help us return nicely
	// structured validation errors.
	return validateScheduleFormat(
		cronjob.Spec.Schedule,
		field.NewPath("spec").Child("schedule"))
}
We’ll need to validate the cron schedule is well-formatted.
func validateScheduleFormat(schedule string, fldPath *field.Path) *field.Error {
	if _, err := cron.ParseStandard(schedule); err != nil {
		return field.Invalid(fldPath, schedule, err.Error())
	}
	return nil
}
Validating the length of a string field can be done declaratively by the validation schema.
But the ObjectMeta.Name field is defined in a shared package under
the apimachinery repo, so we can’t declaratively validate it using
the validation schema.
func validateCronJobName(cronjob *batchv1.CronJob) *field.Error {
	if len(cronjob.Name) > validationutils.DNS1035LabelMaxLength-11 {
		// The job name length is 63 characters like all Kubernetes objects
		// (which must fit in a DNS subdomain). The cronjob controller appends
		// a 11-character suffix to the cronjob (`-$TIMESTAMP`) when creating
		// a job. The job name length limit is 63 characters. Therefore cronjob
		// names must have length <= 63-11=52. If we don't validate this here,
		// then job creation will fail later.
		return field.Invalid(field.NewPath("metadata").Child("name"), cronjob.Name, "must be no more than 52 characters")
	}
	return nil
}
Webhook setup for v2
The v2 webhook provides validation and defaulting for the v2 CronJob format with the structured CronSchedule type. Note how the validation logic differs from v1 - it builds a cron expression from the individual schedule fields:
Apache License
Copyright 2026 The Kubernetes authors.
Licensed under the Apache License, Version 2.0 (the “License”); you may not use this file except in compliance with the License. You may obtain a copy of the License at
http://www.apache.org/licenses/LICENSE-2.0
Unless required by applicable law or agreed to in writing, software distributed under the License is distributed on an “AS IS” BASIS, WITHOUT WARRANTIES OR CONDITIONS OF ANY KIND, either express or implied. See the License for the specific language governing permissions and limitations under the License.
Imports
package v2

import (
	"context"
	"strings"

	"github.com/robfig/cron"
	apierrors "k8s.io/apimachinery/pkg/api/errors"
	"k8s.io/apimachinery/pkg/runtime/schema"
	validationutils "k8s.io/apimachinery/pkg/util/validation"
	"k8s.io/apimachinery/pkg/util/validation/field"

	ctrl "sigs.k8s.io/controller-runtime"
	logf "sigs.k8s.io/controller-runtime/pkg/log"
	"sigs.k8s.io/controller-runtime/pkg/webhook/admission"

	batchv2 "tutorial.kubebuilder.io/project/api/v2"
)
Webhook Setup and Defaulting
// nolint:unused
// log is for logging in this package.
var cronjoblog = logf.Log.WithName("cronjob-resource")

// SetupCronJobWebhookWithManager registers the webhook for CronJob in the manager.
func SetupCronJobWebhookWithManager(mgr ctrl.Manager) error {
	return ctrl.NewWebhookManagedBy(mgr, &batchv2.CronJob{}).
		WithValidator(&CronJobValidator{}).
		WithDefaulter(&CronJobDefaulter{
			DefaultConcurrencyPolicy:          batchv2.AllowConcurrent,
			DefaultSuspend:                    false,
			DefaultSuccessfulJobsHistoryLimit: 3,
			DefaultFailedJobsHistoryLimit:     1,
		}).
		Complete()
}

// TODO(user): EDIT THIS FILE!  THIS IS SCAFFOLDING FOR YOU TO OWN!

// +kubebuilder:webhook:path=/mutate-batch-tutorial-kubebuilder-io-v2-cronjob,mutating=true,failurePolicy=fail,sideEffects=None,groups=batch.tutorial.kubebuilder.io,resources=cronjobs,verbs=create;update,versions=v2,name=mcronjob-v2.kb.io,admissionReviewVersions=v1

// CronJobDefaulter struct is responsible for setting default values on the custom resource of the
// Kind CronJob when those are created or updated.
//
// NOTE: The +kubebuilder:object:generate=false marker prevents controller-gen from generating DeepCopy methods,
// as it is used only for temporary operations and does not need to be deeply copied.
type CronJobDefaulter struct {
	// Default values for various CronJob fields
	DefaultConcurrencyPolicy          batchv2.ConcurrencyPolicy
	DefaultSuspend                    bool
	DefaultSuccessfulJobsHistoryLimit int32
	DefaultFailedJobsHistoryLimit     int32
}

// Default implements admission.Defaulter so a webhook will be registered for the Kind CronJob.
func (d *CronJobDefaulter) Default(_ context.Context, obj *batchv2.CronJob) error {
	cronjoblog.Info("Defaulting for CronJob", "name", obj.GetName())

	// Set default values
	d.applyDefaults(obj)
	return nil

}

// TODO(user): change verbs to "verbs=create;update;delete" if you want to enable deletion validation.
// NOTE: If you want to customise the 'path', use the flags '--defaulting-path' or '--validation-path'.
// +kubebuilder:webhook:path=/validate-batch-tutorial-kubebuilder-io-v2-cronjob,mutating=false,failurePolicy=fail,sideEffects=None,groups=batch.tutorial.kubebuilder.io,resources=cronjobs,verbs=create;update,versions=v2,name=vcronjob-v2.kb.io,admissionReviewVersions=v1

// CronJobValidator struct is responsible for validating the CronJob resource
// when it is created, updated, or deleted.
//
// NOTE: The +kubebuilder:object:generate=false marker prevents controller-gen from generating DeepCopy methods,
// as this struct is used only for temporary operations and does not need to be deeply copied.
type CronJobValidator struct {
	// TODO(user): Add more fields as needed for validation
}

// ValidateCreate implements admission.Validator so a webhook will be registered for the type CronJob.
func (v *CronJobValidator) ValidateCreate(_ context.Context, obj *batchv2.CronJob) (admission.Warnings, error) {
	cronjoblog.Info("Validation for CronJob upon creation", "name", obj.GetName())

	return nil, validateCronJob(obj)
}

// ValidateUpdate implements admission.Validator so a webhook will be registered for the type CronJob.
func (v *CronJobValidator) ValidateUpdate(_ context.Context, oldObj, newObj *batchv2.CronJob) (admission.Warnings, error) {
	cronjoblog.Info("Validation for CronJob upon update", "name", newObj.GetName())

	return nil, validateCronJob(newObj)
}

// ValidateDelete implements admission.Validator so a webhook will be registered for the type CronJob.
func (v *CronJobValidator) ValidateDelete(_ context.Context, obj *batchv2.CronJob) (admission.Warnings, error) {
	cronjoblog.Info("Validation for CronJob upon deletion", "name", obj.GetName())

	// TODO(user): fill in your validation logic upon object deletion.

	return nil, nil
}

// applyDefaults applies default values to CronJob fields.
func (d *CronJobDefaulter) applyDefaults(cronJob *batchv2.CronJob) {
	if cronJob.Spec.ConcurrencyPolicy == "" {
		cronJob.Spec.ConcurrencyPolicy = d.DefaultConcurrencyPolicy
	}
	if cronJob.Spec.Suspend == nil {
		cronJob.Spec.Suspend = new(bool)
		*cronJob.Spec.Suspend = d.DefaultSuspend
	}
	if cronJob.Spec.SuccessfulJobsHistoryLimit == nil {
		cronJob.Spec.SuccessfulJobsHistoryLimit = new(int32)
		*cronJob.Spec.SuccessfulJobsHistoryLimit = d.DefaultSuccessfulJobsHistoryLimit
	}
	if cronJob.Spec.FailedJobsHistoryLimit == nil {
		cronJob.Spec.FailedJobsHistoryLimit = new(int32)
		*cronJob.Spec.FailedJobsHistoryLimit = d.DefaultFailedJobsHistoryLimit
	}
}
// validateCronJob validates the fields of a CronJob object.
func validateCronJob(cronjob *batchv2.CronJob) error {
	var allErrs field.ErrorList
	if err := validateCronJobName(cronjob); err != nil {
		allErrs = append(allErrs, err)
	}
	if err := validateCronJobSpec(cronjob); err != nil {
		allErrs = append(allErrs, err)
	}
	if len(allErrs) == 0 {
		return nil
	}
	return apierrors.NewInvalid(schema.GroupKind{Group: "batch.tutorial.kubebuilder.io", Kind: "CronJob"}, cronjob.Name, allErrs)
}

func validateCronJobName(cronjob *batchv2.CronJob) *field.Error {
	if len(cronjob.Name) > validationutils.DNS1035LabelMaxLength-11 {
		return field.Invalid(field.NewPath("metadata").Child("name"), cronjob.Name, "must be no more than 52 characters")
	}
	return nil
}

// validateCronJobSpec validates the schedule format of the custom CronSchedule type
func validateCronJobSpec(cronjob *batchv2.CronJob) *field.Error {
	// Build cron expression from the parts
	parts := []string{"*", "*", "*", "*", "*"} // default parts for minute, hour, day of month, month, day of week
	if cronjob.Spec.Schedule.Minute != nil {
		parts[0] = string(*cronjob.Spec.Schedule.Minute) // Directly cast CronField (which is an alias of string) to string
	}
	if cronjob.Spec.Schedule.Hour != nil {
		parts[1] = string(*cronjob.Spec.Schedule.Hour)
	}
	if cronjob.Spec.Schedule.DayOfMonth != nil {
		parts[2] = string(*cronjob.Spec.Schedule.DayOfMonth)
	}
	if cronjob.Spec.Schedule.Month != nil {
		parts[3] = string(*cronjob.Spec.Schedule.Month)
	}
	if cronjob.Spec.Schedule.DayOfWeek != nil {
		parts[4] = string(*cronjob.Spec.Schedule.DayOfWeek)
	}

	// Join parts to form the full cron expression
	cronExpression := strings.Join(parts, " ")

	return validateScheduleFormat(
		cronExpression,
		field.NewPath("spec").Child("schedule"))
}

func validateScheduleFormat(schedule string, fldPath *field.Path) *field.Error {
	if _, err := cron.ParseStandard(schedule); err != nil {
		return field.Invalid(fldPath, schedule, "invalid cron schedule format: "+err.Error())
	}
	return nil
}
…and main.go
Similarly, our existing main file is sufficient:
Apache License
Copyright 2026 The Kubernetes authors.
Licensed under the Apache License, Version 2.0 (the “License”); you may not use this file except in compliance with the License. You may obtain a copy of the License at
http://www.apache.org/licenses/LICENSE-2.0
Unless required by applicable law or agreed to in writing, software distributed under the License is distributed on an “AS IS” BASIS, WITHOUT WARRANTIES OR CONDITIONS OF ANY KIND, either express or implied. See the License for the specific language governing permissions and limitations under the License.
Imports
package main

import (
	"crypto/tls"
	"flag"
	"os"

	// Import all Kubernetes client auth plugins (e.g. Azure, GCP, OIDC, etc.)
	// to ensure that exec-entrypoint and run can make use of them.
	_ "k8s.io/client-go/plugin/pkg/client/auth"

	kbatchv1 "k8s.io/api/batch/v1"
	"k8s.io/apimachinery/pkg/runtime"
	utilruntime "k8s.io/apimachinery/pkg/util/runtime"
	clientgoscheme "k8s.io/client-go/kubernetes/scheme"
	ctrl "sigs.k8s.io/controller-runtime"
	"sigs.k8s.io/controller-runtime/pkg/healthz"
	"sigs.k8s.io/controller-runtime/pkg/log/zap"
	"sigs.k8s.io/controller-runtime/pkg/metrics/filters"
	metricsserver "sigs.k8s.io/controller-runtime/pkg/metrics/server"
	"sigs.k8s.io/controller-runtime/pkg/webhook"

	batchv1 "tutorial.kubebuilder.io/project/api/v1"
	batchv2 "tutorial.kubebuilder.io/project/api/v2"
	"tutorial.kubebuilder.io/project/internal/controller"
	webhookv1 "tutorial.kubebuilder.io/project/internal/webhook/v1"
	webhookv2 "tutorial.kubebuilder.io/project/internal/webhook/v2"
	// +kubebuilder:scaffold:imports
)
existing setup
var (
	scheme   = runtime.NewScheme()
	setupLog = ctrl.Log.WithName("setup")
)

func init() {
	utilruntime.Must(clientgoscheme.AddToScheme(scheme))

	utilruntime.Must(kbatchv1.AddToScheme(scheme)) // we've added this ourselves
	utilruntime.Must(batchv1.AddToScheme(scheme))
	utilruntime.Must(batchv2.AddToScheme(scheme))
	// +kubebuilder:scaffold:scheme
}
// nolint:gocyclo
func main() {
Manager Setup
	var metricsAddr string
	var metricsCertPath, metricsCertName, metricsCertKey string
	var webhookCertPath, webhookCertName, webhookCertKey string
	var webhookPort int
	var enableLeaderElection bool
	var probeAddr string
	var secureMetrics bool
	var enableHTTP2 bool
	var tlsOpts []func(*tls.Config)
	flag.StringVar(&metricsAddr, "metrics-bind-address", "0", "The address the metrics endpoint binds to. "+
		"Use :8443 for HTTPS or :8080 for HTTP, or leave as 0 to disable the metrics service.")
	flag.StringVar(&probeAddr, "health-probe-bind-address", ":8081", "The address the probe endpoint binds to.")
	flag.BoolVar(&enableLeaderElection, "leader-elect", false,
		"Enable leader election for controller manager. "+
			"Enabling this will ensure there is only one active controller manager.")
	flag.BoolVar(&secureMetrics, "metrics-secure", true,
		"If set, the metrics endpoint is served securely via HTTPS. Use --metrics-secure=false to use HTTP instead.")
	flag.StringVar(&webhookCertPath, "webhook-cert-path", "", "The directory that contains the webhook certificate.")
	flag.StringVar(&webhookCertName, "webhook-cert-name", "tls.crt", "The name of the webhook certificate file.")
	flag.StringVar(&webhookCertKey, "webhook-cert-key", "tls.key", "The name of the webhook key file.")
	flag.IntVar(&webhookPort, "webhook-port", 9443, "Port the webhook server listens on. Defaults to 9443.")
	flag.StringVar(&metricsCertPath, "metrics-cert-path", "",
		"The directory that contains the metrics server certificate.")
	flag.StringVar(&metricsCertName, "metrics-cert-name", "tls.crt", "The name of the metrics server certificate file.")
	flag.StringVar(&metricsCertKey, "metrics-cert-key", "tls.key", "The name of the metrics server key file.")
	flag.BoolVar(&enableHTTP2, "enable-http2", false,
		"If set, HTTP/2 will be enabled for the metrics and webhook servers")
	opts := zap.Options{
		Development: true,
	}
	opts.BindFlags(flag.CommandLine)
	flag.Parse()

	ctrl.SetLogger(zap.New(zap.UseFlagOptions(&opts)))

	// if the enable-http2 flag is false (the default), http/2 should be disabled
	// due to its vulnerabilities. More specifically, disabling http/2 will
	// prevent from being vulnerable to the HTTP/2 Stream Cancellation and
	// Rapid Reset CVEs. For more information see:
	// - https://github.com/advisories/GHSA-qppj-fm5r-hxr3
	// - https://github.com/advisories/GHSA-4374-p667-p6c8
	disableHTTP2 := func(c *tls.Config) {
		setupLog.Info("Disabling HTTP/2")
		c.NextProtos = []string{"http/1.1"}
	}

	if !enableHTTP2 {
		tlsOpts = append(tlsOpts, disableHTTP2)
	}
	// Initial webhook TLS options
	webhookTLSOpts := tlsOpts
	webhookServerOptions := webhook.Options{
		TLSOpts: webhookTLSOpts,
		Port:    webhookPort,
	}

	if len(webhookCertPath) > 0 {
		setupLog.Info("Initializing webhook certificate watcher using provided certificates",
			"webhook-cert-path", webhookCertPath, "webhook-cert-name", webhookCertName, "webhook-cert-key", webhookCertKey)

		webhookServerOptions.CertDir = webhookCertPath
		webhookServerOptions.CertName = webhookCertName
		webhookServerOptions.KeyName = webhookCertKey
	}

	webhookServer := webhook.NewServer(webhookServerOptions)

	// Metrics endpoint is enabled in 'config/default/kustomization.yaml'. The Metrics options configure the server.
	// More info:
	// - https://pkg.go.dev/sigs.k8s.io/controller-runtime@v0.24.1/pkg/metrics/server
	// - https://book.kubebuilder.io/reference/metrics.html
	metricsServerOptions := metricsserver.Options{
		BindAddress:   metricsAddr,
		SecureServing: secureMetrics,
		TLSOpts:       tlsOpts,
	}

	if secureMetrics {
		// FilterProvider is used to protect the metrics endpoint with authn/authz.
		// These configurations ensure that only authorized users and service accounts
		// can access the metrics endpoint. The RBAC are configured in 'config/rbac/kustomization.yaml'. More info:
		// https://pkg.go.dev/sigs.k8s.io/controller-runtime@v0.24.1/pkg/metrics/filters#WithAuthenticationAndAuthorization
		metricsServerOptions.FilterProvider = filters.WithAuthenticationAndAuthorization
	}

	// If the certificate is not specified, controller-runtime will automatically
	// generate self-signed certificates for the metrics server. While convenient for development and testing,
	// this setup is not recommended for production.
	//
	// TODO(user): If you enable certManager, uncomment the following lines:
	// - [METRICS-WITH-CERTS] at config/default/kustomization.yaml to generate and use certificates
	// managed by cert-manager for the metrics server.
	// - [PROMETHEUS-WITH-CERTS] at config/prometheus/kustomization.yaml for TLS certification.
	if len(metricsCertPath) > 0 {
		setupLog.Info("Initializing metrics certificate watcher using provided certificates",
			"metrics-cert-path", metricsCertPath, "metrics-cert-name", metricsCertName, "metrics-cert-key", metricsCertKey)

		metricsServerOptions.CertDir = metricsCertPath
		metricsServerOptions.CertName = metricsCertName
		metricsServerOptions.KeyName = metricsCertKey
	}

	mgr, err := ctrl.NewManager(ctrl.GetConfigOrDie(), ctrl.Options{
		Scheme:                 scheme,
		Metrics:                metricsServerOptions,
		WebhookServer:          webhookServer,
		HealthProbeBindAddress: probeAddr,
		LeaderElection:         enableLeaderElection,
		LeaderElectionID:       "80807133.tutorial.kubebuilder.io",
		// LeaderElectionReleaseOnCancel defines if the leader should step down voluntarily
		// when the Manager ends. This requires the binary to immediately end when the
		// Manager is stopped, otherwise, this setting is unsafe. Setting this significantly
		// speeds up voluntary leader transitions as the new leader don't have to wait
		// LeaseDuration time first.
		//
		// In the default scaffold provided, the program ends immediately after
		// the manager stops, so would be fine to enable this option. However,
		// if you are doing or is intended to do any operation such as perform cleanups
		// after the manager stops then its usage might be unsafe.
		// LeaderElectionReleaseOnCancel: true,
	})
	if err != nil {
		setupLog.Error(err, "Failed to start manager")
		os.Exit(1)
	}

	if err := (&controller.CronJobReconciler{
		Client: mgr.GetClient(),
		Scheme: mgr.GetScheme(),
	}).SetupWithManager(mgr); err != nil {
		setupLog.Error(err, "Failed to create controller", "controller", "cronjob")
		os.Exit(1)
	}
Our existing call to SetupWebhookWithManager registers our conversion webhooks with the manager, too.
	// nolint:goconst
	if os.Getenv("ENABLE_WEBHOOKS") != "false" {
		if err := webhookv1.SetupCronJobWebhookWithManager(mgr); err != nil {
			setupLog.Error(err, "Failed to create webhook", "webhook", "CronJob")
			os.Exit(1)
		}
	}
	// nolint:goconst
	if os.Getenv("ENABLE_WEBHOOKS") != "false" {
		if err := webhookv2.SetupCronJobWebhookWithManager(mgr); err != nil {
			setupLog.Error(err, "Failed to create webhook", "webhook", "CronJob")
			os.Exit(1)
		}
	}
	// +kubebuilder:scaffold:builder

	if err := mgr.AddHealthzCheck("healthz", healthz.Ping); err != nil {
		setupLog.Error(err, "Failed to set up health check")
		os.Exit(1)
	}
	if err := mgr.AddReadyzCheck("readyz", healthz.Ping); err != nil {
		setupLog.Error(err, "Failed to set up ready check")
		os.Exit(1)
	}

	setupLog.Info("Starting manager")
	if err := mgr.Start(ctrl.SetupSignalHandler()); err != nil {
		setupLog.Error(err, "Failed to run manager")
		os.Exit(1)
	}
}
Everything is set up and ready to go! All that is left now is to test out our webhooks.
Deployment and testing
Before testing out the conversion, enable them in the CRD:
Kubebuilder generates Kubernetes manifests under the config directory with webhook
bits disabled. To enable them:
-
Enable
patches/webhook_in_<kind>.yamlandpatches/cainjection_in_<kind>.yamlinconfig/crd/kustomization.yamlfile. -
Enable
../certmanagerand../webhookdirectories under thebasessection inconfig/default/kustomization.yamlfile. -
Enable all the vars under the
CERTMANAGERsection inconfig/default/kustomization.yamlfile.
Additionally, if present in the Makefile, set the CRD_OPTIONS variable to just
"crd", removing the trivialVersions option (this ensures that it
actually generates validation for each version, instead of
telling Kubernetes that they are the same):
CRD_OPTIONS ?= "crd"
Now that all code changes and manifests are in place, deploy it to the cluster and test it out.
You’ll need cert-manager installed
(version 0.9.0+) unless you have got some other certificate management
solution. The Kubebuilder team has tested the instructions in this tutorial
with
0.9.0-alpha.0
release.
Once all ducks are in a row with certificates, run make install deploy (as normal) to deploy all the bits (CRD,
controller-manager deployment) onto the cluster.
Testing
Once all of the bits are up and running on the cluster with conversion enabled, test out the conversion by requesting different versions.
Make a v2 version based on the v1 version (put it under config/samples)
apiVersion: batch.tutorial.kubebuilder.io/v2
kind: CronJob
metadata:
  labels:
    app.kubernetes.io/name: project
    app.kubernetes.io/managed-by: kustomize
  name: cronjob-sample
spec:
  schedule:
    minute: "*/1"
  startingDeadlineSeconds: 60
  concurrencyPolicy: Allow # explicitly specify, but Allow is also default.
  jobTemplate:
    spec:
      template:
        spec:
          securityContext:
            runAsNonRoot: true
            runAsUser: 1000
            seccompProfile:
              type: RuntimeDefault
          containers:
          - name: hello
            image: busybox
            args:
            - /bin/sh
            - -c
            - date; echo Hello from the Kubernetes cluster
            securityContext:
              allowPrivilegeEscalation: false
              capabilities:
                drop:
                - ALL
              readOnlyRootFilesystem: false
          restartPolicy: OnFailure
Then, create it on the cluster:
kubectl apply -f config/samples/batch_v2_cronjob.yaml
If you have done everything correctly, it should create successfully, and you should be able to fetch it using both the v2 resource
kubectl get cronjobs.v2.batch.tutorial.kubebuilder.io -o yaml
apiVersion: batch.tutorial.kubebuilder.io/v2
kind: CronJob
metadata:
  labels:
    app.kubernetes.io/name: project
    app.kubernetes.io/managed-by: kustomize
  name: cronjob-sample
spec:
  schedule:
    minute: "*/1"
  startingDeadlineSeconds: 60
  concurrencyPolicy: Allow # explicitly specify, but Allow is also default.
  jobTemplate:
    spec:
      template:
        spec:
          securityContext:
            runAsNonRoot: true
            runAsUser: 1000
            seccompProfile:
              type: RuntimeDefault
          containers:
          - name: hello
            image: busybox
            args:
            - /bin/sh
            - -c
            - date; echo Hello from the Kubernetes cluster
            securityContext:
              allowPrivilegeEscalation: false
              capabilities:
                drop:
                - ALL
              readOnlyRootFilesystem: false
          restartPolicy: OnFailure
and the v1 resource
kubectl get cronjobs.v1.batch.tutorial.kubebuilder.io -o yaml
apiVersion: batch.tutorial.kubebuilder.io/v1
kind: CronJob
metadata:
  labels:
    app.kubernetes.io/name: project
    app.kubernetes.io/managed-by: kustomize
  name: cronjob-sample
spec:
  schedule: "*/1 * * * *"
  startingDeadlineSeconds: 60
  concurrencyPolicy: Allow # explicitly specify, but Allow is also default.
  jobTemplate:
    spec:
      template:
        spec:
          securityContext:
            runAsNonRoot: true
            runAsUser: 1000
            seccompProfile:
              type: RuntimeDefault
          containers:
          - name: hello
            image: busybox
            args:
            - /bin/sh
            - -c
            - date; echo Hello from the Kubernetes cluster
            securityContext:
              allowPrivilegeEscalation: false
              capabilities:
                drop:
                - ALL
              readOnlyRootFilesystem: false
          restartPolicy: OnFailure
Both should be filled out, and look equivalent to the v2 and v1 samples, respectively. Notice that each has a different API version.
Finally, if you wait a bit, you should notice that the CronJob continues to reconcile, even though the controller is written against the v1 API version.
Migrations
Upgrading your Kubebuilder project to the latest version ensures you benefit from new features, bug fixes, and ecosystem improvements. It is recommended to keep your project aligned with ecosystem changes.
Migration may involve updating to a newer plugin version (e.g., from go.kubebuilder.io/v3 in release 3.x to go.kubebuilder.io/v4 in release 4.x) or updating the scaffold produced by the same plugin across CLI releases (e.g., from v4.9.0 to v4.10.1).
Kubebuilder provides multiple migration paths to suit your workflow. Choose the approach that best fits your needs.
Migration options
Tip
Recommended: Enable the AutoUpdate Plugin (GitHub Actions) to reduce effort. You can also run alpha update locally—both use the same update logic. Use the other options mainly for older projects that do not have
cliVersionin thePROJECTfile as a one-time step to reach a supported version; after that, use these workflows for future updates (older versions cannot use these automation features).
(Recommended) AutoUpdate/GitHub Action: Get Notified of New Kubebuilder Releases via Issues with a PR Link to Review and Upgrade
The AutoUpdate Plugin scaffolds an action that automatically monitors for new Kubebuilder releases and opens a GitHub Issue with a Pull Request compare link when updates are available. This is ideal for keeping your project up to date with minimal manual work.
This plugin provides a mechanism similar to Dependabot for GitHub, offering continuous updates with AI assistance for projects that follow the standard scaffold.
kubebuilder edit --plugins="autoupdate/v1-alpha"
See the AutoUpdate Plugin documentation for complete details.
(Recommended) Use alpha update to Upgrade Without Losing Customisations (Logic Behind AutoUpdate/GitHub Action)
If you prefer to run updates locally instead of relying on GitHub Actions, you can use the same logic as the AutoUpdate Plugin directly from your command line.
kubebuilder alpha update
This command uses the same underlying mechanism as the AutoUpdate Plugin. You can migrate your project, resolve any conflicts if needed, and then push a Pull Request from your local environment.
See the alpha update command reference for all options and flags.
Regenerate with Help and Merge Manually
The kubebuilder alpha generate command re-scaffolds your entire project based on your PROJECT file
configuration. You can then manually compare and merge your custom code. For example, you can use it to
regenerate your project after upgrading the Kubebuilder CLI version and then, manually use an IDE or
git diff to compare and merge changes by hand into your existing codebase to ensure that all your changes
apply in a new scaffold.
This approach is useful for projects that heavily customize the scaffold or when other migration methods are not available. You might need to use this method only once to establish a baseline for future automated updates.
kubebuilder alpha generate
See the alpha generate command reference for details.
Fully manual migration
For complete control, you can manually migrate by creating a new project with the latest Kubebuilder version and porting your code over.
In this process, you run all commands from scratch to create a new project, APIs, controllers, webhooks, and other resources. Then, manually copy your business logic and customizations from your old project to the new one.
To streamline this one-time migration, AI Migration Helpers have been added to automate repetitive tasks.
See the Manual Migration Process Guide for a complete step-by-step walkthrough with AI helpers.
Manual migration process
Please ensure you have followed the installation guide
to install the required components and have the desired version of the
Kubebuilder CLI available in your PATH.
This guide outlines the manual steps to migrate your existing Kubebuilder project to a newer version of the Kubebuilder framework. This process involves re-scaffolding your project and manually porting over your custom code and configurations.
From Kubebuilder v3.0.0 onwards, all inputs used by Kubebuilder are tracked in the PROJECT file.
Ensure that you check this file in your current project to verify the recorded configuration and metadata.
Review the PROJECT file documentation for a better understanding.
Also, before starting, it is recommended to check What’s in a basic project? to better understand the project layouts and structure.
Phase 1: Reorganize to New Layout (Required only for Legacy Layouts)
Only needed if ANY of these are true:
- Controllers are NOT in
internal/controller/ - Webhooks are NOT in
internal/webhook/ - Main is NOT in
cmd/
Skip this phase if your project already uses internal/controller/, internal/webhook/, and cmd/main.go.
1.1 Create a reorganization branch
git checkout -b reorganize
1.2 Reorganize file locations
Move files to new layout:
# If you have controllers/ directory
mkdir -p internal/controller
mv controllers/* internal/controller/
rmdir controllers

# OR if you have pkg/controllers/ directory
mkdir -p internal/controller
mv pkg/controllers/* internal/controller/

# If you have webhooks in api/v1/ or apis/v1/
mkdir -p internal/webhook/v1
mv api/v1/*_webhook* internal/webhook/v1/ 2>/dev/null || mv apis/v1/*_webhook* internal/webhook/v1/ 2>/dev/null || echo "No webhook files found to move (this is expected if your project has no webhooks)"

# If main.go is in root
mkdir -p cmd
mv main.go cmd/
1.3 Update package declarations
After moving files, update package declarations:
Controllers: Change package controllers → package controller in all *_controller.go and *_controller_test.go files.
Webhooks: Keep version as package name (e.g., package v1 stays package v1 in internal/webhook/v1/).
1.4 Update import paths
Find and update all imports:
grep -r "pkg/controllers\|/controllers\"" --include="*.go"
In each file found, update:
- Imports:
<module>/controllersor<module>/pkg/controllers→<module>/internal/controller - References:
controllers.TypeName→controller.TypeName
1.5 Update Dockerfile (if needed)
If your Dockerfile has explicit COPY statements for moved paths, update them to reflect the new structure, or simplify to COPY . . and use .dockerignore to exclude unnecessary files.
1.6 Verify and commit
Build and test the reorganized project:
make generate manifests
make build && make test
If successful, commit the layout changes. Your project now uses the new layout. Proceed to Phase 2.
Phase 2: Migrate to Latest Version
Step 1: Prepare Your Current Project
1.1 Create a migration branch
Create a branch from your current codebase:
git checkout -b migration
1.2 Create a backup
mkdir ../migration-backup
cp -r . ../migration-backup/
1.3 Clean your project directory
Remove all files except .git:
find . -not -path './.git*' -not -name '.' -not -name '..' -delete
Step 2: Initialize the New Project
About the PROJECT file: From v3.0.0+, the PROJECT file tracks all scaffolding metadata. If you have one and used CLI for all resources, try kubebuilder alpha generate first. Otherwise, follow the manual steps below to identify and re-scaffold all resources.
2.1 Identify your module and domain
Identify the information you’ll need for initialization from your backup.
Module path - Check your backup’s go.mod file:
cat ../migration-backup/go.mod
Look for the module line:
module tutorial.kubebuilder.io/migration-project
Domain - Check your backup’s PROJECT file:
cat ../migration-backup/PROJECT
Look for the domain line:
domain: tutorial.kubebuilder.io
If you do not have a PROJECT file (versions < v3.0.0),
check your CRD files under config/crd/bases/ or examine the API group names.
The domain is the part after the group name in your API groups.
2.2 Initialize the Go module
Initialize a new Go module using the same module path from your original project:
go mod init tutorial.kubebuilder.io/migration-project
Replace tutorial.kubebuilder.io/migration-project with your actual module path.
2.3 Initialize Kubebuilder project
Initialize the project with Kubebuilder:
kubebuilder init --domain tutorial.kubebuilder.io --repo tutorial.kubebuilder.io/migration-project
Replace with your actual domain and repository (module path).
2.4 Enable multi-group support (if needed)
Multi-group projects organize APIs into different groups, with each group in its own directory. This is useful when you have APIs for different purposes or domains.
Check if your project uses multi-group layout by examining your backup’s directory structure:
-
Single-group layout: All APIs in one group
api/v1/cronjob_types.goapi/v1/job_types.goapi/v2/cronjob_types.go
-
Multi-group layout: APIs organized by group
api/batch/v1/cronjob_types.goapi/crew/v1/captain_types.goapi/sea/v1/ship_types.go
You can also check your backup’s PROJECT file for multigroup: true.
If your project uses multi-group layout, enable it before creating APIs:
kubebuilder edit --multigroup=true
When following this guide, you will get the new layout automatically since you are creating a fresh project with the latest version and porting your code into it.
Step 3: Re-scaffold APIs and Controllers
For each API resource in your original project, re-scaffold them in the new project.
3.1 Identify all your APIs
Review your backup project (../migration-backup/) to identify all APIs. It’s recommended to check the backup directory
regardless of whether you have a PROJECT file, as not all resources may have been created using the CLI.
Check the directory structure in your backup to ensure you do not miss any manually created resources:
-
Look in the
api/directory (orapis/for projects generated with older Kubebuilder versions) for*_types.gofiles:- Single-group:
api/v1/cronjob_types.go- extract: versionv1, kindCronJob, group from imports - Multi-group:
api/batch/v1/cronjob_types.go- extract: groupbatch, versionv1, kindCronJob
- Single-group:
-
Check for controllers in these locations:
- Current:
internal/controller/cronjob_controller.goorinternal/controller/<group>/cronjob_controller.go - Legacy:
controllers/cronjob_controller.goorpkg/controllers/cronjob_controller.go
- Current:
If you used the CLI to create all APIs from Kubebuilder v3.0.0+ you should have them in the PROJECT file under the resources section, such as:
resources:
  - api:
      crdVersion: v1
      namespaced: true
    controller: true
    group: batch
    kind: CronJob
    version: v1
3.2 Create each API and Controller
For each API identified in step 3.1, re-scaffold it:
kubebuilder create api --group batch --version v1 --kind CronJob
When prompted:
- Answer yes to “Create Resource [y/n]” to generate the API types
- Answer yes to “Create Controller [y/n]” if your original project has a controller for this API
After creating each API, update the generated manifests and code:
make manifests  # Generate CRD, RBAC, and other config files
make generate   # Generate code (e.g., DeepCopy methods)
Then verify everything compiles:
make build
These steps ensure the newly scaffolded API is properly integrated. See the Quick Start guide for a detailed walkthrough of the API creation workflow.
Repeat this process for ALL APIs in your project.
After creating all resources, regenerate manifests:
make manifests
make generate
3.3 Re-scaffold webhooks (if applicable)
If your original project has webhooks, you need to re-scaffold them.
Identify webhooks in your backup project:
-
From directory structure, look for webhook files:
- Legacy location (v3 and earlier):
api/v1/<kind>_webhook.goorapi/<group>/<version>/<kind>_webhook.go - Current location (single-group):
internal/webhook/<version>/<kind>_webhook.go - Current location (multi-group):
internal/webhook/<group>/<version>/<kind>_webhook.go
- Legacy location (v3 and earlier):
-
From
PROJECTfile (if available), check each resource’s webhooks section:
resources:
  - api:
      ...
    webhooks:
      defaulting: true
      validation: true
      webhookVersion: v1
Re-scaffold webhooks:
For each resource with webhooks, run:
kubebuilder create webhook --group batch --version v1 --kind CronJob --defaulting --programmatic-validation
Webhook options:
--defaulting- creates a defaulting webhook (sets default values)--programmatic-validation- creates a validation webhook (validates create/update/delete operations)--conversion- creates a conversion webhook (for multi-version APIs, see next section)
3.4 Re-scaffold conversion webhooks (if applicable)
If your project has multi-version APIs with conversion webhooks, you need to set up the hub-spoke conversion pattern.
Setting up conversion webhooks:
Create the conversion webhook for the hub version, with spoke versions specified using the --spoke flag.
Note: In the examples below, v1 is used as the hub for illustration. Choose the version in your project that should be the central conversion point—typically your most feature-complete and stable storage version, not necessarily the oldest or newest.
kubebuilder create webhook --group batch --version v1 --kind CronJob --conversion --spoke v2
This command:
- Creates conversion webhook for
v1as the hub version - Configures
v2as a spoke that converts to/from the hubv1 - Generates
*_conversion.gofiles with conversion method stubs
For multiple spokes, specify them as a comma-separated list:
kubebuilder create webhook --group batch --version v1 --kind CronJob --conversion --spoke v2,v1alpha1
This sets up v1 as the hub with both v2 and v1alpha1 as spokes.
What you need to implement:
The command generates method stubs that you’ll fill in during Step 4:
- Hub version: Implement
Hub()method (usually just a marker) - Spoke versions: Implement
ConvertTo(hub)andConvertFrom(hub)methods with your conversion logic
See the Multi-Version Tutorial for comprehensive guidance on implementing the conversion logic.
After scaffolding all webhooks, verify everything compiles:
make manifests && make build
Step 4: Port Your Custom Code
Manually port your custom business logic and configurations from the backup to the new project.
4.1 Port API definitions
Compare and merge your custom API fields and markers from your backup project.
Files to compare:
- Single-group:
api/v1/<kind>_types.go - Multi-group:
api/<group>/<version>/<kind>_types.go
What to port:
- Custom fields in Spec and Status structs
- Validation markers - e.g.,
+kubebuilder:validation:Minimum=0,+kubebuilder:validation:Pattern=... - CRD generation markers - e.g.,
+kubebuilder:printcolumn,+kubebuilder:resource:scope=Cluster - SubResources - e.g.,
+kubebuilder:subresource:status,+kubebuilder:subresource:scale - Documentation comments - Used for CRD descriptions
See CRD Generation, CRD Validation, and Markers for all available markers.
If your APIs reference a parent package (e.g., scheduling.GroupName), port it:
mkdir -p api/<group>/
cp ../migration-backup/apis/<group>/groupversion_info.go api/<group>/
After porting API definitions, regenerate and verify:
make manifests  # Generate CRD manifests from your types
make generate   # Generate DeepCopy methods
This ensures your API types and CRD manifests are properly generated before moving forward.
4.2 Port controller logic
Files to compare:
- Current single-group:
internal/controller/<kind>_controller.go - Current multi-group:
internal/controller/<group>/<kind>_controller.go
What to port:
- Reconcile function implementation - Your core business logic
- Helper functions - Any additional functions in the controller file
- RBAC markers -
+kubebuilder:rbac:groups=...,resources=...,verbs=... - Additional watches - Custom watch configurations in
SetupWithManager - Imports - Any additional packages your controller needs
- Struct fields - Custom fields added to the Reconciler struct
See RBAC Markers for details on permission markers.
After porting controller logic, regenerate manifests and verify compilation:
make generate
make manifests
make build
4.3 Port webhook implementations
Webhooks have changed location between Kubebuilder versions. Be aware of the path differences:
Legacy webhook location (Kubebuilder v3 and earlier):
api/v1/<kind>_webhook.goapi/<group>/<version>/<kind>_webhook.go
Current webhook location:
- Single-group:
internal/webhook/<version>/<kind>_webhook.go - Multi-group:
internal/webhook/<group>/<version>/<kind>_webhook.go
What to port:
- Defaulting webhook -
Default()method implementation - Validation webhook -
ValidateCreate(),ValidateUpdate(),ValidateDelete()methods - Conversion webhook -
ConvertTo()andConvertFrom()methods (for multi-version APIs) - Helper functions - Any validation or defaulting helper functions
- Webhook markers - Usually auto-generated, but verify they match your needs
See Webhook Overview, Admission Webhook, and the Multi-Version Tutorial for details.
For conversion webhooks:
If you have conversion webhooks, ensure you used the create webhook --conversion --spoke <version> command in Step 3.4. This sets up the hub-spoke infrastructure automatically. You only need to fill in the conversion logic in the ConvertTo() and ConvertFrom() methods in your spoke versions, and the Hub() method in your hub version.
The command creates all the necessary boilerplate - you just implement the business logic for converting fields between versions.
After porting webhooks, regenerate and verify:
make generate
make manifests
make build
4.4 Port main.go customizations (if any)
File: cmd/main.go
Most projects do not need to customize main.go as Kubebuilder handles all the standard setup automatically
(registering APIs, setting up controllers and webhooks, manager initialization, metrics, etc.).
Only port customizations that are not part of the standard scaffold. Compare your backup main.go with the
new scaffolded one to identify any custom logic you added.
4.5 Configure Kustomize manifests
The config/ directory contains Kustomize manifests for deploying your operator. Compare with your backup to ensure all configurations are properly set up.
Review and update these directories:
-
config/default/kustomization.yaml- Main kustomization file- Ensure webhook configurations are enabled if you have webhooks (uncomment webhook-related patches)
- Ensure cert-manager is enabled if using webhooks (uncomment certmanager resources)
- Enable or disable metrics endpoint based on your original configuration
- Review namespace and name prefix settings
-
config/manager/- Controller manager deployment- Usually no changes are needed unless you have customizations. In that case, compare resource limits and requests with your backup and check environment variables
-
config/rbac/- RBAC configurations- Usually auto-generated from markers - no manual changes needed
- Only check if you have custom role bindings or service account configurations not covered by markers
-
config/webhook/- Webhook configurations (if applicable)- Usually auto-generated - no manual changes needed
- Only check if you have custom webhook service or certificate configurations
-
config/samples/- Sample CR manifests- Copy your sample resources from the backup
After configuring Kustomize, verify the manifests build correctly:
make all
make build-installer
4.6 Port additional customizations
Port any additional packages, dependencies, and customizations from your backup:
Additional packages (e.g., pkg/util):
cp -r ../migration-backup/pkg/<package-name> pkg/
# Update import paths (works on both macOS and Linux)
find pkg/ -name "*.go" -exec sed -i.bak 's|<module>/apis/|<module>/api/|g' {} \;
find pkg/ -name "*.go.bak" -delete
For dependencies, run go mod tidy or copy go.mod/go.sum from backup for complex projects.
Check for additional customizations (Makefile, Dockerfile, test files). Use diff tools to compare with backup and identify missed files.
After porting all customizations, verify everything builds:
make all
Step 5: Test and Verify
Compare against the backup to ensure all customizations were correctly ported, such as:
diff -r --brief ../migration-backup/ . | grep "Only in ../migration-backup"
Run tests and verify functionality:
make test && make lint-fix
Deploy to a test cluster (e.g. kind) and verify the changes (i.e. validate expected behavior, run regression checks, confirm the full CI pipeline still passes, and execute the e2e tests).
Additional resources
- Migration Overview - Overview of all migration options
- PROJECT File Reference - Understanding the PROJECT file
- What’s in a basic project? - Understanding project structure
- Alpha Generate Command - Automated re-scaffolding
- Alpha Update Command - Automated migration
- Using External Types - Controllers for types not defined in your project
- CRD Generation - Generating CRDs from Go types
- CRD Validation - Adding validation to your APIs
- Markers - All available markers for code generation
- RBAC Markers - Generating RBAC manifests
- Webhook Overview - Understanding webhooks
- Admission Webhook - Implementing admission webhooks
- Multi-Version Tutorial - Handling multiple API versions
- Deploying cert-manager - Required for webhooks
- Configuring EnvTest - Testing with EnvTest
Using AI to migrate projects from any version to the latest
AI can assist manual migrations by reducing repetitive work and helping resolve breaking changes. It will not replace the Manual Migration Process, but it can help reduce effort and accomplish the goal.
Workflow and AI-assisted steps
Step 1: Reorganize to New Layout (required only for legacy layouts)
AI helps ensure the project is structured with the new layout (main.go under cmd/, controllers and webhooks inside internal/). Review and verify the reorganization, then run make build to ensure it still compiles.
See Step 1: Reorganize to New Layout
Step 2: Discovery CLI Commands to Re-scaffold
AI analyzes your project and generates all Kubebuilder CLI commands to fully re-scaffold with the latest release. Create a backup (mkdir ../migration-backup && cp -r . ../migration-backup/), then execute the generated commands to scaffold a fresh project.
See Step 2: Discovery CLI Commands
Step 3: Port Custom Code
AI helps port your custom code from backup to the new scaffolded project. Review all changes carefully and ensure business logic is correctly transferred.
Step 4: Validate
Run make generate && make manifests && make build, then make test to verify all tests pass. Deploy to a test cluster and verify your solution still does the same thing.
See the Manual Migration Process for complete details.
Step 1: Reorganize to New Layout (Required only for Legacy Layouts)
If your project was built with Kubebuilder prior to v3.0.0, you will probably need this step.
Reorganize files to match the new directory layout.
Check if you need this step (if ANY are true, you need this):
- Controllers are NOT in
internal/controller/ - Webhooks are NOT in
internal/webhook/ - Main is NOT in
cmd/
If ALL are already in the new layout, skip to Step 2
Instructions to provide to your AI assistant
Copy and paste these instructions to your AI assistant:
Reorganize Kubebuilder project files to match new directory layout.

CONTEXT:
- Project location: . (current directory - your existing project)
- Goal: Move files to new layout WITHOUT changing code or versions
- Keep project functional after reorganization

STEP 1 - Check which files need to move:
- Controllers in controllers/ or pkg/controllers/: needs move
- Controllers in internal/controller/ or internal/controller/<group>/ (multi-group): already correct
- Webhooks in api/v1/ or apis/<group>/v1/: needs move
- Webhooks in internal/webhook/v1/ or internal/webhook/<group>/v1/ (multi-group): already correct
- Main in root (main.go): needs move
- Main in cmd/ (cmd/main.go or cmd/*/main.go): already correct

STEP 2 - Reorganize file locations:

a. Move controllers if needed:
   - If controllers/ directory exists:
     mkdir -p internal/controller
     mv controllers/* internal/controller/
     rmdir controllers
   - If pkg/controllers/ directory exists:
     mkdir -p internal/controller
     mv pkg/controllers/* internal/controller/

b. Move webhooks if needed:
   - If api/v1/ or apis/v1/ contains *_webhook.go files:
     mkdir -p internal/webhook/v1
     mv api/v1/*_webhook* internal/webhook/v1/ 2>/dev/null || mv apis/v1/*_webhook* internal/webhook/v1/ 2>/dev/null || true
   - If api/<group>/v1/ or apis/<group>/v1/ contains webhooks (multi-group):
     mkdir -p internal/webhook/<group>/v1
     mv api/<group>/v1/*_webhook* internal/webhook/<group>/v1/ 2>/dev/null || mv apis/<group>/v1/*_webhook* internal/webhook/<group>/v1/ 2>/dev/null || true

c. Move main.go if needed:
   - If main.go exists in root:
     mkdir -p cmd
     mv main.go cmd/

STEP 3 - Update import paths in ALL files:

After moving files, imports will break. Fix them systematically:

a. In cmd/main.go (or cmd/*/main.go, cmd/*/*.go):
   - Find: import "your-module/controllers"
   - Replace with: import "your-module/internal/controller"
   - Find: import "your-module/pkg/controllers"
   - Replace with: import "your-module/internal/controller"
   - Find: &controllers.SomeReconciler or controllers.NewController
   - Replace with: &controller.SomeReconciler or controller.NewController
   - API imports (api/v1, apis/v1alpha1) - NO CHANGE needed

b. In internal/controller/*.go files:
   - Check package declaration is still: package controller (not controllers)
   - API imports stay same - NO CHANGE needed
   - If you had controller-to-controller imports, update paths

c. In internal/webhook/v1/*.go files:
   - Check package declaration: should be package v1
   - API imports stay same - NO CHANGE needed
   - Webhook imports in main.go may need updating

STEP 4 - Update Dockerfile (if using explicit COPY):

Check Dockerfile for explicit COPY statements. If found, update:

Old pattern:
    COPY cmd/main.go cmd/main.go
    COPY api/ api/
    COPY internal/controller/ internal/controller/

Option 1 - Simplify (recommended):
    COPY . .

Ensure .dockerignore has:
    **
    !go.mod
    !go.sum
    !**/*.go
    **/*_test.go

Note: Podman does not honor the !**/*.go re-include
(https://github.com/containers/buildah/issues/6417). If the project is built
with Podman, also re-include the source directories by name:
    !cmd
    !api
    !internal

Option 2 - Update explicit paths:
    COPY cmd/ cmd/
    COPY api/ api/
    COPY internal/ internal/

STEP 5 - Verify reorganization:

- Run: go mod tidy
- Run: make generate
- Run: make manifests
- Run: make build
- Run: make test

If errors, fix import paths.

Success: new layout, make build succeeds, make test passes, project functional
What this does
The AI will:
- Move files to new layout (controllers/ to internal/controller/, webhooks to internal/webhook/, main.go to cmd/)
- Fix import paths in all files after moves
- Verify the reorganized project builds and tests pass
After this step, your project uses the new layout (same code, new locations), making migration much simpler!
Next steps
After AI reorganizes:
- Verify:
make build && make test(in current project) - If successful, backup and proceed to Step 2: Discovery CLI Commands
- If errors, review and fix before proceeding
Step 2: Discovery CLI Commands
Use AI to analyze your (now reorganized) Kubebuilder project and generate all CLI commands needed to recreate it with the latest version.
Instructions to provide to your AI assistant
Copy and paste these instructions to your AI assistant (Cursor, Claude, GitHub Copilot, etc.):
Analyze this Kubebuilder project and generate all CLI commands to recreate it.

CONTEXT:
Kubebuilder projects have these components:

APIs (Custom Resources):
- Location: api/ or apis/ directory
- Recognition: Look for Go structs with marker: // +kubebuilder:object:root=true
- Pattern: type <Name> struct with metav1.TypeMeta and metav1.ObjectMeta fields
- Example: type Captain struct { metav1.TypeMeta; metav1.ObjectMeta; Spec CaptainSpec; Status CaptainStatus }

Controllers:
- Location: controllers/, internal/controller/, or pkg/controllers/
- Recognition: Look for Reconcile() function signature
- Pattern: func (r *<Name>Reconciler) Reconcile(ctx context.Context, req ctrl.Request) (ctrl.Result, error)
- Struct embeds: client.Client
- Has function: SetupWithManager(mgr ctrl.Manager) error

Webhooks:
- Location: api/v1/ or internal/webhook/v1/
- Recognition: Look for webhook method signatures
- Defaulting pattern: func Default() or func Default(ctx context.Context, obj *<Type>) error
- Validation pattern: func ValidateCreate() error or func ValidateCreate(ctx context.Context, obj *<Type>) (admission.Warnings, error)
- Conversion pattern: func Hub() or func ConvertTo() or func ConvertFrom()

CLI Command Formats:
- kubebuilder init --domain <domain> --repo <module>
- kubebuilder edit --multigroup=true (if multi-group layout)
- kubebuilder create api --group <group> --version <version> --kind <Kind> --controller=<bool> --resource=<bool>
  * --controller=true: create controller
  * --resource=true: create API definition
  * --resource=false: controller only (for external types like Deployment, Pod)
- kubebuilder create webhook --group <group> --version <version> --kind <Kind> [flags]
  * --defaulting: sets default values
  * --programmatic-validation: validates create/update/delete
  * --conversion --spoke <versions>: for multi-version APIs (hub-spoke pattern)
    - Hub version: Usually oldest stable version (e.g., v1) - command runs on this version
    - Spoke versions: Newer versions that convert to/from hub (e.g., v2, v3) - specified with --spoke
    - Example: --group crew --version v1 --kind Captain --conversion --spoke v2
      (v1 is hub, v2 is spoke)
- External types (k8s.io/api/*): use --resource=false --controller=true

Project structure patterns:
- Single-group: api/v1/, api/v2/ (versions directly under api/)
- Multi-group: api/<group>/v1/, api/<group>/v2/ (group subdirectories)
- Multi-group detection: Check PROJECT file for "multigroup: true" OR check if api/ has group subdirectories

Files to IGNORE:
- zz_generated.*.go (auto-generated code)
- groupversion_info.go (just group registration)
- config/crd/bases/*.yaml (auto-generated from code)
- config/rbac/*.yaml (auto-generated from markers)

References:
- Kubebuilder Book: ../introduction.md
- controller-runtime: https://github.com/kubernetes-sigs/controller-runtime
- controller-tools: https://github.com/kubernetes-sigs/controller-tools

ANALYZE PROJECT:

1. Extract module path from go.mod (line 1: "module <path>")
2. Extract domain from PROJECT file (domain: <value>) OR api/*/groupversion_info.go (// +groupName=<group>.<domain>)
3. Detect multi-group: api/ has api/<group>/v1/ structure? (yes/no)

4. Scan api/ or apis/ directory - Find ALL your own APIs:
   - Find all *_types.go files OR types.go (exclude groupversion_info.go, zz_generated.deepcopy.go)
   - For each file, find: type <Kind> struct with // +kubebuilder:object:root=true above it
   - Extract: Kind name, group (from groupversion_info.go +groupName comment), version (from directory)
   - Check controller: look for controllers/<lowercaseKind>_controller.go OR internal/controller/<lowercaseKind>_controller.go OR pkg/controllers/<lowercaseKind>_controller.go
   - Check webhooks: look for api/v1/<lowercaseKind>_webhook.go OR internal/webhook/v1/<lowercaseKind>_webhook.go
   - If webhook file found, scan for methods:
     * "func (r *<Kind>) Default()": has --defaulting
     * "func (r *<Kind>) ValidateCreate()": has --programmatic-validation
     * "func (*<Kind>) Hub()": this version is conversion hub
     * "func (r *<Kind>) ConvertTo(": this version is a spoke

5. Scan internal/controller/, controllers/, or pkg/controllers/ - Find controllers for external types:
   - For each *_controller.go file, check imports NOT from your module
   - Look for: k8s.io/api/apps/v1, k8s.io/api/core/v1, github.com/cert-manager/cert-manager/pkg/apis/*
   - Extract type from: type <Kind>Reconciler struct OR Reconcile signature
   - This is a controller-only resource (use --controller=true --resource=false)

6. Scan internal/webhook/ - Find webhooks for external types:
   - For each *_webhook.go file in internal/webhook/v1/ (or other versions)
   - Check if the Kind type is imported (not defined in your api/)
   - If imported from k8s.io/api/* or external package: external type webhook
   - Scan for Default() and ValidateCreate() methods to determine flags

OUTPUT FORMAT (bash script):

#!/bin/bash
# Module: <module-path>
# Domain: <domain>
# Multi-group: <yes/no>

set -e
kubebuilder init --domain <domain> --repo <module-path>
kubebuilder edit --multigroup=true  # only if multi-group

# External type controllers (--resource=false)
kubebuilder create api --group cert-manager --version v1 --kind Certificate \
  --controller=true --resource=false \
  --external-api-path=<path> --external-api-domain=<domain> --external-api-module=<module>

# Your own APIs (--resource=true)
kubebuilder create api --group crew --version v1 --kind Captain --controller=true --resource=true
kubebuilder create api --group crew --version v2 --kind FirstMate --controller=false --resource=true

# Webhooks for your own APIs
kubebuilder create webhook --group crew --version v1 --kind Captain --defaulting --programmatic-validation
kubebuilder create webhook --group crew --version v1 --kind FirstMate --conversion --spoke v2

# Webhooks for external/core types (no create api needed)
kubebuilder create webhook --group apps --version v1 --kind Deployment --defaulting --programmatic-validation
kubebuilder create webhook --group core --version v1 --kind Pod --defaulting

make manifests && make generate && make build

RULES:
- Combine ALL webhook types in ONE command: --defaulting --programmatic-validation together
- Conversion webhooks: use hub version and list ALL spokes: --conversion --spoke v2,v3
- List EVERY Kind found in source code, not just what is in PROJECT file
- External type controllers: use --controller=true --resource=false
- Webhooks for external/core types: just create webhook (no create api needed)
- Order: external controllers first, then your APIs, then all webhooks
Understanding the output
The AI will analyze your project and output a bash script. The script will contain commands in this order:
kubebuilder init- Initialize the projectkubebuilder edit --multigroup=true- If multi-group detectedkubebuilder create api- For external type controllers (with--resource=false)kubebuilder create api- For your own APIs (with--resource=true)kubebuilder create webhook- For all webhooksmake manifests && make generate && make build- Verify
Example outputs
Here are real examples of what the AI instructions generate:
Example 1: Simple multi-group project
Analyzed: kubernetes-sigs/scheduler-plugins
#!/bin/bash
# Module: sigs.k8s.io/scheduler-plugins
# Domain: scheduling.x-k8s.io
# Multi-group: YES

set -e
kubebuilder init --domain scheduling.x-k8s.io --repo sigs.k8s.io/scheduler-plugins
kubebuilder edit --multigroup=true

kubebuilder create api --group scheduling --version v1alpha1 --kind ElasticQuota --controller=true --resource=true
kubebuilder create api --group scheduling --version v1alpha1 --kind PodGroup --controller=true --resource=true

make manifests && make generate && make build
Discovered: 2 APIs, multi-group, no webhooks
Example 2: Single-group with webhooks (go/v3 migration)
Analyzed: project-v3
#!/bin/bash
# Module: sigs.k8s.io/kubebuilder/testdata/project-v3
# Domain: testproject.org
# Multi-group: NO

set -e
kubebuilder init --domain testproject.org --repo sigs.k8s.io/kubebuilder/testdata/project-v3

kubebuilder create api --group crew --version v1 --kind Captain --controller=true --resource=true
kubebuilder create api --group crew --version v1 --kind FirstMate --controller=true --resource=true
kubebuilder create api --group crew --version v1 --kind Admiral --controller=true --resource=true

kubebuilder create webhook --group crew --version v1 --kind Captain --defaulting --programmatic-validation
kubebuilder create webhook --group crew --version v1 --kind Admiral --defaulting

make manifests && make generate && make build
Discovered: 3 APIs, single-group, webhooks with defaulting and validation
Example 3: Complex multi-group with external types
Analyzed: testdata/project-v4-multigroup
#!/bin/bash
# Module: sigs.k8s.io/kubebuilder/testdata/project-v4-multigroup
# Domain: testproject.org
# Multi-group: YES

set -e
kubebuilder init --domain testproject.org --repo sigs.k8s.io/kubebuilder/testdata/project-v4-multigroup
kubebuilder edit --multigroup=true

# External type controllers
kubebuilder create api --group cert-manager --version v1 --kind Certificate \
  --controller=true --resource=false \
  --external-api-path=github.com/cert-manager/cert-manager/pkg/apis/certmanager/v1 \
  --external-api-domain=io \
  --external-api-module=github.com/cert-manager/cert-manager@v1.19.2
kubebuilder create api --group apps --version v1 --kind Deployment --controller=true --resource=false

# APIs - Group: crew
kubebuilder create api --group crew --version v1 --kind Captain --controller=true --resource=true

# APIs - Group: ship
kubebuilder create api --group ship --version v1beta1 --kind Frigate --controller=true --resource=true
kubebuilder create api --group ship --version v1 --kind Destroyer --controller=true --resource=true
kubebuilder create api --group ship --version v2alpha1 --kind Cruiser --controller=true --resource=true

# APIs - Group: sea-creatures
kubebuilder create api --group sea-creatures --version v1beta1 --kind Kraken --controller=true --resource=true
kubebuilder create api --group sea-creatures --version v1beta2 --kind Leviathan --controller=true --resource=true

# APIs - Group: foo.policy
kubebuilder create api --group foo.policy --version v1 --kind HealthCheckPolicy --controller=true --resource=true

# APIs - Group: foo
kubebuilder create api --group foo --version v1 --kind Bar --controller=true --resource=true

# APIs - Group: fiz
kubebuilder create api --group fiz --version v1 --kind Bar --controller=true --resource=true

# APIs - Group: example.com
kubebuilder create api --group example.com --version v1alpha1 --kind Memcached --controller=true --resource=true
kubebuilder create api --group example.com --version v1alpha1 --kind Busybox --controller=true --resource=true
kubebuilder create api --group example.com --version v1 --kind Wordpress --controller=true --resource=true
kubebuilder create api --group example.com --version v2 --kind Wordpress --controller=false --resource=true

# Webhooks for your APIs
kubebuilder create webhook --group crew --version v1 --kind Captain --defaulting --programmatic-validation
kubebuilder create webhook --group ship --version v1 --kind Destroyer --defaulting
kubebuilder create webhook --group ship --version v2alpha1 --kind Cruiser --programmatic-validation
kubebuilder create webhook --group example.com --version v1alpha1 --kind Memcached --programmatic-validation
kubebuilder create webhook --group example.com --version v1 --kind Wordpress --conversion --spoke v2

# Webhooks for external types
kubebuilder create webhook --group cert-manager --version v1 --kind Issuer --defaulting
kubebuilder create webhook --group core --version v1 --kind Pod --programmatic-validation
kubebuilder create webhook --group apps --version v1 --kind Deployment --defaulting --programmatic-validation

make manifests && make generate && make build
Discovered: 12 APIs across 6 groups, conversion webhook, external controllers, external webhooks
What to do next
- Review the generated script carefully and ensure it matches your project structure.
- Save it as
migration-commands.shand make it executable:chmod +x migration-commands.sh - Follow the Manual Migration Process to:
- Backup your project in another location
- Execute the commands of this script in the root of your project when it is empty
- After you have the fully re-scaffolded project, you needs to add all your code back on top of it
- Port your custom code
Step 3: Port Custom Code
After reorganizing your project (Step 1) and executing scaffolding commands from discovery (Step 2), use AI to port your custom code to the new project.
Instructions to provide to your AI assistant
Copy and paste these instructions to your AI assistant:
Port custom code from Kubebuilder project backup to new scaffolded project.

CONTEXT:
What is scaffold vs custom:
- Scaffold: Auto-generated boilerplate by Kubebuilder (has "// TODO(user):" comments)
- Custom: Your business logic that replaces TODOs

Backup location: ../migration-backup/ (your old project with custom code)
New project: . (newly scaffolded project with TODOs to replace)

How to recognize each file type (by content, not just name):

API files (typically *_types.go):
- Have marker: // +kubebuilder:object:root=true
- Have structs: type <Name> struct with metav1.TypeMeta, metav1.ObjectMeta
- Have: <Name>Spec struct (desired state)
- Have: <Name>Status struct (observed state)
- Markers like: // +kubebuilder:validation:...

Controller files (typically *_controller.go):
- Have struct: type <Name>Reconciler struct { client.Client; Scheme *runtime.Scheme }
- Have function: func (r *<Name>Reconciler) Reconcile(ctx context.Context, req ctrl.Request) (ctrl.Result, error)
- Have function: func (r *<Name>Reconciler) SetupWithManager(mgr ctrl.Manager) error
- May have: // +kubebuilder:rbac markers before Reconcile

Webhook files (typically *_webhook.go):
- OLD pattern: func (r *<Name>) Default(), func (r *<Name>) ValidateCreate() error
- NEW pattern: type <Name>Defaulter struct, func (d *<Name>Defaulter) Default(ctx context.Context, obj *<Name>) error
- Conversion: func (*<Name>) Hub(), func (r *<Name>) ConvertTo(...), func (r *<Name>) ConvertFrom(...)

Main file:
- Has: func main()
- Has: ctrl.NewManager(...)
- Registers controllers and webhooks

File paths after Step 1:
- APIs in: api/v1/ or api/<group>/v1/
- Controllers in: internal/controller/ or internal/controller/<group>/
- Webhooks in: internal/webhook/v1/ or internal/webhook/<group>/v1/
- Main: cmd/main.go

Files to NEVER edit (auto-generated):
- config/crd/bases/*.yaml (generated from make manifests)
- config/rbac/role.yaml (generated from make manifests)
- config/webhook/manifests.yaml (generated from make manifests)
- **/zz_generated.*.go (generated from make generate)
- PROJECT file (managed by CLI)

Critical markers to NEVER remove:
- // +kubebuilder:scaffold:* (Kubebuilder injects code here)

Make command sequence:
- After editing APIs or markers: make generate && make manifests
- After editing Go code: make build
- After all changes: make lint-fix && make generate && make manifests && make all && make test

Common markers in API files:
- // +kubebuilder:validation:Required
- // +kubebuilder:validation:Minimum=1
- // +kubebuilder:validation:Pattern="^[a-z]+$"
- // +kubebuilder:printcolumn:name="Status",type=string,JSONPath=...

RBAC markers in controller files:
- // +kubebuilder:rbac:groups=<group>,resources=<resource>,verbs=get;list;watch;create;update;patch;delete
- // +kubebuilder:rbac:groups=<group>,resources=<resource>/status,verbs=get;update;patch
- // +kubebuilder:rbac:groups=<group>,resources=<resource>/finalizers,verbs=update

References:
- Kubebuilder Book: ../introduction.md
- Markers Reference: ../reference/markers.md
- controller-runtime: https://github.com/kubernetes-sigs/controller-runtime
- controller-tools: https://github.com/kubernetes-sigs/controller-tools

PORT CUSTOM CODE (in this order):

1. Port go.mod dependencies FIRST:

   Compare ../migration-backup/go.mod with current go.mod

   a. For packages in backup but NOT in new (exclude k8s.io/*, sigs.k8s.io/controller-*):
      - Run: go get <package>@<version>

   b. For packages in BOTH with different versions:
      - Keep the HIGHER (newer) version
      - If backup has newer version: go get <package>@<newer-version>
      - If new scaffold has newer version: keep it (do not downgrade)
      - NOTE: Old projects can have newer versions than scaffold

   After ALL: run go mod tidy

2. Port API type definitions:

   For each *_types.go in backup to new (paths match after Step 1):
   Backup: ../migration-backup/api/v1/<kind>_types.go
   New: api/v1/<kind>_types.go

   Port:
   - Custom fields in Spec and Status structs
   - ALL +kubebuilder markers (validation, printcolumn, resource, etc.)
   - Documentation comments
   - Custom types (enums, type aliases)
   - REMOVE "// TODO(user):" comments when adding fields

   NEVER remove: // +kubebuilder:scaffold:* or // +kubebuilder:object:root=true

   After each: go mod tidy && make generate && make manifests

3. Port controller implementations:

   For each controller (paths match after Step 1):
   Backup: ../migration-backup/internal/controller/<kind>_controller.go
   New: internal/controller/<kind>_controller.go

   Port in order:
   a. Additional imports (ADD to existing)
   b. Custom constants, variables, types, interfaces (before Reconciler struct)
   c. Custom fields in <Kind>Reconciler struct
   d. ALL +kubebuilder:rbac markers (place before Reconcile)
   e. Reconcile() body (REMOVE "// TODO(user):" and paste custom logic)
   f. ALL helper functions (closures and standalone)
   g. SetupWithManager customizations (if any beyond default .For().Named().Complete())

   After each: go mod tidy && make generate && make manifests && make build

4. Port webhooks:

   CRITICAL: Code pattern depends on controller-runtime version!

   Webhooks (paths match after Step 1):
   Backup: ../migration-backup/internal/webhook/v1/<kind>_webhook.go
   New: internal/webhook/v1/<kind>_webhook.go

   Detect pattern by reading backup file:
   - Has "func (r *<Kind>) Default() {": OLD pattern (needs adaptation)
   - Has "func (d *<Kind>Defaulter) Default(ctx": NEW pattern (direct copy)

   IF OLD pattern - ADAPT:
   - Default(): Extract logic, paste after type assertion, change 'r.' to '<kind>.', add return nil, REMOVE TODO
   - Validate*(): Extract logic, paste after assertion, change 'r.' to '<kind>.', change return types, REMOVE TODO
   - Conversion: Copy Hub/ConvertTo/ConvertFrom directly (no change needed)

   IF NEW pattern - DIRECT COPY:
   - Copy Defaulter/Validator structs and all methods
   - Copy helper functions and imports

   After each: go mod tidy && make manifests && make build

5. Port main.go customizations:

   Backup: ../migration-backup/cmd/main.go
   New: cmd/main.go

   Compare and port ONLY custom additions:
   - Custom manager options
   - Custom command-line flags
   - Custom initialization before mgr.Start()
   - Additional scheme registrations

   DO NOT port standard scaffold (controller/webhook setup, manager config)

   After: make build

6. Port config settings (ADAPT, do not copy):

   a. config/default/kustomization.yaml - Compare and adapt:
      - Uncomment webhook/certmanager if you have webhooks
      - Update namespace/namePrefix if custom
      - Match metrics configuration
      - Add custom patches/resources
      DO NOT copy entire file

   b. Other config/*/kustomization.yaml - Check for custom patches, adapt if needed

   c. Custom config dirs - Copy any additional dirs: config/dev/, config/prod/, etc.

   After: make build-installer

7. Port config samples and customizations:
   - Sample CRs: Copy ../migration-backup/config/samples/*.yaml to config/samples/
   - Makefile: Copy custom targets from backup (preserve scaffolded targets)
   - Dockerfile: Apply custom build steps from backup

8. Port ALL tests:
   - Controller tests: Copy *_controller_test.go from backup
   - Webhook tests: Copy *_webhook_test.go (adapt if pattern changed)
   - E2E tests: Copy test/e2e/* if exist
   - Integration tests: Copy test/integration/* if exist

9. Port additional files:
   - README: Port custom sections (do not replace entire file)
   - Additional dirs: Copy docs/, scripts/, examples/, charts/, testdata/ if exist
   - Root files: Copy .env, VERSION, CHANGELOG.md, CONTRIBUTING.md if exist
   - .github workflows: Copy custom workflows

   DO NOT port: dist/, bin/, vendor/

10. Verify nothing missed:
   - Run: diff -r --brief ../migration-backup/ . | grep "Only in ../migration-backup"
   - Port any custom files found (ignore: .git/, bin/, vendor/, dist/, zz_generated.*, go.sum, auto-gen configs)
   - Verify key files have custom code (APIs, controllers, webhooks)

11. Final verification:
   - Run: go mod tidy
   - Run: make lint-fix
   - Run: make generate
   - Run: make manifests
   - Run: make build
   - Run: make build-installer
   - Run: make test

   Success: no errors, tests pass, functionally identical to backup

IMPORTANT REMINDERS:
- NEVER edit auto-generated files (already listed in CONTEXT above)
- NEVER remove // +kubebuilder:scaffold:* comments
- REMOVE "// TODO(user):" when replacing with custom code
- ADAPT config YAML files, do not copy entire files
- Port EVERYTHING except: .git/, bin/, vendor/, dist/, zz_generated.*, go.sum
- Follow make command sequence from CONTEXT above
What AI will do
The AI will:
- Detect layouts - Compare old and new project structures
- Port API definitions - Custom fields, markers, documentation
- Port controller logic - Imports, types, Reconcile(), helpers, RBAC, SetupWithManager
- Adapt webhooks - Handle pattern changes if needed, port all logic and helpers
- Port main.go - Only custom initialization, flags, and manager options
- Port configs - kustomization.yaml, samples, Makefile, Dockerfile
- Port dependencies - Add packages to go.mod, run go mod tidy
- Port tests - Controller tests, webhook tests, e2e tests, integration tests
- Port additional files - README, docs/, scripts/, .github/, any custom directories
- Verify completely - Run lint-fix, generate, manifests, build, test
After AI completes
Critical: Review carefully!
Example: What Gets Ported
API Custom Fields
From backup (api/v1/captain_types.go):
type CaptainSpec struct {
    // +kubebuilder:validation:Minimum=1
    // +kubebuilder:validation:Maximum=100
    Replicas int32 `json:"replicas"`

    // +kubebuilder:validation:Pattern=`^[a-z]+$`
    Name string `json:"name"`
}
To new project (TODO removed, custom fields added):
type CaptainSpec struct {
    // +kubebuilder:validation:Minimum=1
    // +kubebuilder:validation:Maximum=100
    Replicas int32 `json:"replicas"`

    // +kubebuilder:validation:Pattern=`^[a-z]+$`
    Name string `json:"name"`
}
Controller reconcile logic
From backup (Reconcile function body):
func (r *CaptainReconciler) Reconcile(ctx context.Context, req ctrl.Request) (ctrl.Result, error) {
    log := log.FromContext(ctx)

    // Your custom reconciliation logic here
    var captain crewv1.Captain
    if err := r.Get(ctx, req.NamespacedName, &captain); err != nil {
        return ctrl.Result{}, client.IgnoreNotFound(err)
    }

    // Custom business logic...

    return ctrl.Result{}, nil
}
To new project (TODO removed, custom logic added):
func (r *CaptainReconciler) Reconcile(ctx context.Context, req ctrl.Request) (ctrl.Result, error) {
    log := log.FromContext(ctx)

    // Custom reconciliation logic from backup
    var captain crewv1.Captain
    if err := r.Get(ctx, req.NamespacedName, &captain); err != nil {
        return ctrl.Result{}, client.IgnoreNotFound(err)
    }

    // Custom business logic...

    return ctrl.Result{}, nil
}
Webhook adaptation (v3 to v4)
From go/v3 backup:
func (r *Captain) Default() {
    if r.Spec.Replicas == 0 {
        r.Spec.Replicas = 1
    }
}
To go/v4 new project:
func (d *CaptainDefaulter) Default(ctx context.Context, obj *crewv1.Captain) error {
    // Ported logic adapted (obj is type-safe, no assertion needed):
    if obj.Spec.Replicas == 0 {
        obj.Spec.Replicas = 1
    }

    return nil
}
Next steps
After AI ports your code:
- Check if nothing is missed, broken or wrongly ported
- Deploy to test cluster - Verify behavior
Single group to multi-group
Kubebuilder scaffolds single-group projects by default to keep things simple, as most projects do not require multiple API groups. However, you can convert an existing single-group project to use multi-group layout when needed. This reorganizes your APIs and controllers into group-specific directories.
See the design doc for the rationale behind this design decision.
Understanding the Layouts
Here’s what changes when you go from single-group to multi-group:
Single-group layout (default):
api/<version>/*_types.go                  All your CRD schemas in one place
internal/controller/*                     All your controllers together
internal/webhook/<version>/*              Webhooks organized by version (if you have any)
Multi-group layout:
api/<group>/<version>/*_types.go          CRD schemas organized by group
internal/controller/<group>/*             Controllers organized by group
internal/webhook/<group>/<version>/*      Webhooks organized by group and version (if you have any)
You can tell which layout you are using by checking your PROJECT file for multigroup: true.
Migration steps
The following steps migrate the CronJob example from single-group to multi-group layout.
Step 1: Enable multi-group mode
First, tell Kubebuilder you want to use multi-group layout:
kubebuilder edit --multigroup=true
This command updates your PROJECT file by adding multigroup: true. After this change:
- New APIs you create will automatically use the multi-group structure (
api/<group>/<version>/) - Existing APIs remain in their current location and must be migrated manually (steps 3-9 below)
Step 2: Identify your group name
Check api/v1/groupversion_info.go to find your group name:
// +groupName=batch.tutorial.kubebuilder.io
package v1
The group name is the first part before the dot (batch in this example).
Step 3: Move your APIs
Create a directory for your group and move your version directories:
mkdir -p api/batch
mv api/v1 api/batch/
If you have multiple versions (like v1, v2, etc.), move them all:
mv api/v2 api/batch/
Step 4: Move your controllers
Create a group directory and move all controller files:
mkdir -p internal/controller/batch
mv internal/controller/*.go internal/controller/batch/
This will move all your controller files, including suite_test.go, into the group directory. Each group needs its own test suite.
Step 5: Move your webhooks (if you have any)
If your project has webhooks (check for an internal/webhook/ directory), add the group directory:
mkdir -p internal/webhook/batch
mv internal/webhook/v1 internal/webhook/batch/
mv internal/webhook/v2 internal/webhook/batch/  # if v2 exists
If you do not have webhooks, skip this step.
Step 6: Update import paths
Update all import statements to point to the new locations.
What used to look like this:
import (
    batchv1 "tutorial.kubebuilder.io/project/api/v1"
    "tutorial.kubebuilder.io/project/internal/controller"
)
Should now look like this:
import (
    batchv1 "tutorial.kubebuilder.io/project/api/batch/v1"
    batchcontroller "tutorial.kubebuilder.io/project/internal/controller/batch"
)
If you have webhooks, you’ll also need to update those imports:
// Before
webhookv1 "tutorial.kubebuilder.io/project/internal/webhook/v1"

// After
webhookbatchv1 "tutorial.kubebuilder.io/project/internal/webhook/batch/v1"
Files to check and update:
cmd/main.gointernal/controller/batch/*.gointernal/webhook/batch/v1/*.go(if you have webhooks)api/batch/v1/*_test.go
Tip: Use your IDE’s “Find and Replace” feature across the project.
Step 7: Update the PROJECT file
The kubebuilder edit --multigroup=true command sets multigroup: true in your PROJECT file but does not update paths for existing APIs. You need to manually update the path field for each resource.
Verify your PROJECT file has these changes:
- Check that
multigroup: trueis set (at the top level):
layout:
- go.kubebuilder.io/v4
multigroup: true  # Must be true
projectName: project
- Update the
pathfield for each resource:
Before:
resources:
- api:
    crdVersion: v1
    namespaced: true
  controller: true
  group: batch
  kind: CronJob
  path: tutorial.kubebuilder.io/project/api/v1  # Old path
  version: v1
After:
resources:
- api:
    crdVersion: v1
    namespaced: true
  controller: true
  group: batch
  kind: CronJob
  path: tutorial.kubebuilder.io/project/api/batch/v1  # New path with group
  version: v1
Repeat this for all resources in your PROJECT file.
Step 8: Update test suite CRD paths
Update the CRD directory path in test suites. Since files moved one level deeper, add one more ".." to the path.
In internal/controller/batch/suite_test.go:
Before (was at internal/controller/suite_test.go):
testEnv = &envtest.Environment{
    CRDDirectoryPaths: []string{filepath.Join("..", "..", "config", "crd", "bases")},
}
After (now at internal/controller/batch/suite_test.go):
testEnv = &envtest.Environment{
    CRDDirectoryPaths: []string{filepath.Join("..", "..", "..", "config", "crd", "bases")},
}
If you have webhooks, update internal/webhook/batch/v1/webhook_suite_test.go:
Before (was at internal/webhook/v1/webhook_suite_test.go):
testEnv = &envtest.Environment{
    CRDDirectoryPaths: []string{filepath.Join("..", "..", "..", "config", "crd", "bases")},
}
After (now at internal/webhook/batch/v1/webhook_suite_test.go):
testEnv = &envtest.Environment{
CRDDirectoryPaths: []string{filepath.Join("..", "..", "..", "..", "config", "crd", "bases")},
}
Step 9: Verify the migration
Run the following commands to verify everything works:
make manifests # Regenerate CRDs and RBAC
make generate # Regenerate code
make test # Run tests
make build # Build the project
AI-Assisted Migration
If you are using an AI coding assistant (Cursor, GitHub Copilot, etc.), you can automate most of the migration steps.
Migrating to Namespace-Scoped Manager
This guide covers converting existing cluster-scoped projects to namespace-scoped deployment.
By default, Kubebuilder scaffolds cluster-scoped managers that watch and manage resources across all namespaces. This guide shows how to convert an existing cluster-scoped project to namespace-scoped deployment, limiting the manager to watch only specific namespace(s).
When to use namespace-scoped
Use namespace-scoped when:
- Building tenant-specific managers in multi-tenant clusters
- Security policies require least-privilege (no cluster-wide permissions)
- Need multiple manager instances in different namespaces
- Managing only namespace-scoped resources (Deployments, Services, ConfigMaps, etc.)
Use cluster-scoped (default) when:
- Managing cluster-scoped resources (Nodes, ClusterRoles, Namespaces, etc.)
- Single manager instance managing resources across all namespaces
Migration steps
Quick Summary:
- Run
kubebuilder edit --namespaced --force- scaffolds Role/RoleBinding and updates manager.yaml - Update cmd/main.go to configure namespace-scoped cache
- Add
namespace=parameter to RBAC markers in existing controller files - Run
make manifests- regenerate RBAC from updated markers - Verify and deploy
Detailed steps
1. Enable namespace-scoped mode
kubebuilder edit --namespaced --force
This command automatically:
- Sets
namespaced: truein your PROJECT file - Scaffolds
config/rbac/role.yamlwithkind: Role(namespace-scoped) - Scaffolds
config/rbac/role_binding.yamlwithkind: RoleBinding - Regenerates
config/manager/manager.yamlwith WATCH_NAMESPACE environment variable - Regenerates admin/editor/viewer roles with
kind: Role(namespace-scoped) for all existing APIs
Note: The --force flag regenerates config/manager/manager.yaml. Without --force, you must manually add WATCH_NAMESPACE (see below).
2. Update cmd/main.go (Required Manual Step)
The edit command cannot update cmd/main.go automatically. You must manually add namespace-scoped configuration.
a. Add import:
import (
// ... existing imports ...
"sigs.k8s.io/controller-runtime/pkg/cache"
)
b. Add helper functions (after init() and before main()):
// getWatchNamespace returns the namespace(s) the manager should watch for changes.
// It reads the value from the WATCH_NAMESPACE environment variable.
func getWatchNamespace() (string, error) {
watchNamespaceEnvVar := "WATCH_NAMESPACE"
ns, found := os.LookupEnv(watchNamespaceEnvVar)
if !found {
return "", fmt.Errorf("%s must be set", watchNamespaceEnvVar)
}
return ns, nil
}
// setupCacheNamespaces configures the cache to watch specific namespace(s).
func setupCacheNamespaces(namespaces string) cache.Options {
defaultNamespaces := make(map[string]cache.Config)
for _, ns := range strings.Split(namespaces, ",") {
defaultNamespaces[strings.TrimSpace(ns)] = cache.Config{}
}
return cache.Options{
DefaultNamespaces: defaultNamespaces,
}
}
c. In main() function, before ctrl.NewManager(), add:
// Get the namespace(s) for namespace-scoped mode from WATCH_NAMESPACE environment variable.
watchNamespace, err := getWatchNamespace()
if err != nil {
setupLog.Error(err, "Unable to get WATCH_NAMESPACE")
os.Exit(1)
}
d. Update manager creation to use namespace-scoped cache:
mgrOptions := ctrl.Options{
Scheme: scheme,
Metrics: metricsServerOptions,
WebhookServer: webhookServer,
HealthProbeBindAddress: probeAddr,
LeaderElection: enableLeaderElection,
LeaderElectionID: "your-leader-election-id",
// ... other existing options ...
}
// Configure cache to watch namespace(s) specified in WATCH_NAMESPACE
mgrOptions.Cache = setupCacheNamespaces(watchNamespace)
setupLog.Info("Watching namespace(s)", "namespaces", watchNamespace)
mgr, err := ctrl.NewManager(ctrl.GetConfigOrDie(), mgrOptions)
if err != nil {
setupLog.Error(err, "Failed to start manager")
os.Exit(1)
}
3. Update RBAC markers in existing controllers
For each existing controller file, add the namespace= parameter to RBAC markers.
Find controller files:
- Look for files containing
func (r *SomeReconciler) Reconcile( - Common locations:
internal/controller/*_controller.go
In internal/controller/cronjob_controller.go:
Before (cluster-scoped):
// +kubebuilder:rbac:groups=batch.tutorial.kubebuilder.io,resources=cronjobs,verbs=get;list;watch;create;update;patch;delete
// +kubebuilder:rbac:groups=batch.tutorial.kubebuilder.io,resources=cronjobs/status,verbs=get;update;patch
// +kubebuilder:rbac:groups=batch.tutorial.kubebuilder.io,resources=cronjobs/finalizers,verbs=update
// Reconcile is part of the main Kubernetes reconciliation loop
func (r *CronJobReconciler) Reconcile(ctx context.Context, req ctrl.Request) (ctrl.Result, error) {
After (namespace-scoped):
// +kubebuilder:rbac:groups=batch.tutorial.kubebuilder.io,namespace=<project-name>-system,resources=cronjobs,verbs=get;list;watch;create;update;patch;delete
// +kubebuilder:rbac:groups=batch.tutorial.kubebuilder.io,namespace=<project-name>-system,resources=cronjobs/status,verbs=get;update;patch
// +kubebuilder:rbac:groups=batch.tutorial.kubebuilder.io,namespace=<project-name>-system,resources=cronjobs/finalizers,verbs=update
// Reconcile is part of the main Kubernetes reconciliation loop
func (r *CronJobReconciler) Reconcile(ctx context.Context, req ctrl.Request) (ctrl.Result, error) {
Replace project-system with your namespace (found in config/default/kustomization.yaml under the namespace: field).
4. Regenerate RBAC manifests
After updating RBAC markers in Step 3, regenerate the RBAC manifests:
make manifests # Regenerate RBAC from updated controller markers
Verify the generated files show kind: Role instead of kind: ClusterRole:
config/rbac/role.yaml:
kind: Role
metadata:
name: manager-role
# Note: namespace is added by kustomize during build, not in source
**config/rbac/*_editor_role.yaml, _viewer_role.yaml, _admin_role.yaml:
kind: Role
metadata:
name: cronjob-editor-role
# Note: namespace is added by kustomize during build, not in source
5. Verify and deploy
Run tests to verify everything works:
make generate # Regenerate code
make test # Run tests
Deploy and verify:
make deploy IMG=<your-image>
# Verify RBAC is namespace-scoped (not cluster-scoped)
kubectl get role,rolebinding -n <manager-namespace>
# Test: Create a resource in the manager's namespace - should be reconciled
kubectl apply -f config/samples/ -n <manager-namespace>
# Test: Create a resource in a different namespace - should NOT be reconciled
kubectl apply -f config/samples/ -n other-namespace
AI-Assisted Migration
If you are using an AI coding assistant (Cursor, GitHub Copilot, etc.), you can automate the manual migration steps.
Multi-namespace support
The WATCH_NAMESPACE environment variable supports comma-separated values to watch multiple specific namespaces:
env:
- name: WATCH_NAMESPACE
value: "namespace-1,namespace-2,namespace-3"
Note: You’ll need to create Role/RoleBinding in each namespace for proper RBAC.
Reverting to cluster-scoped
To revert back to cluster-scoped:
kubebuilder edit --namespaced=false --force
This command automatically:
- Sets
namespaced: falsein your PROJECT file - Scaffolds
config/rbac/role.yamlwithkind: ClusterRole - Scaffolds
config/rbac/role_binding.yamlwithkind: ClusterRoleBinding - With
--force: Regeneratesconfig/manager/manager.yamlwithout WATCH_NAMESPACE env var
Manual steps required:
- Remove
namespace=parameter from RBAC markers in all controller files - Run
make manifeststo regenerate cluster-scoped RBAC - Remove namespace-scoped code from
cmd/main.go:- Remove
getWatchNamespace()function - Remove
setupCacheNamespaces()function - Remove namespace retrieval and cache configuration
- Remove added imports (
fmt,strings,cache) if not used elsewhere
- Remove
- If you did not use
--force, manually removeWATCH_NAMESPACEfromconfig/manager/manager.yaml
Important notes
- Only controllers need RBAC updates: Only update
+kubebuilder:rbacmarkers in controller files (files withReconcilefunction). Webhook files do NOT use RBAC markers - webhooks use certificate-based authentication with the API server. - RBAC markers control scope: The
namespace=parameter in controller RBAC markers determines whether controller-gen generatesRole(namespace-scoped) orClusterRole(cluster-scoped). Without thenamespace=parameter, controller-gen always generatesClusterRole. - Controller-gen regenerates role.yaml: After running
make manifests, controller-gen will regenerateconfig/rbac/role.yamlbased on your controller RBAC markers. The initialRolescaffold fromkubebuilder edit --namespaced=trueserves as a template, but controller-gen manages the actual content. - Namespace parameter format: Use
namespace=<your-namespace>in controller RBAC markers, typicallynamespace=<project-name>-systemto match your deployment namespace. - Metrics auth role stays cluster-scoped: The
metrics-auth-roleuses cluster-scoped APIs (TokenReview, SubjectAccessReview) and correctly remains a ClusterRole without namespace parameter. - Webhooks require manual configuration: Currently, controller-gen does not support
namespaceSelectororobjectSelectormarkers for webhooks. See the webhook section above for details.
See also
- Manager Scope - Detailed explanation of manager scope concepts
- Project Config - PROJECT file configuration reference
Alpha Commands
Kubebuilder provides experimental alpha commands to assist with advanced operations such as project migration and scaffold regeneration.
These commands are designed to simplify tasks that were previously manual and error-prone by automating or partially automating the process.
The following alpha commands are currently available:
alpha generate— Re-scaffold the project using the installed CLI versionalpha update— Automate the migration process via 3-way merge using scaffold snapshots
For more information, see each command’s dedicated documentation.
Regenerate your project with (alpha generate)
Overview
The kubebuilder alpha generate command re-scaffolds your project using the currently installed
CLI and plugin versions.
It regenerates the full scaffold based on the configuration specified in your PROJECT file. This allows you to apply the latest layout changes, plugin features, and code generation improvements introduced in newer Kubebuilder releases.
You may choose to re-scaffold the project in-place (overwriting existing files) or in a separate directory for diff-based inspection and manual integration.
When to use it?
You can use kubebuilder alpha generate to upgrade your project scaffold when new changes are introduced
in Kubebuilder. This includes updates to plugins (for example, go.kubebuilder.io/v3 → go.kubebuilder.io/v4)
or the CLI releases (for example, 4.3.1 → latest) .
This command is helpful when you want to:
- Update your project to use the latest layout or plugin version
- Regenerate your project scaffold to include recent changes
- Compare the current scaffold with the latest and apply updates manually
- Create a clean scaffold for reviewing or testing changes
Use this command when you want full control of the upgrade process.
It is also useful if your project was created with an older CLI version and does not support alpha update.
This approach allows you to compare changes between your current branch and upstream scaffold updates (e.g., from the main branch), and helps you overlay custom code atop the new scaffold.
How to use it?
Upgrade your current project to CLI version installed (i.e. latest scaffold)
kubebuilder alpha generate
After running this command, your project is re-scaffolded in place. You can then compare the local changes with your main branch to see what was updated, and re-apply your custom code on top as needed.
Generate scaffold to a new directory
Use the --input-dir and --output-dir flags to specify input and output paths.
kubebuilder alpha generate \
--input-dir=/path/to/existing/project \
--output-dir=/path/to/new/project
After running the command, you can inspect the generated scaffold in the specified output directory.
Flags
| Flag | Description |
|---|---|
--input-dir | Path to the directory containing the PROJECT file. Defaults to CWD. Deletes all files except .git and PROJECT. |
--output-dir | Directory where the new scaffold is written. If unset, re-scaffolds in-place. |
--plugins | Plugin keys to use for this generation. |
-h, --help | Show help for this command. |
Further resources
Update Your Project with (alpha update)
Overview
kubebuilder alpha update upgrades your project’s scaffold to a newer Kubebuilder release using a 3-way Git merge. It rebuilds clean scaffolds for the old and new versions, merges your current code into the new scaffold, and gives you a reviewable output branch.
It takes care of the heavy lifting so you can focus on reviewing and resolving conflicts,
not re-applying your code.
By default, the final result is squashed into a single commit on a dedicated output branch.
If you prefer to keep the full history (no squash), use --show-commits.
When to use it
Use this command when you:
- Want to move to a newer Kubebuilder version or plugin layout
- Want to review scaffold changes on a separate branch
- Want to focus on resolving merge conflicts (not re-applying your custom code)
How it works
You tell the tool the new version, and which branch has your project. It rebuilds both scaffolds, merges your code into the new one with a 3-way merge, and gives you an output branch you can review and merge safely. You decide if you want one clean commit, the full history, or an auto-push to remote.
Step 1: Detect versions
- It looks at your
PROJECTfile or the flags you pass. - Decides which old version you are coming from by reading the
cliVersionfield in thePROJECTfile (if available). - Figures out which new version you want (defaults to the latest release).
- Chooses which branch has your current code (defaults to
main).
Step 2: Create scaffolds
The command creates three temporary branches:
- Ancestor: a clean project scaffold from the old version.
- Original: a snapshot of your current code.
- Upgrade: a clean scaffold from the new version.
Step 3: Do a 3-way merge
- Merges Original (your code) into Upgrade (the new scaffold) using Git’s 3-way merge.
- This keeps your customizations while pulling in upstream changes.
- If conflicts happen:
- Default → stop and let you resolve them manually.
- With
--force→ continue and commit even with conflict markers. (ideal for automation)
- Runs
make manifests generate fmt vet lint-fixto tidy things up.
Step 4: Write the output branch
- By default, everything is squashed into one commit on a safe output branch:
kubebuilder-update-from-<from-version>-to-<to-version>. - You can change the behavior:
--show-commits: keep the full history.--restore-path: in squash mode, restore specific files (like CI configs) from your base branch.--output-branch: pick a custom branch name.--merge-message: customize the commit message for clean merges.--conflict-message: customize the commit message when conflicts occur.--push: push the result tooriginautomatically.--git-config: sets git configurations.--open-gh-issue: create a GitHub issue with a checklist and compare link (requiresgh).
Step 5: Cleanup
- Once the output branch is ready, all the temporary working branches are deleted.
- You are left with one clean branch you can test, review, and merge back into your main branch.
How to use it (commands)
Run from your project root:
kubebuilder alpha update
Pin versions and base branch:
kubebuilder alpha update \
--from-version v4.5.2 \
--to-version v4.6.0 \
--from-branch main
Automation-friendly (proceed even with conflicts):
kubebuilder alpha update --force
Keep full history instead of squashing:
kubebuilder alpha update --from-version v4.5.0 --to-version v4.7.0 --force --show-commits
Default squash but preserve CI/workflows from the base branch:
kubebuilder alpha update --force \
--restore-path .github/workflows \
--restore-path docs
Use a custom output branch name:
kubebuilder alpha update --force \
--output-branch upgrade/kb-to-v4.7.0
Run update and push the result to origin:
kubebuilder alpha update --from-version v4.6.0 --to-version v4.7.0 --force --push
Customize commit messages:
kubebuilder alpha update --force \
--merge-message "chore: upgrade kubebuilder scaffold" \
--conflict-message "chore: upgrade with conflicts - manual review needed"
Handling conflicts (--force vs default)
When you use --force, Git finishes the merge even if there are conflicts.
The commit will include markers like:
<<<<<<< HEAD
Your changes
=======
Incoming changes
>>>>>>> (original)
This allows you to run the command in CI or cron jobs without manual intervention.
- Without
--force: the command stops on the merge branch and prints guidance; no commit is created. - With
--force: the merge is committed (merge or output branch) and contains the markers.
After you fix conflicts, always run:
make manifests generate fmt vet lint-fix
# or
make all
Using with GitHub Issues (--open-gh-issue)
Pass --open-gh-issue to have the command create a GitHub Issue in your repository
to assist with the update.
Examples
Create an Issue with a compare link:
kubebuilder alpha update --open-gh-issue
What you’ll see
The command opens an Issue that links to the diff so you can create the PR and review it, for example:
Automation
This integrates cleanly with automation. The autoupdate.kubebuilder.io/v1-alpha plugin can scaffold a GitHub Actions workflow that runs the command on a schedule (e.g., weekly). When a new Kubebuilder release is available, it opens an Issue with a compare link so you can create the PR and review it.
Changing extra Git configs only during the run (does not change your ~/.gitconfig)
By default, kubebuilder alpha update applies safe Git configs:
merge.renameLimit=999999, diff.renameLimit=999999, merge.conflictStyle=merge
You can add more, or disable them.
- Add more on top of defaults
kubebuilder alpha update \
--git-config rerere.enabled=true
- Disable defaults entirely
kubebuilder alpha update --git-config disable
- Disable defaults and set your own
kubebuilder alpha update \
--git-config disable \
--git-config rerere.enabled=true
Flags
| Flag | Description |
|---|---|
--conflict-message | Custom commit message for merges with conflicts. Defaults to :warning: chore(kubebuilder): update scaffold (manual conflict resolution) <from> -> <to>. |
--force | Continue even if merge conflicts happen. Conflicted files are committed with conflict markers (CI/cron friendly). |
--from-branch | Git branch that holds your current project code. Defaults to main. |
--from-version | Kubebuilder release to update from (e.g., v4.6.0). If unset, read from the PROJECT file when possible. |
--git-config | Repeatable. Pass per-invocation Git config as -c key=value. Default (if omitted): -c merge.renameLimit=999999 -c diff.renameLimit=999999. Your configs are applied on top. To disable defaults, include --git-config disable. |
--merge-message | Custom commit message for successful merges (no conflicts). Defaults to chore(kubebuilder): update scaffold <from> -> <to>. |
--open-gh-issue | Create a GitHub issue with a pre-filled checklist and compare link after the update completes (requires gh). |
--output-branch | Name of the output branch. Default: kubebuilder-update-from-<from-version>-to-<to-version>. |
--push | Push the output branch to the origin remote after the update completes. |
--restore-path | Repeatable. Paths to preserve from the base branch when squashing (e.g., .github/workflows). Not supported with --show-commits. |
--show-commits | Keep full history (do not squash). Not compatible with --restore-path. |
--to-version | Kubebuilder release to update to (e.g., v4.7.0). If unset, defaults to the latest available release. |
-h, --help | Show help for this command. |
Demonstration
Further resources
Reference
-
Using Finalizers Finalizers are a mechanism to execute any custom logic related to a resource before it gets deleted from Kubernetes cluster.
-
Watching Resources Watch resources in the Kubernetes cluster to be informed and take actions on changes.
-
What’s a webhook? Webhooks are HTTP callbacks, there are 3 types of webhooks in k8s: 1) admission webhook 2) CRD conversion webhook 3) authorization webhook
- Admission webhook Admission webhooks are HTTP callbacks for mutating or validating resources before the API server admit them.
Generating CRDs
Kubebuilder uses a tool called controller-gen to
generate utility code and Kubernetes object YAML, like
CustomResourceDefinitions.
To do this, it makes use of special “marker comments” (comments that start
with // +) to indicate additional information about fields, types, and
packages. In the case of CRDs, these are generally pulled from your
_types.go files. For more information on markers, see the marker
reference docs.
Kubebuilder provides a make target to run controller-gen and generate
CRDs: make manifests.
When you run make manifests, you should see CRDs generated under the
config/crd/bases directory. make manifests can generate a number of
other artifacts as well – see the marker reference docs for
more details.
Validation
CRDs support declarative validation using an OpenAPI
v3 schema in the validation section.
In general, validation markers may be attached to fields or to types. If you are defining complex validation, if you need to re-use validation, or if you need to validate slice elements, it is often best to define a new type to describe your validation.
For example:
type ToySpec struct {
// +kubebuilder:validation:MaxLength=15
// +kubebuilder:validation:MinLength=1
Name string `json:"name,omitempty"`
// +kubebuilder:validation:MaxItems=500
// +kubebuilder:validation:MinItems=1
// +kubebuilder:validation:UniqueItems=true
Knights []string `json:"knights,omitempty"`
Alias Alias `json:"alias,omitempty"`
Rank Rank `json:"rank"`
}
// +kubebuilder:validation:Enum=Lion;Wolf;Dragon
type Alias string
// +kubebuilder:validation:Minimum=1
// +kubebuilder:validation:Maximum=3
// +kubebuilder:validation:ExclusiveMaximum=false
type Rank int32
Additional printer columns
Starting with Kubernetes 1.11, kubectl get can ask the server what
columns to display. For CRDs, this can be used to provide useful,
type-specific information with kubectl get, similar to the information
provided for built-in types.
The information that gets displayed can be controlled with the
additionalPrinterColumns field on your
CRD, which is controlled by the
+kubebuilder:printcolumn marker on the Go type for
your CRD.
For instance, in the following example, add fields to display information about the knights, rank, and alias fields from the validation example:
// +kubebuilder:printcolumn:name="Alias",type=string,JSONPath=`.spec.alias`
// +kubebuilder:printcolumn:name="Rank",type=integer,JSONPath=`.spec.rank`
// +kubebuilder:printcolumn:name="Bravely Run Away",type=boolean,JSONPath=`.spec.knights[?(@ == "Sir Robin")]`,description="when danger rears its ugly head, he bravely turned his tail and fled",priority=10
// +kubebuilder:printcolumn:name="Age",type="date",JSONPath=".metadata.creationTimestamp"
type Toy struct {
metav1.TypeMeta `json:",inline"`
metav1.ObjectMeta `json:"metadata,omitempty"`
Spec ToySpec `json:"spec,omitempty"`
Status ToyStatus `json:"status,omitempty"`
}
Subresources
CRDs can choose to implement the /status and /scale
subresources as of Kubernetes 1.13.
It’s generally recommended that you make use of the /status subresource
on all resources that have a status field.
Both subresources have a corresponding marker.
Status
You enable the status subresource via +kubebuilder:subresource:status.
When you enable it, updates at the main resource will not change status.
Similarly, updates to the status subresource cannot change anything but
the status field.
For example:
// +kubebuilder:subresource:status
type Toy struct {
metav1.TypeMeta `json:",inline"`
metav1.ObjectMeta `json:"metadata,omitempty"`
Spec ToySpec `json:"spec,omitempty"`
Status ToyStatus `json:"status,omitempty"`
}
Scale
You enable the scale subresource via +kubebuilder:subresource:scale.
When you enable it, users can use kubectl scale with your
resource. If the selectorpath argument points to the string form of
a label selector, the HorizontalPodAutoscaler can autoscale
your resource.
For example:
type CustomSetSpec struct {
Replicas *int32 `json:"replicas"`
}
type CustomSetStatus struct {
Replicas int32 `json:"replicas"`
Selector string `json:"selector"` // this must be the string form of the selector
}
// +kubebuilder:subresource:status
// +kubebuilder:subresource:scale:specpath=.spec.replicas,statuspath=.status.replicas,selectorpath=.status.selector
type CustomSet struct {
metav1.TypeMeta `json:",inline"`
metav1.ObjectMeta `json:"metadata,omitempty"`
Spec CustomSetSpec `json:"spec,omitempty"`
Status CustomSetStatus `json:"status,omitempty"`
}
Multiple versions
As of Kubernetes 1.13, you can have multiple versions of your Kind defined in your CRD, and use a webhook to convert between them.
For more details on this process, see the multiversion tutorial.
By default, Kubebuilder disables generating different validation for different versions of the Kind in your CRD, to be compatible with older Kubernetes versions.
You’ll need to enable this by switching the line in your makefile that
says CRD_OPTIONS ?= "crd:trivialVersions=true,preserveUnknownFields=false
to CRD_OPTIONS ?= crd:preserveUnknownFields=false if using v1beta CRDs,
and CRD_OPTIONS ?= crd if using v1 (recommended).
Then, you can use the +kubebuilder:storageversion marker
to indicate the GVK that
should be used to store data by the API server.
Under the hood
Kubebuilder scaffolds out make rules to run controller-gen. The rules
will automatically install controller-gen if it is not on your path using
go install with Go modules.
You can also run controller-gen directly, if you want to see what it is
doing.
Each controller-gen “generator” is controlled by an option to
controller-gen, using the same syntax as markers. controller-gen
also supports different output “rules” to control how and where output goes.
Notice the manifests make rule (condensed slightly to only generate CRDs):
# Generate manifests for CRDs
manifests: controller-gen
$(CONTROLLER_GEN) rbac:roleName=manager-role crd webhook paths="./..." output:crd:artifacts:config=config/crd/bases
It uses the output:crd:artifacts output rule to indicate that
CRD-related config (non-code) artifacts should end up in
config/crd/bases instead of config/crd.
To see all the options including generators for controller-gen, run
$ controller-gen -h
or, for more details:
$ controller-gen -hhh
Using finalizers
Finalizers allow controllers to implement asynchronous pre-delete hooks. If
you create an external resource (such as a storage bucket) for each object of
your API type, and you want to delete the associated external resource
on object’s deletion from Kubernetes, use a finalizer to do that.
You can read more about the finalizers in the Kubernetes reference docs. The section below demonstrates how to register and trigger pre-delete hooks
in the Reconcile method of a controller.
The key point to note is that a finalizer causes “delete” on the object to become an “update” to set deletion timestamp. Presence of deletion timestamp on the object indicates that it is being deleted. Otherwise, without finalizers, a delete shows up as a reconcile where the object is missing from the cache.
Highlights:
- If the object is not being deleted and does not have the finalizer registered, then add the finalizer and update the object in Kubernetes.
- If object is being deleted and the finalizer is still present in finalizers list, then execute the pre-delete logic and remove the finalizer and update the object.
- Ensure that the pre-delete logic is idempotent.
Apache License
Licensed under the Apache License, Version 2.0 (the “License”); you may not use this file except in compliance with the License. You may obtain a copy of the License at
http://www.apache.org/licenses/LICENSE-2.0
Unless required by applicable law or agreed to in writing, software distributed under the License is distributed on an “AS IS” BASIS, WITHOUT WARRANTIES OR CONDITIONS OF ANY KIND, either express or implied. See the License for the specific language governing permissions and limitations under the License.
Imports
First, we start out with some standard imports. As before, we need the core controller-runtime library, as well as the client package, and the package for our API types.
package controllers
import (
"context"
"k8s.io/kubernetes/pkg/apis/batch"
ctrl "sigs.k8s.io/controller-runtime"
"sigs.k8s.io/controller-runtime/pkg/client"
"sigs.k8s.io/controller-runtime/pkg/controller/controllerutil"
batchv1 "tutorial.kubebuilder.io/project/api/v1"
)
By default, kubebuilder will include the RBAC rules necessary to update finalizers for CronJobs.
// +kubebuilder:rbac:groups=batch.tutorial.kubebuilder.io,resources=cronjobs,verbs=get;list;watch;create;update;patch;delete
// +kubebuilder:rbac:groups=batch.tutorial.kubebuilder.io,resources=cronjobs/status,verbs=get;update;patch
// +kubebuilder:rbac:groups=batch.tutorial.kubebuilder.io,resources=cronjobs/finalizers,verbs=update
The code snippet below shows skeleton code for implementing a finalizer.
func (r *CronJobReconciler) Reconcile(ctx context.Context, req ctrl.Request) (ctrl.Result, error) {
log := r.Log.WithValues("cronjob", req.NamespacedName)
cronJob := &batchv1.CronJob{}
if err := r.Get(ctx, req.NamespacedName, cronJob); err != nil {
log.Error(err, "unable to fetch CronJob")
// we'll ignore not-found errors, since they can't be fixed by an immediate
// requeue (we'll need to wait for a new notification), and we can get them
// on deleted requests.
return ctrl.Result{}, client.IgnoreNotFound(err)
}
// name of our custom finalizer
myFinalizerName := "batch.tutorial.kubebuilder.io/finalizer"
// examine DeletionTimestamp to determine if object is under deletion
if cronJob.ObjectMeta.DeletionTimestamp.IsZero() {
// The object is not being deleted, so if it does not have our finalizer,
// then let's add the finalizer and update the object. This is equivalent
// to registering our finalizer.
if !controllerutil.ContainsFinalizer(cronJob, myFinalizerName) {
controllerutil.AddFinalizer(cronJob, myFinalizerName)
if err := r.Update(ctx, cronJob); err != nil {
return ctrl.Result{}, err
}
}
} else {
// The object is being deleted
if controllerutil.ContainsFinalizer(cronJob, myFinalizerName) {
// our finalizer is present, so let's handle any external dependency
if err := r.deleteExternalResources(cronJob); err != nil {
// if fail to delete the external dependency here, return with error
// so that it can be retried.
return ctrl.Result{}, err
}
// remove our finalizer from the list and update it.
controllerutil.RemoveFinalizer(cronJob, myFinalizerName)
if err := r.Update(ctx, cronJob); err != nil {
return ctrl.Result{}, err
}
}
// Stop reconciliation as the item is being deleted
return ctrl.Result{}, nil
}
// Your reconcile logic
return ctrl.Result{}, nil
}
func (r *Reconciler) deleteExternalResources(cronJob *batch.CronJob) error {
//
// delete any external resources associated with the cronJob
//
// Ensure that delete implementation is idempotent and safe to invoke
// multiple times for same object.
}
Good practices
What is “reconciliation” in operators?
When you create a project using Kubebuilder, see the scaffolded code generated under cmd/main.go. This code initializes a Manager, and the project relies on the controller-runtime framework. The Manager manages Controllers, which offer a reconcile function that synchronizes resources until the desired state is achieved within the cluster.
Reconciliation is an ongoing loop that executes necessary operations to maintain the desired state, adhering to Kubernetes principles, such as the control loop. For further information, check out the Operator patterns documentation from Kubernetes to better understand those concepts.
Why should reconciliations be idempotent?
When developing operators, the controller’s reconciliation loop needs to be idempotent. By following the Operator pattern, you create controllers that provide a reconcile function responsible for synchronizing resources until the desired state is reached on the cluster. Developing idempotent solutions allows the reconciler to correctly respond to generic or unexpected events, easily deal with application startup or upgrade. More explanation on this is available here.
Writing reconciliation logic according to specific events, breaks the recommendation of operator pattern and goes against the design principles of controller-runtime. This may lead to unforeseen consequences, such as resources becoming stuck and requiring manual intervention.
Understanding Kubernetes APIs and following API conventions
Building your operator commonly involves extending the Kubernetes API itself. It is helpful to understand precisely how Custom Resource Definitions (CRDs) interact with the Kubernetes API. Also, the Kubebuilder documentation on Groups and Versions and Kinds may be helpful to understand these concepts better as they relate to operators.
Additionally, check the documentation on Operator patterns from Kubernetes to better understand the purpose of the standard solutions built with KubeBuilder.
Why you should adhere to the Kubernetes API conventions and standards
Embracing the Kubernetes API conventions and standards is crucial for maximizing the potential of your applications and deployments. By adhering to these established practices, you can benefit in several ways.
Firstly, adherence ensures seamless interoperability within the Kubernetes ecosystem. Following conventions allows your applications to work harmoniously with other components, reducing compatibility issues and promoting a consistent user experience.
Secondly, sticking to API standards enhances the maintainability and troubleshooting of your applications. Adopting familiar patterns and structures makes debugging and supporting your deployments easier, leading to more efficient operations and quicker issue resolution.
Furthermore, leveraging the Kubernetes API conventions empowers you to harness the platform’s full capabilities. By working within the defined framework, you can leverage the rich set of features and resources offered by Kubernetes, enabling scalability, performance optimization, and resilience.
Lastly, embracing these standards future-proofs your native solutions. By aligning with the evolving Kubernetes ecosystem, you ensure compatibility with future updates, new features, and enhancements introduced by the vibrant Kubernetes community.
In summary, by adhering to the Kubernetes API conventions and standards, you unlock the potential for seamless integration, simplified maintenance, optimal performance, and future-readiness, all contributing to the success of your applications and deployments.
Why should one avoid a system design where a single controller is responsible for managing multiple CRDs (Custom Resource Definitions)(for example, an ‘install_all_controller.go’)?
Avoid a design solution where the same controller reconciles more than one Kind. Having many Kinds (such as CRDs), that are all managed by the same controller, usually goes against the design proposed by controller-runtime. Furthermore, this might hurt concepts such as encapsulation, the Single Responsibility Principle, and Cohesion. Damaging these concepts may cause unexpected side effects and increase the difficulty of extending, reusing, or maintaining the operator. Having one controller manage many Custom Resources (CRs) in an Operator can lead to several issues:
- Complexity: A single controller managing multiple CRs can increase the complexity of the code, making it harder to understand, maintain, and debug.
- Scalability: Each controller typically manages a single kind of CR for scalability. If a single controller handles multiple CRs, it could become a bottleneck, reducing the overall efficiency and responsiveness of your system.
- Single Responsibility Principle: Following this principle from software engineering, each controller should ideally have only one job. This approach simplifies development and debugging, and makes the system more robust.
- Error Isolation: If one controller manages multiple CRs and an error occurs, it could potentially impact all the CRs it manages. Having a single controller per CR ensures that an issue with one controller or CR does not directly affect others.
- Concurrency and Synchronization: A single controller managing multiple CRs could lead to race conditions and require complex synchronization, especially if the CRs have interdependencies.
In conclusion, while it might seem efficient to have a single controller manage multiple CRs, it often leads to higher complexity, lower scalability, and potential stability issues. It is generally better to adhere to the single responsibility principle, where each CR is managed by its own controller.
Why you should adopt status conditions
Manage your solutions using Status Conditionals following the K8s Api conventions because:
- Standardization: Conditions provide a standardized way to represent the state of an Operator’s custom resources, making it easier for users and tools to understand and interpret the resource’s status.
- Readability: Conditions can clearly express complex states by using a combination of multiple conditions, making it easier for users to understand the current state and progress of the resource.
- Extensibility: As new features or states are added to your Operator, conditions can be easily extended to represent these new states without requiring significant changes to the existing API or structure.
- Observability: Status conditions can be monitored and tracked by cluster administrators and external monitoring tools, enabling better visibility into the state of the custom resources managed by the Operator.
- Compatibility: By adopting the common pattern of using conditions in Kubernetes APIs, Operator authors ensure their custom resources align with the broader ecosystem, which helps users to have a consistent experience when interacting with multiple Operators and resources in their clusters.
You should adopt Kubernetes conventions for instrumentation and observability
Proper logging is essential for observability in Kubernetes-native applications. However, it is important to understand which logging conventions to apply based on the context of your code.
Understanding Go vs. Kubernetes logging conventions
When developing with Go, you may be familiar with the Go Code Review Comments guidelines, which state that error strings should not be capitalized and should not end with punctuation. These conventions are designed for error messages that are often composed into larger contexts:
// Go conventions (for general Go code, libraries, CLI tools)
return fmt.Errorf("something bad happened") // lowercase, no period
log.Printf("failed to connect: %v", err) // lowercase
However, when developing Kubernetes-native solutions (controllers, operators, webhooks) that run on the cluster, you should follow the Kubernetes Logging Conventions for better observability and consistency with the Kubernetes ecosystem.
Kubernetes logging conventions
For controllers, operators, and webhooks, follow these guidelines:
- Start from a capital letter.
- Do not end the message with a period.
- Use active voice. Use complete sentences when there is an acting subject (“A could not do B”) or omit the subject if the subject would be the program itself (“Could not do B”).
- Use past tense (“Could not delete B” instead of “Cannot delete B”)
- When referring to an object, state what type of object it is. (“Deleted Pod” instead of “Deleted”)
- Use structured logging with balanced key-value pairs.
Examples:
// Kubernetes conventions (for controllers, operators, webhooks)
log.Info("Starting reconciliation") // Capital letter, no period
log.Info("Creating Deployment", "name", name, "namespace", ns) // Specify object type, structured logging
log.Info("Created Deployment", "name", deploy.Name) // Past tense, specify type
log.Error(err, "Failed to create Pod", "name", name) // Past tense, specify type
log.Info("Deployment could not create Pod", "deployment", name) // Acting subject
log.Info("Could not delete Pod", "name", name) // Subject is the program itself
Why different conventions?
- Go conventions are optimized for error messages that get composed into larger contexts and displayed inline with other text
- Kubernetes conventions are optimized for structured logging in distributed systems where logs are:
- Aggregated from multiple components across the cluster
- Parsed by log collectors (Fluentd, Fluentbit, Loki, etc.)
- Displayed in monitoring dashboards and UIs
- Used for alerting and troubleshooting in production
Following these conventions ensures your logs integrate seamlessly with Kubernetes observability tools and provide clear, actionable information for cluster operators and SREs.
(Alpha) Server-Side Apply
The --ssa flag scaffolds APIs with Server-Side Apply support, enabling safer field management when multiple actors modify the same resources.
This adds:
- API markers (
+genclient,+kubebuilder:ac:generate=true,+kubebuilder:resource:path=<plural>) for ApplyConfiguration generation - Makefile integration to generate type-safe ApplyConfiguration types alongside CRD and RBAC manifests
When to use it
Use Server-Side Apply when:
- Multiple controllers or users manage the same resource
- Users customize CRs with labels, annotations, or spec fields your controller shouldn’t overwrite
- You want declarative field ownership tracking
- Other operators will manage instances of your CRs (they can import your generated ApplyConfiguration types)
How it works
Traditional Update() overwrites the entire object. Server-Side Apply with the client’s Apply method only manages the fields you specify.
After running make manifests, ApplyConfiguration types are created at:
api/<version>/applyconfiguration/api/<version>/ (single group)
api/<group>/<version>/applyconfiguration/<group>/<version>/ (multi-group)
Import them as (multi-group projects use
example.com/myproject/api/<group>/v1/applyconfiguration/<group>/v1):
appsv1apply "example.com/myproject/api/v1/applyconfiguration/api/v1"
Mixing SSA and non-SSA APIs
The +kubebuilder:ac:generate=true marker is package-level: it enables ApplyConfiguration generation for all kinds in the same group/version. Kinds scaffolded without --ssa include the +kubebuilder:ac:generate=false marker, so ApplyConfiguration types are only generated for the kinds that opted in. When you create an API with --ssa, kinds previously scaffolded without this marker in that group/version receive it automatically.
To change which kinds are generated:
- Set
+kubebuilder:ac:generate=trueabove a kind to include it - Set
+kubebuilder:ac:generate=falseabove a kind to exclude it
Usage
Create an API with the --ssa flag:
kubebuilder create api --group apps --version v1 --kind Application --ssa
Implement Server-Side Apply in your controller:
import (
"context"
metav1apply "k8s.io/client-go/applyconfigurations/meta/v1"
ctrl "sigs.k8s.io/controller-runtime"
"sigs.k8s.io/controller-runtime/pkg/client"
appsv1apply "example.com/myproject/api/v1/applyconfiguration/api/v1"
)
func (r *ApplicationReconciler) Reconcile(ctx context.Context, req ctrl.Request) (ctrl.Result, error) {
// Build desired state - specify only fields you manage
app := appsv1apply.Application(req.Name, req.Namespace).
WithStatus(appsv1apply.ApplicationStatus().
WithConditions(metav1apply.Condition().
WithType("Available").
WithStatus("True").
WithReason("Reconciled")))
// Apply status, forcing ownership of the fields this controller manages
if err := r.SubResource("status").Apply(ctx, app,
client.FieldOwner("application-controller"), client.ForceOwnership); err != nil {
return ctrl.Result{}, err
}
return ctrl.Result{}, nil
}
Then run:
make generate manifests
Best practices
- Always specify
client.FieldOwner("controller-name")to identify your controller - Controllers should pass
client.ForceOwnershipfor the fields they manage; Kubernetes recommends that controllers always force conflicts - Only specify fields your controller manages using the builder pattern
Additional resources
License header
What is it?
Kubebuilder creates a file at hack/boilerplate.go.txt that contains your license header. This header is automatically added to all generated Go files.
The boilerplate file is used by:
- Kubebuilder when creating new files (
create api,create webhook, etc.) controller-genwhen generating code (DeepCopy methods, etc.)make generateandmake manifestscommands
By default, Kubebuilder uses the Apache 2.0 license.
How to customize
Option 1: Use built-in licenses
Use the --license flag during initialization or to update an existing project:
# During initialization
kubebuilder init --domain example.com --license apache2 --owner "Your Name"
# After initialization (update existing project)
kubebuilder edit --license apache2 --owner "Your Company"
Available license values:
apache2- Apache 2.0 License (default)copyright- Copyright notice only (no license text)none- No license header
Option 2: Use a custom license file
Provide your own license header from a file. Kubebuilder reads the content from your file and copies it to hack/boilerplate.go.txt:
# During initialization
kubebuilder init --domain example.com --license-file ./my-header.txt
# After initialization
kubebuilder edit --license-file ./my-header.txt
How it works:
- Kubebuilder reads your custom license file (can be any path)
- Copies the content to
hack/boilerplate.go.txt
Use this when you need:
- A license not available in the built-in templates
- A specific company license format
- Custom copyright notices
Option 3: Edit the file directly
After initialization, you can edit hack/boilerplate.go.txt directly:
vim hack/boilerplate.go.txt
Custom license file format
Your custom license file must include Go comment delimiters (/* and */).
Example (my-license-header.txt):
/*
Copyright YEAR Your Company Name.
Licensed under the MIT License.
See LICENSE file in the project root for full license text.
*/
Applying license changes to existing files
After updating hack/boilerplate.go.txt, choose how to apply the changes:
Regenerate Generated Code (Recommended):
make generate # Update DeepCopy methods
make manifests # Update CRDs, RBAC, webhooks
This updates generated code but keeps your hand-written files unchanged.
Regenerate Entire Project:
kubebuilder alpha generate
New Files Only: New files will automatically use the updated template:
kubebuilder create api --group myapp --version v1 --kind MyNewKind
Manual Updates:
For hand-written files, manually update headers using hack/boilerplate.go.txt as a reference.
How it is used
hack/boilerplate.go.txt is used when generating or regenerating files:
kubebuilder create apiandcreate webhook- new filesmake generate- DeepCopy methods, etc.make manifests- CRDs, RBAC, webhookskubebuilder alpha generate- entire project
All tools automatically reference hack/boilerplate.go.txt. The Makefile is already configured - no changes needed.
Examples
Example 1: Apache 2.0 License (Default)
Use the built-in Apache 2.0 license:
kubebuilder init --domain example.com --license apache2 --owner "Your Company"
This generates:
/*
Copyright YEAR Your Company.
Licensed under the Apache License, Version 2.0 (the "License");
you may not use this file except in compliance with the License.
You may obtain a copy of the License at
http://www.apache.org/licenses/LICENSE-2.0
Unless required by applicable law or agreed to in writing, software
distributed under the License is distributed on an "AS IS" BASIS,
WITHOUT WARRANTIES OR CONDITIONS OF ANY KIND, either express or implied.
See the License for the specific language governing permissions and
limitations under the License.
*/
Example 2: Copyright Only
Use the built-in copyright license for just a copyright notice:
kubebuilder init --domain example.com --license copyright --owner "Your Company"
This generates:
/*
Copyright YEAR Your Company.
*/
Example 3: Custom License (MIT)
For licenses not built-in, create a custom file mit-header.txt:
/*
Copyright YEAR Your Name.
Permission is hereby granted, free of charge, to any person obtaining a copy
of this software and associated documentation files (the "Software"), to deal
in the Software without restriction, including without limitation the rights
to use, copy, modify, merge, publish, distribute, sublicense, and/or sell
copies of the Software, and to permit persons to whom the Software is
furnished to do so, subject to the following conditions:
The above copyright notice and this permission notice shall be included in
all copies or substantial portions of the Software.
THE SOFTWARE IS PROVIDED "AS IS", WITHOUT WARRANTY OF ANY KIND, EXPRESS OR
IMPLIED, INCLUDING BUT NOT LIMITED TO THE WARRANTIES OF MERCHANTABILITY,
FITNESS FOR A PARTICULAR PURPOSE AND NONINFRINGEMENT. IN NO EVENT SHALL THE
AUTHORS OR COPYRIGHT HOLDERS BE LIABLE FOR ANY CLAIM, DAMAGES OR OTHER
LIABILITY, WHETHER IN AN ACTION OF CONTRACT, TORT OR OTHERWISE, ARISING FROM,
OUT OF OR IN CONNECTION WITH THE SOFTWARE OR THE USE OR OTHER DEALINGS IN THE
SOFTWARE.
*/
Then initialize your project:
kubebuilder init --domain example.com --license-file ./mit-header.txt
What happens:
- Kubebuilder reads the content from
./mit-header.txt - Creates
hack/boilerplate.go.txtwith that content hack/boilerplate.go.txtbecomes the source of truth for all generated files
Related
- Good Practices - Best practices for project structure
- Generating CRDs - How CRDs are generated with headers
- controller-gen CLI - Details on code generation
Creating events
It is often useful to publish Event objects from the controller Reconcile function as they allow users or any automated processes to see what is going on with a particular object and respond to them.
Recent Events for an object can be viewed by running $ kubectl describe <resource kind> <resource name>. Also, they can be checked by running $ kubectl get events.
Watching resources
When extending the Kubernetes API, ensure that your solutions behave consistently with Kubernetes itself.
For example, consider a Deployment resource, which a controller manages. This controller is responsible
for responding to changes in the cluster—such as when you create, update, or delete a Deployment—by triggering
reconciliation to ensure the resource’s state matches the desired state.
Similarly, when developing controllers, watch for relevant changes in resources that are crucial to your solution. These changes—whether creations, updates, or deletions—should trigger the reconciliation loop to take appropriate actions and maintain consistency across the cluster.
The controller-runtime library provides several ways to watch and manage resources.
Primary resources
The Primary Resource is the resource that your controller is responsible
for managing. For example, if you create a custom resource definition (CRD) for MyApp,
the corresponding controller is responsible for managing instances of MyApp.
In this case, MyApp is the Primary Resource for that controller, and your controller’s
reconciliation loop focuses on ensuring the desired state of these primary resources is maintained.
When you create a new API using Kubebuilder, the CLI scaffolds the following default code,
ensuring that the controller watches all relevant events—such as creations, updates, and
deletions—for (For()) the new API.
This setup guarantees that the system triggers the reconciliation loop whenever you create, update, or delete an instance of the API:
// Watches the primary resource (e.g., MyApp) for create, update, delete events
if err := ctrl.NewControllerManagedBy(mgr).
For(&<YourAPISpec>{}). <-- See there that the Controller is For this API
Complete(r); err != nil {
return err
}
Secondary resources
Your controller will likely also need to manage Secondary Resources, which are the resources required on the cluster to support the Primary Resource.
Changes to these Secondary Resources can directly impact the Primary Resource, so the controller must watch and reconcile these resources accordingly.
Which are owned by the controller
These Secondary Resources, such as Services, ConfigMaps, or Deployments,
when Owned by the controllers, the specific controller creates and manages them
and ties them to the Primary Resource via OwnerReferences.
For example, if you have a controller to manage your CR(s) of the Kind MyApp
on the cluster, which represents your application solution, all resources required
to ensure that MyApp is up and running with the desired number of instances
are Secondary Resources. The code responsible for creating, deleting,
and updating these resources is part of the MyApp Controller.
Add the appropriate OwnerReferences
using the controllerutil.SetControllerReference
function to indicate that these resources are owned by the same controller
responsible for managing MyApp instances, which the MyAppReconciler reconciles.
Additionally, if you delete the Primary Resource, Kubernetes’ garbage collection mechanism ensures that all associated Secondary Resources are automatically deleted in a cascading manner.
Which are NOT owned by the controller
Note that Secondary Resources can either be APIs/CRDs defined in your project or in other projects that are relevant to the Primary Resources, but which the specific controller is not responsible for creating or managing.
For example, if you have a CRD that represents a backup solution (i.e. MyBackup) for your MyApp,
it might need to watch changes in the MyApp resource to trigger reconciliation in MyBackup
to ensure the desired state. Similarly, MyApp’s behavior might also be impacted by
CRDs/APIs defined in other projects.
In both scenarios, these resources are treated as Secondary Resources, even if they are not Owned
(i.e., not created or managed) by the MyAppController.
In Kubebuilder, resources that are not defined in the project itself and are not a Core Type (those not defined in the Kubernetes API) are called External Types.
An External Type refers to a resource that is not defined in your
project but one that you need to watch and respond to.
For example, if Operator A manages a MyApp CRD for application deployment,
and Operator B handles backups, Operator B can watch the MyApp CRD as an external type
to trigger backup operations based on changes in MyApp.
In this scenario, Operator B could define a BackupConfig CRD that relies on the state of MyApp.
By treating MyApp as a Secondary Resource, Operator B can watch and reconcile changes in Operator A’s MyApp,
ensuring that the controller initiates backup processes whenever you update or scale MyApp.
General concept of watching resources
Whether you define a resource within your project or it comes from an external project, the concept of Primary and Secondary Resources remains the same:
- The Primary Resource is the resource the controller is primarily responsible for managing.
- Secondary Resources are those that you need to ensure the primary resource works as desired.
Therefore, regardless of whether your project or another project defined the resource, your controller can watch, reconcile, and manage changes to these resources as needed.
Why does watching the secondary resources matter?
When building a Kubernetes controller, it is crucial to not only focus on Primary Resources but also to monitor Secondary Resources. Failing to track these resources can lead to inconsistencies in your controller’s behavior and the overall cluster state.
Secondary resources may not be directly managed by your controller, but changes to these resources can still significantly impact the primary resource and your controller’s functionality. Here are the key reasons why it is important to watch them:
-
Ensuring Consistency:
- Secondary resources (e.g., child objects or external dependencies) may diverge from their desired state. For instance, a secondary resource may be modified or deleted, causing the system to fall out of sync.
- Watching secondary resources ensures that any changes are detected immediately, allowing the controller to reconcile and restore the desired state.
-
Avoiding Random Self-Healing:
- Without watching secondary resources, the controller may “heal” itself only upon restart or when specific events trigger. This can cause unpredictable or delayed reactions to issues.
- Monitoring secondary resources ensures that inconsistencies are addressed promptly, rather than waiting for a controller restart or external event to trigger reconciliation.
-
Effective Lifecycle Management:
- Secondary resources might not be owned by the controller directly, but their state still impacts the behavior of primary resources. Without watching these, you risk leaving orphaned or outdated resources.
- Watching non-owned secondary resources lets the controller respond to lifecycle events (create, update, delete) that might affect the primary resource, ensuring consistent behavior across the system.
See Watching Secondary Resources That Are Not Owned for an example.
Why not use RequeueAfter X for all scenarios instead of watching resources?
Kubernetes controllers are fundamentally event-driven. When creating a controller,
the Reconciliation Loop is typically triggered by events such as create, update, or
delete actions on resources. This event-driven approach is more efficient and responsive
compared to constantly requeuing or polling resources using RequeueAfter. This ensures that
the system only takes action when necessary, maintaining both performance and efficiency.
In many cases, watching resources is the preferred approach for ensuring Kubernetes resources
remain in the desired state. It is more efficient, responsive, and aligns with Kubernetes’ event-driven architecture.
However, there are scenarios where RequeueAfter is appropriate and necessary, particularly for managing external
systems that do not emit events or for handling resources that take time to converge, such as long-running processes.
Relying solely on RequeueAfter for all scenarios can lead to unnecessary overhead and
delayed reactions. Therefore, it is essential to prioritize event-driven reconciliation by configuring
your controller to watch resources whenever possible, and reserving RequeueAfter for situations
where you need periodic checks.
When RequeueAfter X is useful
While RequeueAfter is not the primary method for triggering reconciliations, there are specific cases where it is
necessary, such as:
- Observing External Systems: When working with external resources that do not generate events
(e.g., external databases or third-party services),
RequeueAfterallows the controller to periodically check the status of these resources. - Time-Based Operations: Some tasks, such as rotating secrets or
renewing certificates, must happen at specific intervals.
RequeueAfterensures these operations are performed on schedule, even when no other changes occur. - Handling Errors or Delays: When managing resources that encounter errors or require time to self-heal,
RequeueAfterensures the controller waits for a specified duration before checking the resource’s status again, avoiding constant reconciliation attempts.
Usage of predicates
For more complex use cases, Predicates can be used to fine-tune when your controller should trigger reconciliation. Predicates allow you to filter events based on specific conditions, such as changes to particular fields, labels, or annotations, ensuring that your controller only responds to relevant events and operates efficiently.
Watching secondary resources Owned by the controller
In Kubernetes controllers, it’s common to manage both Primary Resources and Secondary Resources. A Primary Resource is the main resource that the controller is responsible for, while Secondary Resources are created and managed by the controller to support the Primary Resource.
This section explains how to manage Secondary Resources
which are Owned by the controller. This example shows how to:
- Set the Owner Reference between the primary resource (
Busybox) and the secondary resource (Deployment) to ensure proper lifecycle management. - Configure the controller to
Watchthe secondary resource usingOwns()inSetupWithManager(). See thatDeploymentis owned by theBusyboxcontroller because it is created and managed by it.
Setting the owner reference
To link the lifecycle of the secondary resource (Deployment)
to the primary resource (Busybox), set
an Owner Reference on the secondary resource.
This ensures that Kubernetes automatically handles cascading deletions:
if the primary resource is deleted, the secondary resource is also deleted.
Controller-runtime provides the controllerutil.SetControllerReference function, which you can use to set this relationship between the resources.
Setting the owner reference
Below, create the Deployment and set the Owner reference between the Busybox custom resource and the Deployment using controllerutil.SetControllerReference().
// deploymentForBusybox returns a Deployment object for Busybox
func (r *BusyboxReconciler) deploymentForBusybox(busybox *examplecomv1alpha1.Busybox) *appsv1.Deployment {
replicas := busybox.Spec.Size
dep := &appsv1.Deployment{
ObjectMeta: metav1.ObjectMeta{
Name: busybox.Name,
Namespace: busybox.Namespace,
},
Spec: appsv1.DeploymentSpec{
Replicas: &replicas,
Selector: &metav1.LabelSelector{
MatchLabels: map[string]string{"app": busybox.Name},
},
Template: metav1.PodTemplateSpec{
ObjectMeta: metav1.ObjectMeta{
Labels: map[string]string{"app": busybox.Name},
},
Spec: corev1.PodSpec{
Containers: []corev1.Container{
{
Name: "busybox",
Image: "busybox:latest",
},
},
},
},
},
}
// Set the ownerRef for the Deployment, ensuring that the Deployment
// is deleted when the Busybox CR is deleted.
controllerutil.SetControllerReference(busybox, dep, r.Scheme)
return dep
}
Explanation
By setting the OwnerReference, if the Busybox resource is deleted, Kubernetes will automatically delete
the Deployment as well. This also allows the controller to watch for changes in the Deployment
and ensure that the desired state (such as the number of replicas) is maintained.
For example, if someone modifies the Deployment to change the replica count to 3,
while the Busybox CR defines the desired state as 1 replica,
the controller reconciles this and ensures the Deployment
is scaled back to 1 replica.
Reconcile Function Example
// Reconcile handles the main reconciliation loop for Busybox and the Deployment
func (r *BusyboxReconciler) Reconcile(ctx context.Context, req ctrl.Request) (ctrl.Result, error) {
log := logf.FromContext(ctx)
// Fetch the Busybox instance
busybox := &examplecomv1alpha1.Busybox{}
if err := r.Get(ctx, req.NamespacedName, busybox); err != nil {
if apierrors.IsNotFound(err) {
log.Info("Busybox resource not found. Ignoring since it must be deleted")
return ctrl.Result{}, nil
}
log.Error(err, "Failed to get Busybox")
return ctrl.Result{}, err
}
// Check if the Deployment already exists, if not create a new one
found := &appsv1.Deployment{}
err := r.Get(ctx, types.NamespacedName{Name: busybox.Name, Namespace: busybox.Namespace}, found)
if err != nil && apierrors.IsNotFound(err) {
// Define a new Deployment
dep := r.deploymentForBusybox(busybox)
log.Info("Creating a new Deployment", "Deployment.Namespace", dep.Namespace, "Deployment.Name", dep.Name)
if err := r.Create(ctx, dep); err != nil {
log.Error(err, "Failed to create new Deployment", "Deployment.Namespace", dep.Namespace, "Deployment.Name", dep.Name)
return ctrl.Result{}, err
}
// Requeue the request to ensure the Deployment is created
return ctrl.Result{RequeueAfter: time.Minute}, nil
} else if err != nil {
log.Error(err, "Failed to get Deployment")
return ctrl.Result{}, err
}
// Ensure the Deployment size matches the desired state
size := busybox.Spec.Size
if *found.Spec.Replicas != size {
found.Spec.Replicas = &size
if err := r.Update(ctx, found); err != nil {
log.Error(err, "Failed to update Deployment size", "Deployment.Namespace", found.Namespace, "Deployment.Name", found.Name)
return ctrl.Result{}, err
}
// Requeue the request to ensure the correct state is achieved
return ctrl.Result{Requeue: true}, nil
}
// Update Busybox status to reflect that the Deployment is available
busybox.Status.AvailableReplicas = found.Status.AvailableReplicas
if err := r.Status().Update(ctx, busybox); err != nil {
log.Error(err, "Failed to update Busybox status")
return ctrl.Result{}, err
}
return ctrl.Result{}, nil
}
Watching secondary resources
To ensure that changes to the secondary resource (such as the Deployment) trigger
a reconciliation of the primary resource (Busybox), configure the controller
to watch both resources.
The Owns() method allows you to specify secondary resources
that the controller should monitor. This way, the controller
automatically reconciles the primary resource whenever the secondary
resource changes (e.g., is updated or deleted).
Example: Configuring SetupWithManager to watch secondary resources
// SetupWithManager sets up the controller with the Manager.
// The controller watches both the Busybox primary resource and the Deployment secondary resource.
func (r *BusyboxReconciler) SetupWithManager(mgr ctrl.Manager) error {
return ctrl.NewControllerManagedBy(mgr).
For(&examplecomv1alpha1.Busybox{}). // Watch the primary resource
Owns(&appsv1.Deployment{}). // Watch the secondary resource (Deployment)
Complete(r)
}
Ensuring the right permissions
Kubebuilder uses markers to define RBAC permissions
required by the controller. In order for the controller to
properly watch and manage both the primary (Busybox) and secondary (Deployment)
resources, it must have the appropriate permissions granted;
i.e. to watch, get, list, create, update, and delete permissions for those resources.
Example: RBAC markers
Before the Reconcile method, define the appropriate RBAC markers.
These markers are used by controller-gen to generate the necessary
roles and permissions when you run make manifests.
// +kubebuilder:rbac:groups=example.com,resources=busyboxes,verbs=get;list;watch;create;update;patch;delete
// +kubebuilder:rbac:groups=apps,resources=deployments,verbs=get;list;watch;create;update;patch;delete
- The first marker gives the controller permission to manage the
Busyboxcustom resource (the primary resource). - The second marker grants the controller permission to manage
Deploymentresources (the secondary resource).
Note that this grants permissions to watch the resources.
Watching secondary resources that are NOT Owned
In some scenarios, a controller may need to watch and respond to changes in
resources that it does not Own, meaning those resources are created and managed by
another controller.
The following examples demonstrate how a controller can monitor and reconcile resources
that it doesn’t directly manage. This applies to any resource not Owned by the controller,
including Core Types or Custom Resources managed by other controllers or projects
and reconciled in separate processes.
For instance, consider two custom resources—Busybox and BackupBusybox.
If changes to Busybox should trigger reconciliation in the BackupBusybox controller,
configure the BackupBusybox controller to watch for updates in Busybox.
Example: Watching a Non-Owned Busybox Resource to Reconcile BackupBusybox
Consider a controller that manages a custom resource BackupBusybox
but also needs to monitor changes to Busybox resources across the cluster.
Trigger reconciliation only when Busybox instances have the Backup
feature enabled.
- Why Watch Secondary Resources?
- The
BackupBusyboxcontroller is not responsible for creating or owningBusyboxresources, but changes in these resources (such as updates or deletions) directly affect the primary resource (BackupBusybox). - By watching
Busyboxinstances with a specific label, the controller ensures that the necessary actions (e.g., backups) are triggered only for the relevant resources.
- The
Configuration example
Here’s how to configure the BackupBusyboxReconciler to watch changes in the
Busybox resource and trigger reconciliation for BackupBusybox:
// SetupWithManager sets up the controller with the Manager.
// The controller watches both the BackupBusybox primary resource and the Busybox resource.
func (r *BackupBusyboxReconciler) SetupWithManager(mgr ctrl.Manager) error {
return ctrl.NewControllerManagedBy(mgr).
For(&examplecomv1alpha1.BackupBusybox{}). // Watch the primary resource (BackupBusybox)
Watches(
&examplecomv1alpha1.Busybox{}, // Watch the Busybox CR
handler.EnqueueRequestsFromMapFunc(func(ctx context.Context, obj client.Object) []reconcile.Request {
// Trigger reconciliation for the BackupBusybox in the same namespace
return []reconcile.Request{
{
NamespacedName: types.NamespacedName{
Name: "backupbusybox", // Reconcile the associated BackupBusybox resource
Namespace: obj.GetNamespace(), // Use the namespace of the changed Busybox
},
},
}
}),
). // Trigger reconciliation when the Busybox resource changes
Complete(r)
}
Here’s how to configure the controller to filter and watch
for changes to only those Busybox resources that have the specific label:
// SetupWithManager sets up the controller with the Manager.
// The controller watches both the BackupBusybox primary resource and the Busybox resource, filtering by a label.
func (r *BackupBusyboxReconciler) SetupWithManager(mgr ctrl.Manager) error {
return ctrl.NewControllerManagedBy(mgr).
For(&examplecomv1alpha1.BackupBusybox{}). // Watch the primary resource (BackupBusybox)
Watches(
&examplecomv1alpha1.Busybox{}, // Watch the Busybox CR
handler.EnqueueRequestsFromMapFunc(func(ctx context.Context, obj client.Object) []reconcile.Request {
// Check if the Busybox resource has the label 'backup-needed: "true"'
if val, ok := obj.GetLabels()["backup-enable"]; ok && val == "true" {
// If the label is present and set to "true", trigger reconciliation for BackupBusybox
return []reconcile.Request{
{
NamespacedName: types.NamespacedName{
Name: "backupbusybox", // Reconcile the associated BackupBusybox resource
Namespace: obj.GetNamespace(), // Use the namespace of the changed Busybox
},
},
}
}
// If the label is not present or does not match, do not trigger reconciliation
return []reconcile.Request{}
}),
). // Trigger reconciliation when the labeled Busybox resource changes
Complete(r)
}
Using predicates to refine watches
When working with controllers, it is often beneficial to use Predicates to filter events and control when the reconciliation loop should be triggered.
Predicates allow you to define conditions based on events (such as create, update, or delete) and resource fields (such as labels, annotations, or status fields). By using Predicates, you can refine your controller’s behavior to respond only to specific changes in the resources it watches.
This can be especially useful when you want to refine which changes in resources should trigger a reconciliation. By using predicates, you avoid unnecessary reconciliations and can ensure that the controller only reacts to relevant changes.
When to use predicates
Predicates are useful when:
- You want to ignore certain changes, such as updates that do not impact the fields your controller is concerned with.
- You want to trigger reconciliation only for resources with specific labels or annotations.
- You want to watch external resources and react only to specific changes.
Example: Using predicates to filter update events
Suppose the BackupBusybox controller should reconcile only
when certain fields of the Busybox resource change, for example, when
the spec.size field changes, but should ignore all other changes (such as status updates).
Defining a predicate
In the following example, define a predicate that only
allows reconciliation when there is a meaningful update
to the Busybox resource:
import (
"sigs.k8s.io/controller-runtime/pkg/predicate"
"sigs.k8s.io/controller-runtime/pkg/event"
)
// Predicate to trigger reconciliation only on size changes in the Busybox spec
updatePred := predicate.Funcs{
// Only allow updates when the spec.size of the Busybox resource changes
UpdateFunc: func(e event.UpdateEvent) bool {
oldObj := e.ObjectOld.(*examplecomv1alpha1.Busybox)
newObj := e.ObjectNew.(*examplecomv1alpha1.Busybox)
// Trigger reconciliation only if the spec.size field has changed
return oldObj.Spec.Size != newObj.Spec.Size
},
// Allow create events
CreateFunc: func(e event.CreateEvent) bool {
return true
},
// Allow delete events
DeleteFunc: func(e event.DeleteEvent) bool {
return true
},
// Allow generic events (e.g., external triggers)
GenericFunc: func(e event.GenericEvent) bool {
return true
},
}
Explanation
In this example:
- The
UpdateFuncreturnstrueonly if thespec.sizefield has changed between the old and new objects, meaning that all other changes in thespec, like annotations or other fields, are ignored. CreateFunc,DeleteFunc, andGenericFuncreturntrue, meaning that create, delete, and generic events are still processed, allowing reconciliation to happen for these event types.
This ensures that the controller reconciles only when the specific field spec.size is modified, while ignoring any other modifications in the spec that are irrelevant to your logic.
Example: Using predicates in Watches
Now, apply this predicate in the Watches() method of
the BackupBusyboxReconciler to trigger reconciliation only for relevant events:
// SetupWithManager sets up the controller with the Manager.
// The controller watches both the BackupBusybox primary resource and the Busybox resource, using predicates.
func (r *BackupBusyboxReconciler) SetupWithManager(mgr ctrl.Manager) error {
return ctrl.NewControllerManagedBy(mgr).
For(&examplecomv1alpha1.BackupBusybox{}). // Watch the primary resource (BackupBusybox)
Watches(
&examplecomv1alpha1.Busybox{}, // Watch the Busybox CR
handler.EnqueueRequestsFromMapFunc(func(ctx context.Context, obj client.Object) []reconcile.Request {
return []reconcile.Request{
{
NamespacedName: types.NamespacedName{
Name: "backupbusybox", // Reconcile the associated BackupBusybox resource
Namespace: obj.GetNamespace(), // Use the namespace of the changed Busybox
},
},
}
}),
builder.WithPredicates(updatePred), // Apply the predicate
). // Trigger reconciliation when the Busybox resource changes (if it meets predicate conditions)
Complete(r)
}
Explanation
builder.WithPredicates(updatePred): This method applies the predicate, ensuring that reconciliation only occurs when thespec.sizefield inBusyboxchanges.- Other Events: The controller will still trigger reconciliation on
Create,Delete, andGenericevents.
Using kind for development purposes and CI
Why use kind
- Fast Setup: Launch a multi-node Kubernetes cluster locally in under a minute.
- Quick Teardown: Dismantle the cluster in just a few seconds, streamlining your development workflow.
- Local Image Usage: Deploy your container images directly without the need to push to a remote registry.
- Lightweight and Efficient: Kind is a minimalistic Kubernetes distribution, making it perfect for local development and CI/CD pipelines.
This only cover the basics to use a kind cluster. You can find more details at kind documentation.
Installation
Follow the kind installation instructions to install kind.
Create a cluster
You can simply create a kind cluster by
kind create cluster
To customize your cluster, you can provide additional configuration.
For example, the following is a sample kind configuration.
kind: Cluster
apiVersion: kind.x-k8s.io/v1alpha4
nodes:
- role: control-plane
- role: worker
- role: worker
- role: worker
Using the configuration above, run the following command will give you a k8s v1.17.2 cluster with 1 control-plane node and 3 worker nodes.
kind create cluster --config hack/kind-config.yaml --image=kindest/node:v1.17.2
You can use the --image flag to specify the cluster version you want, e.g.
--image=kindest/node:v1.17.2. See the kind node images for supported versions.
Load docker image into the cluster
When developing with a local kind cluster, loading docker images to the cluster is a very useful feature. You can avoid using a container registry.
kind load docker-image your-image-name:your-tag
See Load a local image into a kind cluster for more information.
Delete a cluster
kind delete cluster
Webhook
Webhooks are requests for information sent in a blocking fashion. A web application implementing webhooks sends a HTTP request to other applications when a certain event happens.
In the Kubernetes world, there are 3 kinds of webhooks: admission webhook, authorization webhook and CRD conversion webhook.
In controller-runtime libraries, we support admission webhooks and CRD conversion webhooks.
Kubernetes supports these dynamic admission webhooks as of version 1.9 (when the feature entered beta).
Kubernetes supports the conversion webhooks as of version 1.15 (when the feature entered beta).
Admission webhooks
Admission webhooks are HTTP callbacks that receive admission requests, process them and return admission responses.
Kubernetes provides the following types of admission webhooks:
-
Mutating Admission Webhook: These can mutate the object while it is being created or updated, before it gets stored. It can be used to default fields in a resource requests, e.g. fields in Deployment that are not specified by the user. It can be used to inject sidecar containers.
-
Validating Admission Webhook: These can validate the object while it is being created or updated, before it gets stored. It allows more complex validation than pure schema-based validation. e.g. cross-field validation and pod image whitelisting.
The apiserver by default does not authenticate itself to the webhooks. However, if you want to authenticate the clients, you can configure the apiserver to use basic auth, bearer token, or a cert to authenticate itself to the webhooks. See the Kubernetes authentication documentation for detailed steps.
Custom webhook paths
By default, Kubebuilder generates webhook paths based on the resource’s group, version, and kind. For example:
- Mutating webhook for
batch/v1/CronJob:/mutate-batch-v1-cronjob - Validating webhook for
batch/v1/CronJob:/validate-batch-v1-cronjob
You can specify custom paths for webhooks using dedicated flags:
# Custom path for defaulting webhook
kubebuilder create webhook --group batch --version v1 --kind CronJob \
--defaulting --defaulting-path=/my-custom-mutate-path
# Custom path for validation webhook
kubebuilder create webhook --group batch --version v1 --kind CronJob \
--programmatic-validation --validation-path=/my-custom-validate-path
# Both webhooks with different custom paths
kubebuilder create webhook --group batch --version v1 --kind CronJob \
--defaulting --programmatic-validation \
--defaulting-path=/custom-mutate --validation-path=/custom-validate
Handling resource status in admission webhooks
Understanding why
Mutating admission webhooks
Mutating Admission Webhooks are primarily designed to intercept and modify requests concerning the creation, modification, or deletion of objects. Though they possess the capability to modify an object’s specification, directly altering its status is not deemed a standard practice, often leading to unintended results.
// MutatingWebhookConfiguration allows for modification of objects.
// However, direct modification of the status might result in unexpected behavior.
type MutatingWebhookConfiguration struct {
...
}
Setting initial status
For those diving into custom controllers for custom resources, it is imperative to grasp the concept of setting an initial status. This initialization typically takes place within the controller itself. The moment the controller identifies a new instance of its managed resource, primarily through a watch mechanism, it holds the authority to assign an initial status to that resource.
// Custom controller's reconcile function might look something like this:
func (r *ReconcileMyResource) Reconcile(request reconcile.Request) (reconcile.Result, error) {
// ...
// Upon discovering a new instance, set the initial status
instance.Status = SomeInitialStatus
// ...
}
Status subresource
Delving into Kubernetes custom resources, a clear demarcation exists between the spec (depicting the desired state)
and the status (illustrating the observed state). Activating the /status subresource for a custom resource definition
(CRD) bifurcates the status and spec, each assigned to its respective API endpoint.
This separation ensures that changes introduced by users, such as modifying the spec, and system-driven updates,
like status alterations, remain distinct. Leveraging a mutating webhook to tweak the status during a spec-modifying
operation might not pan out as expected, courtesy of this isolation.
apiVersion: apiextensions.k8s.io/v1
kind: CustomResourceDefinition
metadata:
name: myresources.mygroup.mydomain
spec:
...
subresources:
status: {} # Enables the /status subresource
Conclusion
While certain edge scenarios might allow a mutating webhook to seamlessly modify the status, treading this path is not a universally acclaimed or recommended strategy. Entrusting the controller logic with status updates remains the most advocated approach.
Webhook bootstrap problem
The problem
When you create a webhook for a core Kubernetes type (Pod, Deployment, Job, etc.), the webhook can block its own controller Pod from starting, causing a deployment deadlock.
Example command:
kubebuilder create webhook --group core --version v1 --kind Pod --programmatic-validation
Example scenario:
- You create a validating webhook for Pods
- You deploy your controller (which runs in a Pod)
- Kubernetes tries to create your controller Pod
- Your webhook intercepts this Pod creation
- The webhook server is not ready yet (it is inside the Pod being created)
- The Pod creation hangs waiting for webhook validation
- The webhook never starts because the Pod is blocked
Result: Deadlock. Your deployment fails.
When does this occur?
Core Kubernetes types
The bootstrap problem occurs when creating webhooks for built-in Kubernetes resources:
coregroup: Pod, Service, Namespace, ConfigMap, Secretappsgroup: Deployment, StatefulSet, DaemonSet, ReplicaSetbatchgroup: Job, CronJob- Other built-in types
Why? Your webhook validates the same type of resource that your controller deployment creates (typically Pods or Deployments).
Custom CRDs
The bootstrap problem does not occur with custom resource webhooks:
- Your webhook validates
MyResourceobjects - Your controller runs as a Pod
- Pods and MyResources are different types
- No circular dependency
How to fix
Configure your webhook to skip validating its own resources using either namespaceSelector or objectSelector.
Option 1: namespaceSelector (recommended)
Exclude the entire namespace where your webhook runs.
Step 1: Add label to the Namespace in config/manager/manager.yaml:
apiVersion: v1
kind: Namespace
metadata:
labels:
control-plane: controller-manager
app.kubernetes.io/name: my-project
app.kubernetes.io/managed-by: kustomize
webhook-excluded: "true"
name: system
Step 2: Create patch file config/webhook/namespaceselector_patch.yaml:
# For mutating webhooks (--defaulting)
- op: add
path: /webhooks/0/namespaceSelector
value:
matchExpressions:
- key: webhook-excluded
operator: DoesNotExist
For validating webhooks (--programmatic-validation), create a similar patch targeting ValidatingWebhookConfiguration.
Step 3: Add patch to config/webhook/kustomization.yaml:
resources:
- manifests.yaml
- service.yaml
patches:
- path: namespaceselector_patch.yaml
target:
group: admissionregistration.k8s.io
version: v1
kind: MutatingWebhookConfiguration
name: mutating-webhook-configuration
Step 4: Deploy:
make deploy IMG=<your-image>
Option 2: objectSelector
Exclude specific labeled Pods from webhook validation.
Step 1: Add label to Pods in config/manager/manager.yaml:
spec:
template:
metadata:
annotations:
kubectl.kubernetes.io/default-container: manager
labels:
control-plane: controller-manager
app.kubernetes.io/name: my-project
webhook-excluded: "true"
Step 2-4: Same as Option 1, but use objectSelector instead of namespaceSelector in the patch file.
Multiple webhooks
If you created webhooks for multiple core types (e.g., Pod and Deployment), you’ll have multiple webhook entries.
Check webhook count:
make manifests
grep " name: m" config/webhook/manifests.yaml # Count mutating webhooks
grep " name: v" config/webhook/manifests.yaml # Count validating webhooks
Example output:
name: mpod-v1.kb.io # Index 0
name: mdeployment-v1.kb.io # Index 1
Add patches for all indices in your patch file:
- op: add
path: /webhooks/0/namespaceSelector
value:
matchExpressions:
- key: webhook-excluded
operator: DoesNotExist
- op: add
path: /webhooks/1/namespaceSelector
value:
matchExpressions:
- key: webhook-excluded
operator: DoesNotExist
Mixed webhooks (CRD + core types)
If you have both custom CRD webhooks and core type webhooks:
- CRD webhooks appear first in the configuration
- Core type webhooks appear after
- Count all webhooks and add patches for the indices of your core type webhooks
Example: If you have 1 CRD webhook (index 0) and 1 core type webhook (index 1), your patch should target index 1:
- op: add
path: /webhooks/1/namespaceSelector
value:
matchExpressions:
- key: webhook-excluded
operator: DoesNotExist
Choosing between namespaceSelector and objectSelector
| Feature | namespaceSelector | objectSelector |
|---|---|---|
| Excludes | Entire namespace | Specific pods |
| Scope | Broad | Fine-grained |
| Best for | Dedicated webhook namespace | Shared namespace |
| Complexity | Simple | More targeted |
Recommendation: Use namespaceSelector unless you need fine-grained control.
References
- Kubernetes Admission Webhook Best Practices
- namespaceSelector API Reference
- objectSelector API Reference
Markers for config/code generation
Kubebuilder makes use of a tool called controller-gen for generating utility code and Kubernetes YAML. This code and config generation is controlled by the presence of special “marker comments” in Go code.
Markers are single-line comments that start with a plus, followed by a marker name, optionally followed by some marker specific configuration:
// +kubebuilder:validation:Optional
// +kubebuilder:validation:MaxItems=2
// +kubebuilder:printcolumn:JSONPath=".status.replicas",name=Replicas,type=string
See each subsection for information about different types of code and YAML generation.
Generating code & artifacts in Kubebuilder
Kubebuilder projects have two make targets that make use of
controller-gen:
-
make manifestsgenerates Kubernetes object YAML, like CustomResourceDefinitions, WebhookConfigurations, and RBAC roles. When Server-Side Apply is enabled, it also generates ApplyConfiguration types. -
make generategenerates code, like runtime.Object/DeepCopy implementations.
See Generating CRDs for a comprehensive overview.
Marker syntax
Exact syntax is described in the godocs for controller-tools.
In general, markers may either be:
-
Empty (
+kubebuilder:validation:Optional): empty markers are like boolean flags on the command line – just specifying them enables some behavior. -
Anonymous (
+kubebuilder:validation:MaxItems=2): anonymous markers take a single value as their argument. -
Multi-option (
+kubebuilder:printcolumn:JSONPath=".status.replicas",name=Replicas,type=string): multi-option markers take one or more named arguments. The first argument is separated from the name by a colon, and latter arguments are comma-separated. Order of arguments does not matter. Some arguments may be optional.
Marker arguments may be strings, ints, bools, slices, or maps thereof. Strings, ints, and bools follow their Go syntax:
// +kubebuilder:validation:ExclusiveMaximum=false
// +kubebuilder:validation:Format="date-time"
// +kubebuilder:validation:Maximum=42
For convenience, in simple cases the quotes may be omitted from strings, although this is not encouraged for anything other than single-word strings:
// +kubebuilder:validation:Type=string
Slices may be specified either by surrounding them with curly braces and separating with commas:
// +kubebuilder:webhooks:Enum={"crackers, Gromit, we forgot the crackers!","not even wensleydale?"}
or, in simple cases, by separating with semicolons:
// +kubebuilder:validation:Enum=Wallace;Gromit;Chicken
Maps are specified with string keys and values of any type (effectively
map[string]interface{}). A map is surrounded by curly braces ({}),
each key and value is separated by a colon (:), and each key-value
pair is separated by a comma:
// +kubebuilder:default={magic: {numero: 42, stringified: forty-two}}
CRD Generation
These markers describe how to construct a custom resource definition from a series of Go types and packages. Generation of the actual validation schema is described by the validation markers.
See Generating CRDs for examples.
- // +versionName
-
- string
overrides the API group version for this package (defaults to the package name). Example: +versionName=v1beta1
- string
- // +kubebuilder:unservedversion
-
does not serve this version.
This is useful if you need to drop support for a version in favor of a newer version. The version will still be stored in etcd if it's the storage version, but won't be served via the API.
Example:
// +kubebuilder:unservedversion type MyCRDv1alpha1 struct { // This version is no longer served }- // +kubebuilder:subresource:status
-
enables the "/status" subresource on a CRD.
The status subresource allows you to update the status field separately from the rest of the resource spec, and prevents updates to the status subresource when updating the root object. This is useful for separating user-provided spec from system-provided status.
Example:
// +kubebuilder:subresource:status type MyCRD struct { metav1.TypeMeta metav1.ObjectMeta Spec MyCRDSpec Status MyCRDStatus }- // +kubebuilder:subresource:scale
-
- selectorpath
- string
- specpath
- string
- statuspath
- string
enables the "/scale" subresource on a CRD.
The scale subresource allows you to use
kubectl scaleand the HorizontalPodAutoscaler with your CRD.Example:
// +kubebuilder:subresource:scale:specpath=.spec.replicas,statuspath=.status.replicas,selectorpath=.status.selector type MyCRD struct { metav1.TypeMeta metav1.ObjectMeta Spec MyCRDSpec Status MyCRDStatus }- selectorpath
- string
specifies the jsonpath to the pod label selector field for the scale's status.
The selector field must be the string form (serialized form) of a selector. Setting a pod label selector is necessary for your type to work with the HorizontalPodAutoscaler. This is typically .status.selector.
- specpath
- string
specifies the jsonpath to the replicas field for the scale's spec.
This is where the desired number of replicas is stored (typically .spec.replicas).
- statuspath
- string
specifies the jsonpath to the replicas field for the scale's status.
This is where the actual number of replicas is stored (typically .status.replicas).
- // +kubebuilder:storageversion
-
marks this version as the "storage version" for the CRD for conversion.
When conversion is enabled for a CRD (i.e. it's not a trivial-versions/single-version CRD), one version is set as the "storage version" to be stored in etcd. Attempting to store any other version will result in conversion to the storage version via a conversion webhook.
Example:
// +kubebuilder:storageversion type MyCRDv2 struct { metav1.TypeMeta metav1.ObjectMeta Spec MyCRDSpec }- // +kubebuilder:skipversion
-
removes the particular version of the CRD from the CRDs spec.
This is useful if you need to skip generating and listing version entries for 'internal' resource versions, which typically exist if using the Kubernetes upstream conversion-gen tool.
Example:
// +kubebuilder:skipversion type MyCRDInternal struct { // internal version not served by API }- // +kubebuilder:skip
-
don't consider this package as an API version. Use this to exclude internal or helper packages from CRD generation.
- // +kubebuilder:selectablefield
-
- JSONPath
- string
adds a field that may be used with field selectors.
Field selectors allow users to filter resources based on field values when listing. For example,
kubectl get mycrds --field-selector status.phase=Running.Example:
// +kubebuilder:selectablefield:JSONPath=".status.phase" type MyCRD struct { metav1.TypeMeta metav1.ObjectMeta Status MyCRDStatus }- JSONPath
- string
specifies the jsonpath expression which is used to produce a field selector value.
The path is relative to the resource root. Example:
.status.phase.
- // +kubebuilder:resource
-
- categories
- string
- path
- string
- scope
- string
- shortName
- string
- singular
- string
configures naming and scope for a CRD.
Example:
// +kubebuilder:resource:path=mycrdplural,singular=mycrdsingular,shortName=mc;mcrd,categories=all,scope=Namespaced type MyCRD struct { metav1.TypeMeta metav1.ObjectMeta }- categories
- string
specifies which group aliases this resource is part of.
Group aliases are used to work with groups of resources at once. The most common one is "all" which covers about a third of the base resources in Kubernetes, and is generally used for "user-facing" resources. This allows users to run commands like
kubectl get allto include your CRD.- path
- string
specifies the plural "resource" for this CRD.
It generally corresponds to a plural, lower-cased version of the Kind. For example, if the Kind is "MyCRD", the path might be "mycrds". See https://book.kubebuilder.io/cronjob-tutorial/gvks.html.
- scope
- string
overrides the scope of the CRD (Cluster vs Namespaced).
Scope defaults to "Namespaced". Cluster-scoped ("Cluster") resources don't exist in namespaces and are accessible from anywhere in the cluster.
- shortName
- string
specifies aliases for this CRD.
Short names are often used when people have work with your resource over and over again. For instance, "rs" for "replicaset" or "crd" for customresourcedefinition. Multiple short names can be specified separated by semicolons.
- singular
- string
overrides the singular form of your resource.
The singular form is otherwise defaulted off the plural (path). This is used in API responses and
kubectloutput.
- // +kubebuilder:printcolumn
-
- JSONPath
- string
- description
- string
- format
- string
- name
- string
- priority
- int
- type
- string
adds a column to "kubectl get" output for this CRD.
This allows you to customize which columns are shown when users run
kubectl geton your CRD.Example:
// +kubebuilder:printcolumn:name="Status",type=string,JSONPath=`.status.phase` // +kubebuilder:printcolumn:name="Age",type=date,JSONPath=`.metadata.creationTimestamp` type MyCRD struct { metav1.TypeMeta metav1.ObjectMeta }- JSONPath
- string
specifies the jsonpath expression used to extract the value of the column.
The path is relative to the resource root. Example:
.status.phaseor.spec.replicas.- description
- string
specifies optional help text for this column.
Display behavior is client-dependent; see CustomResourceColumnDefinition in the Kubernetes API docs.
- format
- string
specifies the format of the column.
It may be any OpenAPI data format corresponding to the type, listed at https://github.com/OAI/OpenAPI-Specification/blob/master/versions/2.0.md#data-types.
- name
- string
specifies the name of the column as it will appear in the header.
- priority
- int
indicates how important it is that this column be displayed.
Lower priority (higher numbered) columns will be hidden if the terminal width is too small. Priority 0 columns are always shown.
- type
- string
indicates the type of the column.
It may be any OpenAPI data type listed at https://github.com/OAI/OpenAPI-Specification/blob/master/versions/2.0.md#data-types. Common values: "string", "integer", "number", "boolean", "date".
- // +kubebuilder:metadata
-
- annotations
- string
- labels
- string
configures the additional annotations or labels for this CRD.
For example adding annotation "api-approved.kubernetes.io" for a CRD with Kubernetes groups, or annotation "cert-manager.io/inject-ca-from-secret" for a CRD that needs CA injection.
Example:
// +kubebuilder:metadata:annotations="api-approved.kubernetes.io/v1=https://github.com/myorg/myrepo/pull/123" // +kubebuilder:metadata:labels="app=myapp" type MyCRD struct { metav1.TypeMeta metav1.ObjectMeta }- annotations
- string
will be added into the annotations of this CRD.
Format: "key=value". Multiple annotations can be specified by repeating the marker.
- labels
- string
will be added into the labels of this CRD.
Format: "key=value". Multiple labels can be specified by repeating the marker.
- // +kubebuilder:externalDocs
-
- description
- string
- url
- string
specifies external documentation for this field or type.
The url is required and must be a valid URL. The description is optional and provides a short description of the external documentation.
- description
- string
is a short description of the target documentation.
- url
- string
specifies the URL for the target documentation.
- // +kubebuilder:deprecatedversion
-
- warning
- string
marks this version as deprecated.
Deprecated versions show a warning message when used. This is useful for communicating to users that they should migrate to a newer version.
Example:
// +kubebuilder:deprecatedversion:warning="v1alpha1 is deprecated; use v1 instead" type MyCRDv1alpha1 struct { metav1.TypeMeta metav1.ObjectMeta }- warning
- string
message to be shown on the deprecated version.
This message is displayed to users when they interact with the deprecated version.
- // +k8s:enum
-
indicates that the given type is an enum; all const values of this type are considered values in the enum
- // +groupName
-
- string
specifies the API group name for this package. Example: +groupName=mygroup.example.com
- string
CRD Validation
These markers modify how the CRD validation schema is produced for the types and fields they modify. Each corresponds roughly to an OpenAPI/JSON schema option.
See Generating CRDs for examples.
- // +required
-
specifies that this field is required.
- // +optional
-
specifies that this field is optional.
- // +nullable
-
marks this field as allowing the "null" value.
This is often not necessary, but may be helpful with custom serialization.
Example:
// +nullable Description *string- // +kubebuilder:validation:items:XValidation
-
- fieldPath
- string
- message
- string
- messageExpression
- string
- optionalOldSelf
- bool
- reason
- string
- rule
- string
for array items marks a field as requiring a value for which a given
expression evaluates to true.
This marker may be repeated to specify multiple expressions, all of which must evaluate to true.
Examples:
// Basic field validation // +kubebuilder:validation:XValidation:rule="self.minReplicas <= self.replicas && self.replicas <= self.maxReplicas",message="replicas must be between minReplicas and maxReplicas" // Validation with custom reason // +kubebuilder:validation:XValidation:rule="self.x <= self.maxX",message="x cannot be greater than maxX",reason="FieldValueInvalid" // Immutability check // +kubebuilder:validation:XValidation:rule="self == oldSelf",message="field is immutable"- fieldPath
- string
- message
- string
- messageExpression
- string
- optionalOldSelf
- bool
- reason
- string
- rule
- string
- // +kubebuilder:validation:items:XValidation
-
- fieldPath
- string
- message
- string
- messageExpression
- string
- optionalOldSelf
- bool
- reason
- string
- rule
- string
for array items marks a field as requiring a value for which a given
expression evaluates to true.
This marker may be repeated to specify multiple expressions, all of which must evaluate to true.
Examples:
// Basic field validation // +kubebuilder:validation:XValidation:rule="self.minReplicas <= self.replicas && self.replicas <= self.maxReplicas",message="replicas must be between minReplicas and maxReplicas" // Validation with custom reason // +kubebuilder:validation:XValidation:rule="self.x <= self.maxX",message="x cannot be greater than maxX",reason="FieldValueInvalid" // Immutability check // +kubebuilder:validation:XValidation:rule="self == oldSelf",message="field is immutable"- fieldPath
- string
- message
- string
- messageExpression
- string
- optionalOldSelf
- bool
- reason
- string
- rule
- string
- // +kubebuilder:validation:items:XIntOrString
-
for array items marks a fields as an IntOrString.
This is required when applying patterns or other validations to an IntOrString field. Known information about the type is applied during the collapse phase and as such is not normally available during marker application.
Example:
// +kubebuilder:validation:XIntOrString // +kubebuilder:validation:Pattern="^(\\d+|\\d+%|)$" Port intstr.IntOrString- // +kubebuilder:validation:items:XIntOrString
-
for array items marks a fields as an IntOrString.
This is required when applying patterns or other validations to an IntOrString field. Known information about the type is applied during the collapse phase and as such is not normally available during marker application.
Example:
// +kubebuilder:validation:XIntOrString // +kubebuilder:validation:Pattern="^(\\d+|\\d+%|)$" Port intstr.IntOrString- // +kubebuilder:validation:items:XEmbeddedResource
-
for array items marks a fields as an embedded resource with apiVersion, kind and metadata fields.
An embedded resource is a value that has apiVersion, kind and metadata fields. They are validated implicitly according to the semantics of the currently running apiserver. It is not necessary to add any additional schema for these field, yet it is possible. This can be combined with PreserveUnknownFields.
Example:
// +kubebuilder:validation:EmbeddedResource Template runtime.RawExtension- // +kubebuilder:validation:items:XEmbeddedResource
-
for array items marks a fields as an embedded resource with apiVersion, kind and metadata fields.
An embedded resource is a value that has apiVersion, kind and metadata fields. They are validated implicitly according to the semantics of the currently running apiserver. It is not necessary to add any additional schema for these field, yet it is possible. This can be combined with PreserveUnknownFields.
Example:
// +kubebuilder:validation:EmbeddedResource Template runtime.RawExtension- // +kubebuilder:validation:items:UniqueItems
-
- bool
for array items specifies that all items in this list must be unique.
Example:
// +kubebuilder:validation:UniqueItems=true Tags []string- bool
- // +kubebuilder:validation:items:UniqueItems
-
- bool
for array items specifies that all items in this list must be unique.
Example:
// +kubebuilder:validation:UniqueItems=true Tags []string- bool
- // +kubebuilder:validation:items:Type
-
- string
for array items overrides the type for this field (which defaults to the equivalent of the Go type).
This generally must be paired with custom serialization. For example, the metav1.Time field would be marked as "type: string" and "format: date-time".
Common types include: "string", "number", "integer", "boolean", "array", "object".
Example:
// +kubebuilder:validation:Type=string // +kubebuilder:validation:Format=date-time Time metav1.Time- string
- // +kubebuilder:validation:items:Pattern
-
- string
for array items specifies that this string must match the given regular expression.
Example (DNS subdomain):
// +kubebuilder:validation:Pattern=`^[a-z0-9]([-a-z0-9]*[a-z0-9])?(\.[a-z0-9]([-a-z0-9]*[a-z0-9])?)*$` DNSName string- string
- // +kubebuilder:validation:items:Pattern
-
- string
for array items specifies that this string must match the given regular expression.
Example (DNS subdomain):
// +kubebuilder:validation:Pattern=`^[a-z0-9]([-a-z0-9]*[a-z0-9])?(\.[a-z0-9]([-a-z0-9]*[a-z0-9])?)*$` DNSName string- string
- // +kubebuilder:validation:items:MultipleOf
-
for array items specifies that this field must have a numeric value that's a multiple of this one.
Example (value must be a multiple of 5):
// +kubebuilder:validation:MultipleOf=5 Count int32- // +kubebuilder:validation:items:MultipleOf
-
for array items specifies that this field must have a numeric value that's a multiple of this one.
Example (value must be a multiple of 5):
// +kubebuilder:validation:MultipleOf=5 Count int32- // +kubebuilder:validation:items:Minimum
-
for array items specifies the minimum numeric value that this field can have. Negative numbers are supported.
Example:
// +kubebuilder:validation:Minimum=0 Replicas int32- // +kubebuilder:validation:items:Minimum
-
for array items specifies the minimum numeric value that this field can have. Negative numbers are supported.
Example:
// +kubebuilder:validation:Minimum=0 Replicas int32- // +kubebuilder:validation:items:MinProperties
-
- int
for array items restricts the number of keys in an object
Example:
// +kubebuilder:validation:MinProperties=1 Metadata map[string]string- int
- // +kubebuilder:validation:items:MinProperties
-
- int
for array items restricts the number of keys in an object
Example:
// +kubebuilder:validation:MinProperties=1 Metadata map[string]string- int
- // +kubebuilder:validation:items:MinLength
-
- int
for array items specifies the minimum length for this string.
Example:
// +kubebuilder:validation:MinLength=1 Name string- int
- // +kubebuilder:validation:items:MinLength
-
- int
for array items specifies the minimum length for this string.
Example:
// +kubebuilder:validation:MinLength=1 Name string- int
- // +kubebuilder:validation:items:MinItems
-
- int
for array items specifies the minimum length for this list.
Example:
// +kubebuilder:validation:MinItems=1 Endpoints []string- int
- // +kubebuilder:validation:items:MinItems
-
- int
for array items specifies the minimum length for this list.
Example:
// +kubebuilder:validation:MinItems=1 Endpoints []string- int
- // +kubebuilder:validation:items:Maximum
-
for array items specifies the maximum numeric value that this field can have.
Example:
// +kubebuilder:validation:Maximum=100 Percentage int32- // +kubebuilder:validation:items:Maximum
-
for array items specifies the maximum numeric value that this field can have.
Example:
// +kubebuilder:validation:Maximum=100 Percentage int32- // +kubebuilder:validation:items:MaxProperties
-
- int
for array items restricts the number of keys in an object
Example:
// +kubebuilder:validation:MaxProperties=10 Labels map[string]string- int
- // +kubebuilder:validation:items:MaxProperties
-
- int
for array items restricts the number of keys in an object
Example:
// +kubebuilder:validation:MaxProperties=10 Labels map[string]string- int
- // +kubebuilder:validation:items:MaxLength
-
- int
for array items specifies the maximum length for this string.
Example:
// +kubebuilder:validation:MaxLength=64 Name string- int
- // +kubebuilder:validation:items:MaxLength
-
- int
for array items specifies the maximum length for this string.
Example:
// +kubebuilder:validation:MaxLength=64 Name string- int
- // +kubebuilder:validation:items:MaxItems
-
- int
for array items specifies the maximum length for this list.
Example:
// +kubebuilder:validation:MaxItems=10 Items []string- int
- // +kubebuilder:validation:items:MaxItems
-
- int
for array items specifies the maximum length for this list.
Example:
// +kubebuilder:validation:MaxItems=10 Items []string- int
- // +kubebuilder:validation:items:Format
-
- string
for array items specifies additional "complex" formatting for this field.
For example, a date-time field would be marked as "type: string" and "format: date-time".
Common formats include: "int32", "int64", "float", "double", "byte", "date", "date-time", "password".
Example:
// +kubebuilder:validation:Format=date-time CreatedAt string- string
- // +kubebuilder:validation:items:ExclusiveMinimum
-
- bool
for array items indicates that the minimum is "up to" but not including that value.
Example (value must be greater than 0, not greater than or equal to 0):
// +kubebuilder:validation:Minimum=0 // +kubebuilder:validation:ExclusiveMinimum=true PositiveNumber float64- bool
- // +kubebuilder:validation:items:ExclusiveMaximum
-
- bool
for array items indicates that the maximum is "up to" but not including that value.
Example (value must be less than 100, not less than or equal to 100):
// +kubebuilder:validation:Maximum=100 // +kubebuilder:validation:ExclusiveMaximum=true Percentage float64- bool
- // +kubebuilder:validation:items:Enum
-
- any
for array items specifies that this (scalar) field is restricted to the *exact* values specified here.
Example:
// +kubebuilder:validation:Enum=ClusterIP;NodePort;LoadBalancer ServiceType string- any
- // +kubebuilder:validation:items:Enum
-
- any
for array items specifies that this (scalar) field is restricted to the *exact* values specified here.
Example:
// +kubebuilder:validation:Enum=ClusterIP;NodePort;LoadBalancer ServiceType string- any
- // +kubebuilder:validation:XValidation
-
- fieldPath
- string
- message
- string
- messageExpression
- string
- optionalOldSelf
- bool
- reason
- string
- rule
- string
marks a field as requiring a value for which a given
expression evaluates to true.
This marker may be repeated to specify multiple expressions, all of which must evaluate to true.
Examples:
// Basic field validation // +kubebuilder:validation:XValidation:rule="self.minReplicas <= self.replicas && self.replicas <= self.maxReplicas",message="replicas must be between minReplicas and maxReplicas" // Validation with custom reason // +kubebuilder:validation:XValidation:rule="self.x <= self.maxX",message="x cannot be greater than maxX",reason="FieldValueInvalid" // Immutability check // +kubebuilder:validation:XValidation:rule="self == oldSelf",message="field is immutable"- fieldPath
- string
- message
- string
- messageExpression
- string
- optionalOldSelf
- bool
- reason
- string
- rule
- string
- // +kubebuilder:validation:XIntOrString
-
marks a fields as an IntOrString.
This is required when applying patterns or other validations to an IntOrString field. Known information about the type is applied during the collapse phase and as such is not normally available during marker application.
Example:
// +kubebuilder:validation:XIntOrString // +kubebuilder:validation:Pattern="^(\\d+|\\d+%|)$" Port intstr.IntOrString- // +kubebuilder:validation:XIntOrString
-
marks a fields as an IntOrString.
This is required when applying patterns or other validations to an IntOrString field. Known information about the type is applied during the collapse phase and as such is not normally available during marker application.
Example:
// +kubebuilder:validation:XIntOrString // +kubebuilder:validation:Pattern="^(\\d+|\\d+%|)$" Port intstr.IntOrString- // +kubebuilder:validation:XEmbeddedResource
-
marks a fields as an embedded resource with apiVersion, kind and metadata fields.
An embedded resource is a value that has apiVersion, kind and metadata fields. They are validated implicitly according to the semantics of the currently running apiserver. It is not necessary to add any additional schema for these field, yet it is possible. This can be combined with PreserveUnknownFields.
Example:
// +kubebuilder:validation:EmbeddedResource Template runtime.RawExtension- // +kubebuilder:validation:XEmbeddedResource
-
marks a fields as an embedded resource with apiVersion, kind and metadata fields.
An embedded resource is a value that has apiVersion, kind and metadata fields. They are validated implicitly according to the semantics of the currently running apiserver. It is not necessary to add any additional schema for these field, yet it is possible. This can be combined with PreserveUnknownFields.
Example:
// +kubebuilder:validation:EmbeddedResource Template runtime.RawExtension- // +kubebuilder:validation:UniqueItems
-
- bool
specifies that all items in this list must be unique.
Example:
// +kubebuilder:validation:UniqueItems=true Tags []string- bool
- // +kubebuilder:validation:UniqueItems
-
- bool
specifies that all items in this list must be unique.
Example:
// +kubebuilder:validation:UniqueItems=true Tags []string- bool
- // +kubebuilder:validation:Type
-
- string
overrides the type for this field (which defaults to the equivalent of the Go type).
This generally must be paired with custom serialization. For example, the metav1.Time field would be marked as "type: string" and "format: date-time".
Common types include: "string", "number", "integer", "boolean", "array", "object".
Example:
// +kubebuilder:validation:Type=string // +kubebuilder:validation:Format=date-time Time metav1.Time- string
- // +kubebuilder:validation:Schemaless
-
marks a field as being a schemaless object.
Schemaless objects are not introspected, so you must provide any type and validation information yourself. One use for this tag is for embedding fields that hold JSONSchema typed objects. Because this field disables all type checking, it is recommended to be used only as a last resort.
Example:
// +kubebuilder:validation:Schemaless JSONSchema apiextensionsv1.JSONSchemaProps- // +kubebuilder:validation:Required
-
specifies that all fields in this package are required by default.
- // +kubebuilder:validation:Required
-
specifies that this field is required.
- // +kubebuilder:validation:Pattern
-
- string
specifies that this string must match the given regular expression.
Example (DNS subdomain):
// +kubebuilder:validation:Pattern=`^[a-z0-9]([-a-z0-9]*[a-z0-9])?(\.[a-z0-9]([-a-z0-9]*[a-z0-9])?)*$` DNSName string- string
- // +kubebuilder:validation:Pattern
-
- string
specifies that this string must match the given regular expression.
Example (DNS subdomain):
// +kubebuilder:validation:Pattern=`^[a-z0-9]([-a-z0-9]*[a-z0-9])?(\.[a-z0-9]([-a-z0-9]*[a-z0-9])?)*$` DNSName string- string
- // +kubebuilder:validation:Optional
-
specifies that all fields in this package are optional by default.
- // +kubebuilder:validation:Optional
-
specifies that this field is optional.
- // +kubebuilder:validation:MultipleOf
-
specifies that this field must have a numeric value that's a multiple of this one.
Example (value must be a multiple of 5):
// +kubebuilder:validation:MultipleOf=5 Count int32- // +kubebuilder:validation:MultipleOf
-
specifies that this field must have a numeric value that's a multiple of this one.
Example (value must be a multiple of 5):
// +kubebuilder:validation:MultipleOf=5 Count int32- // +kubebuilder:validation:Minimum
-
specifies the minimum numeric value that this field can have. Negative numbers are supported.
Example:
// +kubebuilder:validation:Minimum=0 Replicas int32- // +kubebuilder:validation:Minimum
-
specifies the minimum numeric value that this field can have. Negative numbers are supported.
Example:
// +kubebuilder:validation:Minimum=0 Replicas int32- // +kubebuilder:validation:MinProperties
-
- int
restricts the number of keys in an object
Example:
// +kubebuilder:validation:MinProperties=1 Metadata map[string]string- int
- // +kubebuilder:validation:MinProperties
-
- int
restricts the number of keys in an object
Example:
// +kubebuilder:validation:MinProperties=1 Metadata map[string]string- int
- // +kubebuilder:validation:MinLength
-
- int
specifies the minimum length for this string.
Example:
// +kubebuilder:validation:MinLength=1 Name string- int
- // +kubebuilder:validation:MinLength
-
- int
specifies the minimum length for this string.
Example:
// +kubebuilder:validation:MinLength=1 Name string- int
- // +kubebuilder:validation:MinItems
-
- int
specifies the minimum length for this list.
Example:
// +kubebuilder:validation:MinItems=1 Endpoints []string- int
- // +kubebuilder:validation:MinItems
-
- int
specifies the minimum length for this list.
Example:
// +kubebuilder:validation:MinItems=1 Endpoints []string- int
- // +kubebuilder:validation:Maximum
-
specifies the maximum numeric value that this field can have.
Example:
// +kubebuilder:validation:Maximum=100 Percentage int32- // +kubebuilder:validation:Maximum
-
specifies the maximum numeric value that this field can have.
Example:
// +kubebuilder:validation:Maximum=100 Percentage int32- // +kubebuilder:validation:MaxProperties
-
- int
restricts the number of keys in an object
Example:
// +kubebuilder:validation:MaxProperties=10 Labels map[string]string- int
- // +kubebuilder:validation:MaxProperties
-
- int
restricts the number of keys in an object
Example:
// +kubebuilder:validation:MaxProperties=10 Labels map[string]string- int
- // +kubebuilder:validation:MaxLength
-
- int
specifies the maximum length for this string.
Example:
// +kubebuilder:validation:MaxLength=64 Name string- int
- // +kubebuilder:validation:MaxLength
-
- int
specifies the maximum length for this string.
Example:
// +kubebuilder:validation:MaxLength=64 Name string- int
- // +kubebuilder:validation:MaxItems
-
- int
specifies the maximum length for this list.
Example:
// +kubebuilder:validation:MaxItems=10 Items []string- int
- // +kubebuilder:validation:MaxItems
-
- int
specifies the maximum length for this list.
Example:
// +kubebuilder:validation:MaxItems=10 Items []string- int
- // +kubebuilder:validation:Format
-
- string
specifies additional "complex" formatting for this field.
For example, a date-time field would be marked as "type: string" and "format: date-time".
Common formats include: "int32", "int64", "float", "double", "byte", "date", "date-time", "password".
Example:
// +kubebuilder:validation:Format=date-time CreatedAt string- string
- // +kubebuilder:validation:ExclusiveMinimum
-
- bool
indicates that the minimum is "up to" but not including that value.
Example (value must be greater than 0, not greater than or equal to 0):
// +kubebuilder:validation:Minimum=0 // +kubebuilder:validation:ExclusiveMinimum=true PositiveNumber float64- bool
- // +kubebuilder:validation:ExclusiveMaximum
-
- bool
indicates that the maximum is "up to" but not including that value.
Example (value must be less than 100, not less than or equal to 100):
// +kubebuilder:validation:Maximum=100 // +kubebuilder:validation:ExclusiveMaximum=true Percentage float64- bool
- // +kubebuilder:validation:ExactlyOneOf
-
- string
specifies a list of field names that must conform to the ExactlyOneOf constraint.
- string
- // +kubebuilder:validation:Enum
-
- any
specifies that this (scalar) field is restricted to the *exact* values specified here.
Example:
// +kubebuilder:validation:Enum=ClusterIP;NodePort;LoadBalancer ServiceType string- any
- // +kubebuilder:validation:Enum
-
- any
specifies that this (scalar) field is restricted to the *exact* values specified here.
Example:
// +kubebuilder:validation:Enum=ClusterIP;NodePort;LoadBalancer ServiceType string- any
- // +kubebuilder:validation:EmbeddedResource
-
marks a fields as an embedded resource with apiVersion, kind and metadata fields.
An embedded resource is a value that has apiVersion, kind and metadata fields. They are validated implicitly according to the semantics of the currently running apiserver. It is not necessary to add any additional schema for these field, yet it is possible. This can be combined with PreserveUnknownFields.
Example:
// +kubebuilder:validation:EmbeddedResource Template runtime.RawExtension- // +kubebuilder:validation:AtMostOneOf
-
- string
specifies a list of field names that must conform to the AtMostOneOf constraint.
- string
- // +kubebuilder:validation:AtLeastOneOf
-
- string
specifies a list of field names that must conform to the AtLeastOneOf constraint.
- string
- // +kubebuilder:title
-
- any
sets the title for this field.
The title is metadata that makes the OpenAPI documentation more user-friendly, making the schema more understandable when viewed in documentation tools. It's a metadata field that doesn't affect validation but provides important context about what the schema represents.
Examples:
// Simple title // +kubebuilder:title="Replica Count" Replicas int32 // Descriptive title // +kubebuilder:title="Database Connection Configuration" DatabaseConfig DatabaseConfig- any
is the title text to be shown in OpenAPI documentation.
- // +kubebuilder:example
-
- any
sets the example value for this field.
An example value will be accepted as any value valid for the field. Formatting for common types include: boolean:
true, string:Cluster, numerical:1.24, array:{1,2}, object:{policy: "delete"}). Examples should be defined in pruned form, and only best-effort validation will be performed. Full validation of an example requires submission of the containing CRD to an apiserver.Examples are shown in API documentation to help users understand the expected format.
Usage Examples:
// String example // +kubebuilder:example="my-service" ServiceName string // Integer example // +kubebuilder:example=5 Replicas int32 // Boolean example // +kubebuilder:example=false Debug bool // Array example // +kubebuilder:example={8080,8443} Ports []int // Object example // +kubebuilder:example={cpu: "100m", memory: "128Mi"} Resources map[string]string- any
is the example value to be shown in API documentation.
- // +kubebuilder:default
-
- any
sets the default value for this field.
A default value will be accepted as any value valid for the field. Formatting for common types include: boolean:
true, string:Cluster, numerical:1.24, array:{1,2}, object:{policy: "delete"}). Defaults should be defined in pruned form, and only best-effort validation will be performed. Full validation of a default requires submission of the containing CRD to an apiserver.Examples:
// String default // +kubebuilder:default="ClusterIP" ServiceType string // Integer default // +kubebuilder:default=3 Replicas int32 // Boolean default // +kubebuilder:default=true Enabled bool // Array default // +kubebuilder:default={80,443} Ports []int // Object default // +kubebuilder:default={replicas: 1} Config map[string]interface{}- any
is the default value. It can be any value valid for the field type.
- // +k8s:required
-
specifies that this field is required.
- // +k8s:optional
-
specifies that this field is optional.
- // +k8s:immutable
-
marks a field as immutable. Once set, the value cannot be changed.
For optional fields, a single transition from unset to set is allowed.
Note that immutable fields that are nested below optional fields can still be updated by unsetting the optional parent field and re-setting it again.
Examples:
// +k8s:immutable // +required Port intstr.IntOrString // +k8s:immutable // +optional TargetPort intstr.IntOrString- // +default
-
- value
- any
sets the default value for this field.
A default value will be accepted as any value valid for the field. Only JSON-formatted values are accepted.
ref(...)values are ignored. Formatting for common types include: boolean:true, string:"Cluster", numerical:1.24, array:[1,2], object:{"policy": "delete"}). Defaults should be defined in pruned form, and only best-effort validation will be performed. Full validation of a default requires submission of the containing CRD to an apiserver.Examples:
// String default (note the JSON quotes) // +default="ClusterIP" ServiceType string // Integer default // +default=3 Replicas int32 // Boolean default // +default=true Enabled bool // Array default (JSON format) // +default=[80,443] Ports []int // Object default (JSON format) // +default={"policy": "delete"} Config map[string]interface{}- value
- any
is the default value in JSON format. It can be any value valid for the field type.
CRD Processing
These markers help control how the Kubernetes API server processes API requests involving your custom resources.
See Generating CRDs for examples.
- // +structType
-
- string
specifies the level of atomicity of the struct;
i.e. whether each field in the struct is independent of the others, or all fields are treated as a single unit.
This is important for Server-Side Apply to correctly merge struct updates.
Possible values:
-
"granular": fields in the struct are independent of each other, and can be manipulated by different actors. This is the default behavior.
-
"atomic": all fields are treated as one unit. Any changes have to replace the entire struct.
Examples:
// Granular struct (default) - individual fields can be updated independently // +structType=granular type Config struct { Host string Port int } // Atomic struct - entire struct is replaced on update // +structType=atomic type Credentials struct { Username string Password string }- string
-
- // +mapType
-
- string
specifies the level of atomicity of the map;
i.e. whether each item in the map is independent of the others, or all fields are treated as a single unit.
This is important for Server-Side Apply to correctly merge map updates.
Possible values:
-
"granular": items in the map are independent of each other, and can be manipulated by different actors. This is the default behavior.
-
"atomic": all fields are treated as one unit. Any changes have to replace the entire map.
Examples:
// Granular map (default) - individual keys can be updated independently // +mapType=granular Labels map[string]string // Atomic map - entire map is replaced on update // +mapType=atomic Config map[string]string- string
-
- // +listType
-
- string
specifies the type of data-structure that the list
represents (map, set, atomic).
This is important for Server-Side Apply to correctly merge list updates.
Possible data-structure types of a list are:
-
"map": it needs to have a key field, which will be used to build an associative list. A typical example is a the pod container list, which is indexed by the container name.
-
"set": Fields need to be "scalar", and there can be only one occurrence of each.
-
"atomic": All the fields in the list are treated as a single value, are typically manipulated together by the same actor.
Examples:
// Map list (associative list) - items are merged by key // +listType=map // +listMapKey=name Containers []Container // Set list - items must be unique scalars // +listType=set Tags []string // Atomic list - entire list is replaced on update // +listType=atomic Args []string- string
-
- // +listMapKey
-
- string
specifies the keys to map listTypes.
It indicates the index of a map list. They can be repeated if multiple keys must be used. It can only be used when ListType is set to map, and the keys should be scalar types.
Examples:
// Single key // +listType=map // +listMapKey=name Containers []Container // Composite key (multiple keys) // +listType=map // +listMapKey=name // +listMapKey=protocol Ports []Port- string
- // +kubebuilder:validation:items:XPreserveUnknownFields
-
for array items stops the apiserver from pruning fields which are not specified.
By default the apiserver drops unknown fields from the request payload during the decoding step. This marker stops the API server from doing so. It affects fields recursively, but switches back to normal pruning behaviour if nested properties or additionalProperties are specified in the schema. This can either be true or undefined. False is forbidden.
NB: The kubebuilder:validation:XPreserveUnknownFields variant is deprecated in favor of the kubebuilder:pruning:PreserveUnknownFields variant. They function identically.
Example:
// +kubebuilder:pruning:PreserveUnknownFields RawConfig map[string]interface{}- // +kubebuilder:validation:items:XPreserveUnknownFields
-
for array items stops the apiserver from pruning fields which are not specified.
By default the apiserver drops unknown fields from the request payload during the decoding step. This marker stops the API server from doing so. It affects fields recursively, but switches back to normal pruning behaviour if nested properties or additionalProperties are specified in the schema. This can either be true or undefined. False is forbidden.
NB: The kubebuilder:validation:XPreserveUnknownFields variant is deprecated in favor of the kubebuilder:pruning:PreserveUnknownFields variant. They function identically.
Example:
// +kubebuilder:pruning:PreserveUnknownFields RawConfig map[string]interface{}- // +kubebuilder:validation:XPreserveUnknownFields
-
stops the apiserver from pruning fields which are not specified.
By default the apiserver drops unknown fields from the request payload during the decoding step. This marker stops the API server from doing so. It affects fields recursively, but switches back to normal pruning behaviour if nested properties or additionalProperties are specified in the schema. This can either be true or undefined. False is forbidden.
NB: The kubebuilder:validation:XPreserveUnknownFields variant is deprecated in favor of the kubebuilder:pruning:PreserveUnknownFields variant. They function identically.
Example:
// +kubebuilder:pruning:PreserveUnknownFields RawConfig map[string]interface{}- // +kubebuilder:pruning:PreserveUnknownFields
-
stops the apiserver from pruning fields which are not specified.
By default the apiserver drops unknown fields from the request payload during the decoding step. This marker stops the API server from doing so. It affects fields recursively, but switches back to normal pruning behaviour if nested properties or additionalProperties are specified in the schema. This can either be true or undefined. False is forbidden.
NB: The kubebuilder:validation:XPreserveUnknownFields variant is deprecated in favor of the kubebuilder:pruning:PreserveUnknownFields variant. They function identically.
Example:
// +kubebuilder:pruning:PreserveUnknownFields RawConfig map[string]interface{}
Webhook
These markers describe how webhook configuration is generated. Use these to keep the description of your webhooks close to the code that implements them.
- // +kubebuilder:webhookconfiguration
-
- mutating
- bool
- name
- string
specifies how a webhook should be served.
It specifies only the details that are intrinsic to the application serving it (e.g. the resources it can handle, or the path it serves on).
Example (Validating Webhook):
// +kubebuilder:webhook:path=/validate-mygroup-v1-myresource,mutating=false,failurePolicy=fail,sideEffects=None,groups=mygroup.example.com,resources=myresources,verbs=create;update,versions=v1,name=myresource.kb.io,admissionReviewVersions=v1Example (Mutating Webhook):
// +kubebuilder:webhook:path=/mutate-mygroup-v1-myresource,mutating=true,failurePolicy=fail,sideEffects=None,groups=mygroup.example.com,resources=myresources,verbs=create;update,versions=v1,name=myresource.kb.io,admissionReviewVersions=v1- mutating
- bool
marks this as a mutating webhook (it's validating only if false)
Mutating webhooks are allowed to change the object in their response, and are called before all validating webhooks. Mutating webhooks may choose to reject an object, similarly to a validating webhook.
- name
- string
indicates the name of this webhook configuration. Should be a domain with at least three segments separated by dots
Example: "myresource.mygroup.example.com".
- // +kubebuilder:webhook
-
- admissionReviewVersions
- string
- failurePolicy
- string
- groups
- string
- matchPolicy
- string
- mutating
- bool
- name
- string
- path
- string
- reinvocationPolicy
- string
- resources
- string
- serviceName
- string
- serviceNamespace
- string
- servicePort
- int
- sideEffects
- string
- timeoutSeconds
- int
- url
- string
- verbs
- string
- versions
- string
- webhookVersions
- string
specifies how a webhook should be served.
It specifies only the details that are intrinsic to the application serving it (e.g. the resources it can handle, or the path it serves on).
Example (Validating Webhook):
// +kubebuilder:webhook:path=/validate-mygroup-v1-myresource,mutating=false,failurePolicy=fail,sideEffects=None,groups=mygroup.example.com,resources=myresources,verbs=create;update,versions=v1,name=myresource.kb.io,admissionReviewVersions=v1Example (Mutating Webhook):
// +kubebuilder:webhook:path=/mutate-mygroup-v1-myresource,mutating=true,failurePolicy=fail,sideEffects=None,groups=mygroup.example.com,resources=myresources,verbs=create;update,versions=v1,name=myresource.kb.io,admissionReviewVersions=v1- admissionReviewVersions
- string
is an ordered list of preferred `AdmissionReview`
versions the Webhook expects. The API server will try to use the first version in the list which it supports. If none of the versions specified are supported, the API call will fail. Common values: "v1" or "v1;v1beta1".
- failurePolicy
- string
specifies what should happen if the API server cannot reach the webhook.
It may be either "ignore" (to skip the webhook and continue on) or "fail" (to reject the object in question). Most webhooks should use "fail" to ensure the webhook logic is always executed.
- groups
- string
specifies the API groups that this webhook receives requests for.
Use "" to match all groups. Multiple groups are separated by semicolons. Example: "apps;batch" or "".
- matchPolicy
- string
defines how the "rules" list is used to match incoming requests.
Allowed values are "Exact" (match only if it exactly matches the specified rule) or "Equivalent" (match a request if it modifies a resource listed in rules, even via another API group or version). Defaults to "Equivalent" if not specified.
- mutating
- bool
marks this as a mutating webhook (it's validating only if false)
Mutating webhooks are allowed to change the object in their response, and are called before all validating webhooks. Mutating webhooks may choose to reject an object, similarly to a validating webhook.
- name
- string
indicates the name of this webhook configuration. Should be a domain with at least three segments separated by dots
Example: "myresource.mygroup.example.com".
- path
- string
specifies that path that the API server should connect to this webhook on. Must be
prefixed with a '/validate-' or '/mutate-' depending on the type, and followed by $GROUP-$VERSION-$KIND where all values are lower-cased and the periods in the group are substituted for hyphens. For example, a validating webhook path for type batch.tutorial.kubebuilder.io/v1,Kind=CronJob would be /validate-batch-tutorial-kubebuilder-io-v1-cronjob
- reinvocationPolicy
- string
allows mutating webhooks to request reinvocation after other mutations.
To allow mutating admission plugins to observe changes made by other plugins, built-in mutating admission plugins are re-run if a mutating webhook modifies an object, and mutating webhooks can specify a reinvocationPolicy to control whether they are reinvoked as well. May be "Never" or "IfNeeded". Defaults to "Never".
- resources
- string
specifies the API resources that this webhook receives requests for.
Use "" to match all resources. Multiple resources are separated by semicolons. Example: "deployments;pods" or "".
- serviceName
- string
indicates the name of the K8s Service the webhook uses.
Defaults to "webhook-service" if not specified.
- serviceNamespace
- string
indicates the namespace of the K8s Service the webhook uses.
Defaults to "system" if not specified.
- servicePort
- int
indicates the port of the K8s Service the webhook uses.
Defaults to 443 if not specified.
- sideEffects
- string
specify whether calling the webhook will have side effects.
This has an impact on dry runs and
kubectl diff: if the sideEffect is "Unknown" (the default) or "Some", then the API server will not call the webhook on a dry-run request and fails instead. If the value is "None", then the webhook has no side effects and the API server will call it on dry-run. If the value is "NoneOnDryRun", then the webhook is responsible for inspecting the "dryRun" property of the AdmissionReview sent in the request, and avoiding side effects if that value is "true." Most webhooks should use "None".- timeoutSeconds
- int
allows configuring how long the API server should wait for a webhook to respond before treating the call as a failure.
If the timeout expires before the webhook responds, the webhook call will be ignored or the API call will be rejected based on the failure policy. The timeout value must be between 1 and 30 seconds. The timeout for an admission webhook defaults to 10 seconds.
- url
- string
allows mutating webhooks configuration to specify an external URL when generating
the manifests, instead of using the internal service communication. Should be in format of https://address:port/path When this option is specified, the serviceConfig.Service is removed from webhook the manifest. The URL configuration should be between quotes.
urlcannot be specified whenpathis specified.- verbs
- string
specifies the Kubernetes API verbs that this webhook receives requests for.
Only modification-like verbs may be specified. May be "create", "update", "delete", "connect", or "*" (for all). Multiple verbs are separated by semicolons. Example: "create;update".
- versions
- string
specifies the API versions that this webhook receives requests for.
Use "" to match all versions. Multiple versions are separated by semicolons. Example: "v1;v1beta1" or "".
- webhookVersions
- string
specifies the target API versions of the {Mutating,Validating}WebhookConfiguration objects
itself to generate. The only supported value is v1. Defaults to v1.
Object/DeepCopy
These markers control when DeepCopy and runtime.Object implementation
methods are generated.
- // +kubebuilder:object:root
-
- bool
enables object interface implementation generation for this type
- bool
- // +kubebuilder:object:generate
-
- bool
enables or disables object interface & deepcopy implementation generation for this package
- bool
- // +kubebuilder:object:generate
-
- bool
overrides enabling or disabling deepcopy generation for this type
- bool
- // +k8s:deepcopy-gen:interfaces
-
- string
enables object interface implementation generation for this type
- string
- // +k8s:deepcopy-gen
-
- raw
enables or disables object interface & deepcopy implementation generation for this package
- raw
- // +k8s:deepcopy-gen
-
- raw
overrides enabling or disabling deepcopy generation for this type
- raw
Apply Configuration
These markers control when ApplyConfiguration types are generated for the kinds in a package. These types provide a type-safe way to build patches for Server-Side Apply.
See the Server-Side Apply reference for how the --ssa
flag enables this generation and for examples of using the generated types.
- // +kubebuilder:ac:output:package
-
- string
overrides the default output package for the applyconfiguration generation, supports relative paths to the API directory. The default value is "applyconfiguration"
- string
- // +kubebuilder:ac:generate
-
- bool
overrides enabling or disabling applyconfiguration generation for the package
- bool
- // +kubebuilder:ac:generate
-
- bool
overrides enabling or disabling applyconfiguration generation for the type, can be used to generate applyconfiguration for a single type when the package generation is disabled, or to disable generation for a single type when the package generation is enabled
- bool
RBAC
These markers cause an RBAC ClusterRole to be generated. This allows you to describe the permissions that your controller requires alongside the code that makes use of those permissions.
- // +kubebuilder:rbac
-
- groups
- string
- namespace
- string
- resourceNames
- string
- resources
- string
- roleName
- string
- urls
- string
- verbs
- string
specifies an RBAC rule to all access to some resources or non-resource URLs.
RBAC markers are used to generate ClusterRole or Role manifests. Multiple markers can be combined to build comprehensive RBAC policies.
Examples:
// Basic resource access // +kubebuilder:rbac:groups=apps,resources=deployments,verbs=get;list;watch // Core API group (use empty string) // +kubebuilder:rbac:groups="",resources=pods;services,verbs=get;list;watch // Multiple API groups and resources // +kubebuilder:rbac:groups=apps;batch,resources=deployments;jobs,verbs=get;list;watch;create;update;patch;delete // Access to resource status or scale subresources // +kubebuilder:rbac:groups=apps,resources=deployments/status,verbs=get;update;patch // +kubebuilder:rbac:groups=apps,resources=deployments/scale,verbs=get;update // Access to specific resource instances by name // +kubebuilder:rbac:groups="",resources=configmaps,resourceNames=my-config,verbs=get // Non-resource URLs (for metrics, healthz, etc.) // +kubebuilder:rbac:urls=/metrics;/healthz,verbs=get // Namespace-scoped Role instead of ClusterRole // +kubebuilder:rbac:groups="",namespace=my-namespace,resources=secrets,verbs=get;list;watch // Custom role name // +kubebuilder:rbac:groups=apps,resources=deployments,verbs=get;list,roleName=deployment-reader- groups
- string
specifies the API groups that this rule encompasses.
Use empty string ("") for the core API group. Multiple groups can be specified separated by semicolons. Example: "apps;batch" or "" (for core group).
- namespace
- string
specifies the scope of the Rule.
If not set, the Rule belongs to the generated ClusterRole. If set, the Rule belongs to a Role, whose namespace is specified by this field. Example: "my-namespace".
- resourceNames
- string
specifies the names of the API resources that this rule encompasses.
Create requests cannot be restricted by resourcename, as the object's name is not known at authorization time. Multiple names can be specified separated by semicolons. Example: "my-config;my-secret".
- resources
- string
specifies the API resources that this rule encompasses.
Multiple resources can be specified separated by semicolons. Subresources can be specified with a slash (e.g., "deployments/status"). Example: "deployments;pods" or "deployments/status".
- roleName
- string
specifies a custom name for the Role or ClusterRole.
If not set, uses the default roleName from the generator. Useful for avoiding name conflicts when the same roleName is used across multiple namespaces.
Example: When using namespace-scoped RBAC markers with kustomize's global namespace transformation, multiple Roles might end up in the same namespace with identical names, causing an "ID conflict" error. Use roleName to ensure each Role has a unique name:
// +kubebuilder:rbac:groups=apps,namespace=infrastructure,roleName=infra-manager,resources=deployments,verbs=get;list // +kubebuilder:rbac:groups="",namespace=users,roleName=user-secrets,resources=secrets,verbs=get
This generates Roles named "infra-manager" and "user-secrets" instead of both being "manager-role".
- urls
- string
URL specifies the non-resource URLs that this rule encompasses.
Non-resource URLs are paths that don't represent resources, like "/metrics" or "/healthz". Multiple URLs can be specified separated by semicolons. Example: "/metrics;/healthz".
- verbs
- string
specifies the (lowercase) kubernetes API verbs that this rule encompasses.
Common verbs: "get", "list", "watch", "create", "update", "patch", "delete". Use "*" for all verbs. Multiple verbs must be specified separated by semicolons. Example: "get;list;watch".
Scaffold
The +kubebuilder:scaffold marker is a key part of the Kubebuilder scaffolding system. It marks locations in generated
files where Kubebuilder injects additional code as you scaffold new resources (such as controllers, webhooks, or APIs).
This enables Kubebuilder to seamlessly integrate newly generated components into the project without affecting
user-defined code.
How it works
When you scaffold a new resource using the Kubebuilder CLI (e.g., kubebuilder create api),
the CLI identifies +kubebuilder:scaffold markers in key locations and uses them as placeholders
to insert the required imports and registration code.
Example usage in main.go
Here is how you use the +kubebuilder:scaffold marker in a typical main.go file. To illustrate how it works, consider the following command to create a new API:
kubebuilder create api --group crew --version v1 --kind Admiral --controller=true --resource=true
To add new imports
The +kubebuilder:scaffold:imports marker allows the Kubebuilder CLI to inject additional imports,
such as for new controllers or webhooks. When you create a new API, the CLI automatically adds the required import paths
in this section.
For example, after creating the Admiral API in a single-group layout,
the CLI adds crewv1 "<repo-path>/api/v1" to the imports:
import (
"crypto/tls"
"flag"
"os"
// Import all Kubernetes client auth plugins (e.g. Azure, GCP, OIDC, etc.)
// to ensure that exec-entrypoint and run can make use of them.
_ "k8s.io/client-go/plugin/pkg/client/auth"
...
crewv1 "sigs.k8s.io/kubebuilder/testdata/project-v4/api/v1"
// +kubebuilder:scaffold:imports
)
To register a new scheme
Kubebuilder uses the +kubebuilder:scaffold:scheme marker to register newly created API versions with the runtime scheme,
ensuring the manager recognizes the API types.
For example, after creating the Admiral API, the CLI will inject the
following code into the init() function to register the scheme:
func init() {
...
utilruntime.Must(crewv1.AddToScheme(scheme))
// +kubebuilder:scaffold:scheme
}
To set up a controller
When you create a new controller (e.g., for Admiral), the Kubebuilder CLI injects the controller
setup code into the manager using the +kubebuilder:scaffold:builder marker. This marker indicates where
the setup code for new controllers should be added.
For example, after creating the AdmiralReconciler, the CLI adds the following code
to register the controller with the manager:
if err = (&crewv1.AdmiralReconciler{
Client: mgr.GetClient(),
Scheme: mgr.GetScheme(),
}).SetupWithManager(mgr); err != nil {
setupLog.Error(err, "unable to create controller", "controller", "Admiral")
os.Exit(1)
}
// +kubebuilder:scaffold:builder
The +kubebuilder:scaffold:builder marker ensures that newly scaffolded controllers are
properly registered with the manager, so that the controller can reconcile the resource.
List of +kubebuilder:scaffold Markers
| Marker | Usual Location | Function |
|---|---|---|
+kubebuilder:scaffold:imports | main.go | Marks where imports for new controllers, webhooks, or APIs should be injected. |
+kubebuilder:scaffold:scheme | init() in main.go | Used to add API versions to the scheme for runtime. |
+kubebuilder:scaffold:builder | main.go | Marks where new controllers should be registered with the manager. |
+kubebuilder:scaffold:webhook | webhooks suite tests files | Marks where webhook setup functions are added. |
+kubebuilder:scaffold:crdkustomizeresource | config/crd | Marks where CRD custom resource patches are added. |
+kubebuilder:scaffold:crdkustomizewebhookpatch | config/crd | Marks where CRD webhook patches are added. |
+kubebuilder:scaffold:crdkustomizecainjectionns | config/default | Marks where CA injection patches are added for the conversion webhooks. |
+kubebuilder:scaffold:crdkustomizecainjectioname | config/default | Marks where CA injection patches are added for the conversion webhooks. |
(No longer supported) +kubebuilder:scaffold:crdkustomizecainjectionpatch | config/crd | Marks where CA injection patches are added for the webhooks. Replaced by +kubebuilder:scaffold:crdkustomizecainjectionns and +kubebuilder:scaffold:crdkustomizecainjectioname |
+kubebuilder:scaffold:manifestskustomizesamples | config/samples | Marks where Kustomize sample manifests are injected. |
+kubebuilder:scaffold:e2e-webhooks-checks | test/e2e | Adds e2e checks for webhooks depending on the types of webhooks scaffolded. |
+kubebuilder:scaffold:e2e-metrics-webhooks-readiness | test/e2e | Adds readiness logic so metrics e2e tests wait for webhook service endpoints before creating pods. |
controller-gen CLI
Kubebuilder makes use of a tool called controller-gen for generating utility code and Kubernetes YAML. This code and config generation is controlled by the presence of special “marker comments” in Go code.
controller-gen builds out of different “generators” (which specify what to generate) and “output rules” (which specify how and where to write the results).
You configure both through command line options specified in marker format.
For instance, the following command:
controller-gen paths=./... crd:trivialVersions=true rbac:roleName=controller-perms output:crd:artifacts:config=config/crd/bases
generates CRDs and RBAC, and specifically stores the generated CRD YAML in
config/crd/bases. For the RBAC, it uses the default output rules
(config/rbac). It considers every package in the current directory tree
(as per the normal rules of the go ... wildcard).
Generators
You configure each different generator through a CLI option. You can use multiple
generators in a single invocation of controller-gen.
- // +applyconfiguration
-
- externalApplyConfigurations
- string
- headerFile
- string
generates code containing apply configuration type implementations.
- externalApplyConfigurations
- string
provides mappings between external types and their applyconfiguration packages.
Use this to reference apply configuration types for external types referenced by the Go structs provided as input. Each entry should be in the format: <package>.<TypeName>@<applyconfiguration-package>
For example, to reference the apply configuration for corev1.LocalObjectReference: k8s.io/api/core/v1.LocalObjectReference@k8s.io/client-go/applyconfigurations/core/v1
- headerFile
- string
specifies the header text (e.g. license) to prepend to generated files.
- // +crd
-
- allowDangerousTypes
- bool
- crdVersions
- string
- deprecatedV1beta1CompatibilityPreserveUnknownFields
- bool
- generateEmbeddedObjectMeta
- bool
- headerFile
- string
- ignoreUnexportedFields
- bool
- maxDescLen
- int
- year
- string
generates CustomResourceDefinition objects.
- allowDangerousTypes
- bool
allows types which are usually omitted from CRD generation
because they are not recommended.
Currently the following additional types are allowed when this is true: float32 float64
Left unspecified, the default is false
- crdVersions
- string
specifies the target API versions of the CRD type itself to
generate. Defaults to v1.
Currently, the only supported value is v1.
The first version listed will be assumed to be the "default" version and will not get a version suffix in the output filename.
You'll need to use "v1" to get support for features like defaulting, along with an API server that supports it (Kubernetes 1.16+).
- deprecatedV1beta1CompatibilityPreserveUnknownFields
- bool
indicates whether
or not we should turn off field pruning for this resource.
Specifies spec.preserveUnknownFields value that is false and omitted by default. This value can only be specified for CustomResourceDefinitions that were created with
apiextensions.k8s.io/v1beta1.The field can be set for compatibility reasons, although strongly discouraged, resource authors should move to a structural OpenAPI schema instead.
See https://kubernetes.io/docs/tasks/extend-kubernetes/custom-resources/custom-resource-definitions/#field-pruning for more information about field pruning and v1beta1 resources compatibility.
- generateEmbeddedObjectMeta
- bool
specifies if any embedded ObjectMeta in the CRD should be generated
- headerFile
- string
specifies the header text (e.g. license) to prepend to generated files.
- ignoreUnexportedFields
- bool
indicates that we should skip unexported fields.
Left unspecified, the default is false.
- maxDescLen
- int
specifies the maximum description length for fields in CRD's OpenAPI schema.
0 indicates drop the description for all fields completely. n indicates limit the description to at most n characters and truncate the description to closest sentence boundary if it exceeds n characters.
- year
- string
specifies the year to substitute for " YEAR" in the header file.
- // +object
-
- headerFile
- string
- year
- string
generates code containing DeepCopy, DeepCopyInto, and
DeepCopyObject method implementations.
- headerFile
- string
specifies the header text (e.g. license) to prepend to generated files.
- year
- string
specifies the year to substitute for " YEAR" in the header file.
- // +rbac
-
- fileName
- string
- headerFile
- string
- roleName
- string
- year
- string
generates ClusterRole objects.
- fileName
- string
sets the file name for the generated manifest(s). If not set, defaults to "role.yaml".
- headerFile
- string
specifies the header text (e.g. license) to prepend to generated files.
- roleName
- string
sets the name of the generated ClusterRole.
- year
- string
specifies the year to substitute for " YEAR" in the header file.
- // +schemapatch
-
- generateEmbeddedObjectMeta
- bool
- manifests
- string
- maxDescLen
- int
patches existing CRDs with new schemata.
It will generate output for each "CRD Version" (API version of the CRD type itself) , e.g. apiextensions/v1) available.
- generateEmbeddedObjectMeta
- bool
specifies if any embedded ObjectMeta in the CRD should be generated
- manifests
- string
contains the CustomResourceDefinition YAML files.
- maxDescLen
- int
specifies the maximum description length for fields in CRD's OpenAPI schema.
0 indicates drop the description for all fields completely. n indicates limit the description to at most n characters and truncate the description to closest sentence boundary if it exceeds n characters.
- // +webhook
-
- headerFile
- string
- year
- string
generates (partial) {Mutating,Validating}WebhookConfiguration objects.
- headerFile
- string
specifies the header text (e.g. license) to prepend to generated files.
- year
- string
specifies the year to substitute for " YEAR" in the header file.
Output rules
Output rules configure how a given generator outputs its results. There is
always one global “fallback” output rule (specified as output:<rule>),
plus per-generator overrides (specified as output:<generator>:<rule>).
For brevity, the per-generator output rules (output:<generator>:<rule>)
are omitted below. They are equivalent to the global fallback options
listed here.
- // +output:stdout
-
outputs everything to standard-out, with no separation.
Generally useful for single-artifact outputs.
- // +output:none
-
skips outputting anything.
- // +output:dir
-
- string
outputs each artifact to the given directory, regardless
of if it's package-associated or not.
- string
- // +output:artifacts
-
- code
- string
- config
- string
outputs artifacts to different locations, depending on
whether they're package-associated or not.
Non-package associated artifacts are output to the Config directory, while package-associated ones are output to their package's source files' directory, unless an alternate path is specified in Code.
- code
- string
overrides the directory in which to write new code (defaults to where the existing code lives).
- config
- string
points to the directory to which to write configuration.
Other options
- // +paths
-
- string
represents paths and go-style path patterns to use as package roots.
Multiple paths can be specified using "{path1, path2, path3}".
- string
Enabling shell autocompletion
The Kubebuilder completion script can be generated with the command kubebuilder completion [bash|fish|powershell|zsh].
Note that sourcing the completion script in your shell enables Kubebuilder autocompletion.
Bash
-
Check that bash is an available shell:
cat /etc/shells | grep '^.*/bash' -
If not, add bash to
/etc/shells. For example, if bash is at/usr/local/bin/bash:echo "/usr/local/bin/bash" >> /etc/shells -
Make sure the current user uses bash as their shell.
chsh -s /usr/local/bin/bash -
Add following content to
~/.bash_profileor~/.bashrc# kubebuilder autocompletion if [ -f /usr/local/share/bash-completion/bash_completion ]; then . /usr/local/share/bash-completion/bash_completion fi . <(kubebuilder completion bash) -
Restart terminal for the changes to be reflected or
sourcethe changed bash file.. ~/.bash_profile
Zsh
Follow a similar protocol for zsh completion.
Fish
source (kubebuilder completion fish | psub)
Artifacts
To test your controllers, you need to use the tarballs containing the required binaries:
./bin/k8s/
└── 1.25.0-darwin-amd64
├── etcd
├── kube-apiserver
└── kubectl
These tarballs are released by controller-tools, and you can find the list of available versions at: envtest-releases.yaml.
When you run make envtest or make test, the necessary tarballs are downloaded and properly
configured for your project.
Platforms supported
Kubebuilder produces solutions that by default can work on multiple platforms or specific ones, depending on how you build and configure your workloads. This guide aims to help you properly configure your projects according to your needs.
Overview
To provide support on specific or multiple platforms, you must ensure that all images used in workloads are built to support the desired platforms. Note that they may not be the same as the platform where you develop your solutions and use KubeBuilder, but instead the platform(s) where your solution should run and be distributed. It is recommended to build solutions that work on multiple platforms so that your project works on any Kubernetes cluster regardless of the underlying operating system and architecture.
How to define which platforms are supported
The following covers what you need to do to provide the support for one or more platforms or architectures.
1) Build workload images to provide the support for other platform(s)
The images used in workloads such as in your Pods/Deployments need to provide the support for this other platform.
You can inspect the images using a ManifestList of supported platforms using the command
docker manifest inspect <image>, i.e.:
$ docker manifest inspect myregistry/example/myimage:v0.0.1
{
"schemaVersion": 2,
"mediaType": "application/vnd.docker.distribution.manifest.list.v2+json",
"manifests": [
{
"mediaType": "application/vnd.docker.distribution.manifest.v2+json",
"size": 739,
"digest": "sha256:a274a1a2af811a1daf3fd6b48ff3d08feb757c2c3f3e98c59c7f85e550a99a32",
"platform": {
"architecture": "arm64",
"os": "linux"
}
},
{
"mediaType": "application/vnd.docker.distribution.manifest.v2+json",
"size": 739,
"digest": "sha256:d801c41875f12ffd8211fffef2b3a3d1a301d99f149488d31f245676fa8bc5d9",
"platform": {
"architecture": "amd64",
"os": "linux"
}
},
{
"mediaType": "application/vnd.docker.distribution.manifest.v2+json",
"size": 739,
"digest": "sha256:f4423c8667edb5372fb0eafb6ec599bae8212e75b87f67da3286f0291b4c8732",
"platform": {
"architecture": "s390x",
"os": "linux"
}
},
{
"mediaType": "application/vnd.docker.distribution.manifest.v2+json",
"size": 739,
"digest": "sha256:621288f6573c012d7cf6642f6d9ab20dbaa35de3be6ac2c7a718257ec3aff333",
"platform": {
"architecture": "ppc64le",
"os": "linux"
}
},
]
}
2) (Recommended as a Best Practice) Set node affinity expressions to match the supported platforms
Kubernetes provides a mechanism called nodeAffinity which can be used to limit the possible node targets where a pod can be scheduled. This is especially important to ensure correct scheduling behavior in clusters with nodes that span across multiple platforms (i.e. heterogeneous clusters).
Kubernetes manifest example
affinity:
nodeAffinity:
requiredDuringSchedulingIgnoredDuringExecution:
nodeSelectorTerms:
- matchExpressions:
- key: kubernetes.io/arch
operator: In
values:
- amd64
- arm64
- ppc64le
- s390x
- key: kubernetes.io/os
operator: In
values:
- linux
Golang Example
Template: corev1.PodTemplateSpec{
...
Spec: corev1.PodSpec{
Affinity: &corev1.Affinity{
NodeAffinity: &corev1.NodeAffinity{
RequiredDuringSchedulingIgnoredDuringExecution: &corev1.NodeSelector{
NodeSelectorTerms: []corev1.NodeSelectorTerm{
{
MatchExpressions: []corev1.NodeSelectorRequirement{
{
Key: "kubernetes.io/arch",
Operator: "In",
Values: []string{"amd64"},
},
{
Key: "kubernetes.io/os",
Operator: "In",
Values: []string{"linux"},
},
},
},
},
},
},
},
SecurityContext: &corev1.PodSecurityContext{
...
},
Containers: []corev1.Container{{
...
}},
},
Producing projects that support multiple platforms
You can use docker buildx to cross-compile via emulation (QEMU) to build the manager image.
See that projects scaffold with the latest versions of Kubebuilder have the Makefile target docker-buildx.
Example of Usage
$ make docker-buildx IMG=myregistry/myoperator:v0.0.1
Note that you need to ensure that all images and workloads required and used by your project provide the same
support as recommended above, and that you properly configure the nodeAffinity for all your workloads.
Therefore, ensure that you uncomment the following code in the config/manager/manager.yaml file
# TODO(user): Uncomment the following code to configure the nodeAffinity expression
# according to the platforms which are supported by your solution.
# It is considered best practice to support multiple architectures. You can
# build your manager image using the makefile target docker-buildx.
# affinity:
# nodeAffinity:
# requiredDuringSchedulingIgnoredDuringExecution:
# nodeSelectorTerms:
# - matchExpressions:
# - key: kubernetes.io/arch
# operator: In
# values:
# - amd64
# - arm64
# - ppc64le
# - s390x
# - key: kubernetes.io/os
# operator: In
# values:
# - linux
Which (workload) images are created by default?
Projects created with the Kubebuilder CLI have two workloads which are:
Manager
The config/manager/manager.yaml file configures the container to run the manager implementation.
The Dockerfile that Kubebuilder scaffolds by default builds this image and contains the project binary
that the command go build -a -o manager main.go builds.
Note that when you run make docker-build OR make docker-build IMG=myregistry/myprojectname:<tag>
Docker builds an image from the client host (local environment) and produces an image for
the client os/arch, which is commonly linux/amd64 or linux/arm64.
Monitoring performance with Pprof
Pprof, a Go profiling tool, helps identify performance bottlenecks in areas like CPU and memory usage. It’s integrated with the controller-runtime library’s HTTP server, enabling profiling via HTTP endpoints. You can visualize the data using go tool pprof. Since Pprof is built into controller-runtime, no separate installation is needed. Manager options make it easy to enable pprof and gather runtime metrics to optimize controller performance.
How to use Pprof
-
Enabling Pprof
In your
cmd/main.gofile, add the field:mgr, err := ctrl.NewManager(ctrl.GetConfigOrDie(), ctrl.Options{ ... // PprofBindAddress is the TCP address that the controller should bind to // for serving pprof. Specify the manager address and the port that should be bind. PprofBindAddress: ":8082", ... }) -
Test it out
After enabling Pprof, you need to build and deploy your controller to test it out. Follow the steps in the Quick Start guide to run your project locally or on a cluster.
Then, you can apply your CRs/samples in order to monitor the performance of its controllers.
-
Exporting the data
Using
curl, export the profiling statistics to a file like this:# Note that this uses the bind host and port configured via the # Manager Options in the cmd/main.go curl -s "http://127.0.0.1:8082/debug/pprof/profile" > ./cpu-profile.out -
Visualizing the results on browser
# Go tool opens a session on port 8080. # You can change this as per your own need. go tool pprof -http=:8080 ./cpu-profile.outVisualization results will vary depending on the deployed workload, and the Controller’s behavior. However, you’ll see the result on your browser similar to this one:
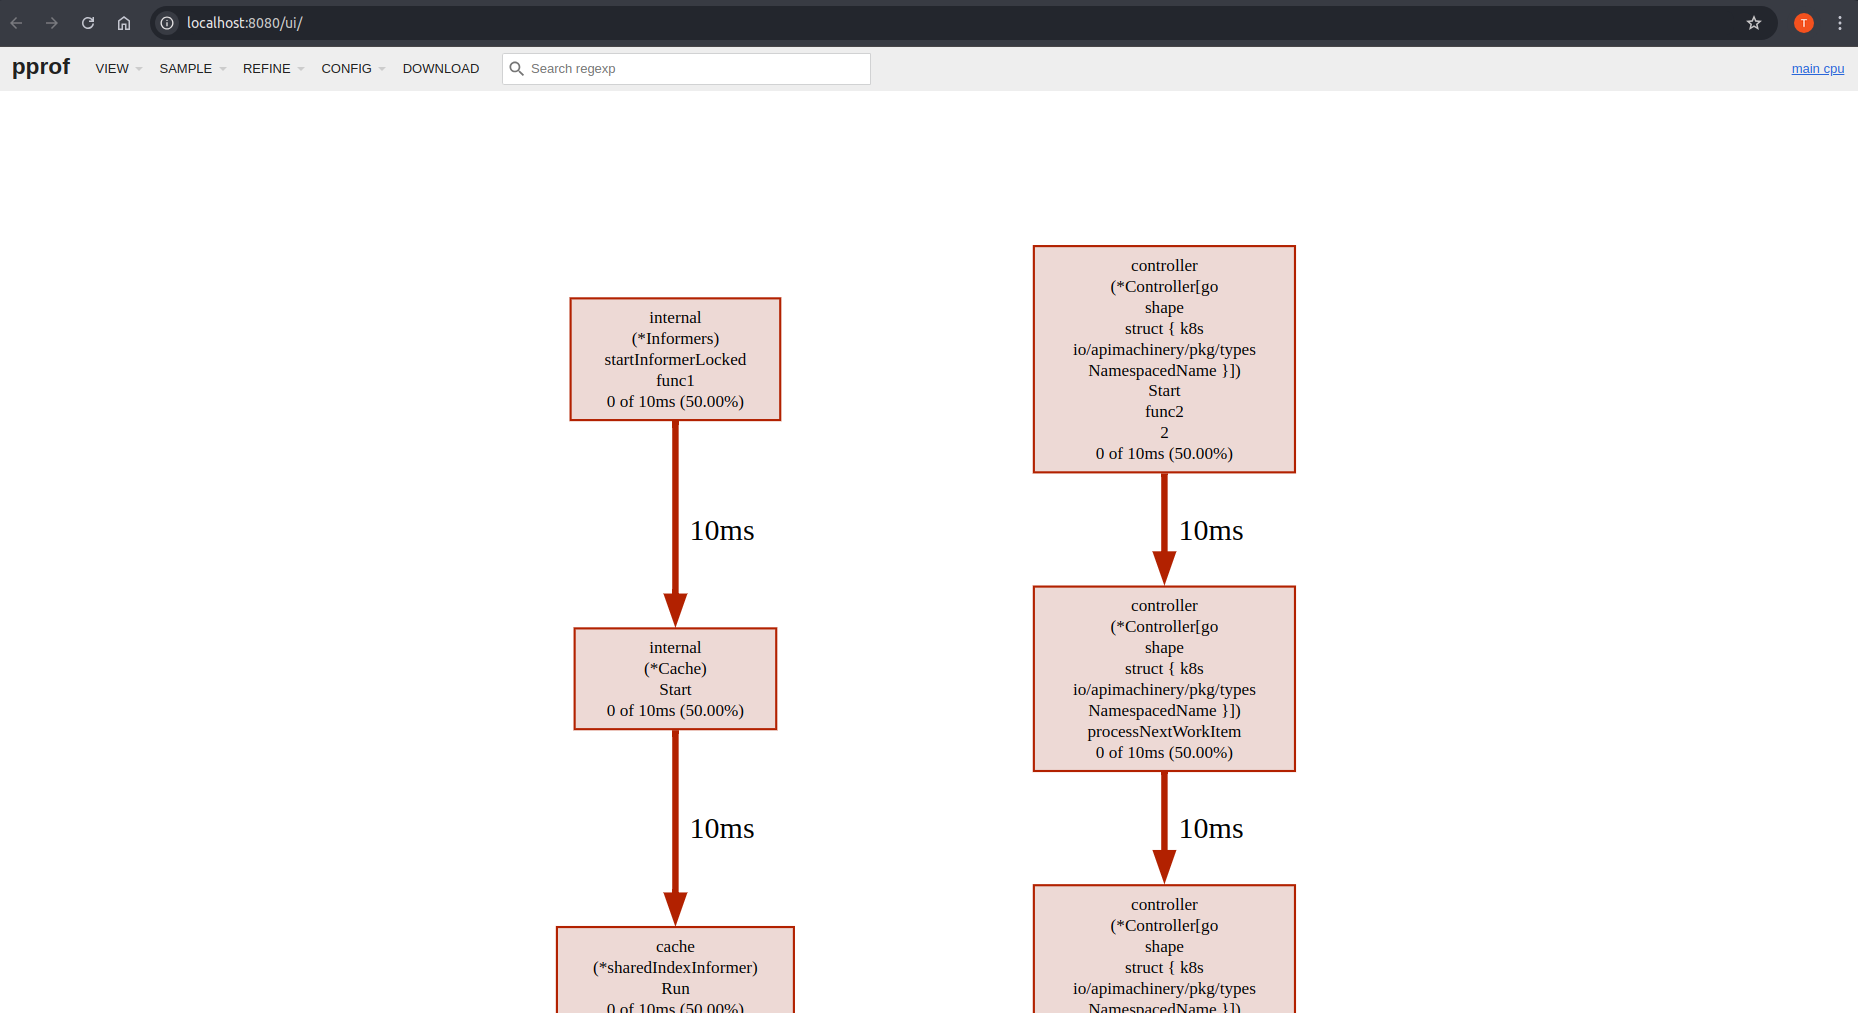
Understanding scopes in Kubebuilder
In Kubernetes, scope defines the boundaries within which a resource or controller operates.
When building with Kubebuilder, you work with two independent scoping concepts:
- Manager Scope - Determines which namespace(s) your manager watches and operates in
- CRD Scope - Determines whether your custom resources are namespace-specific or cluster-wide
What is scope?
Scope defines the visibility and access boundaries in a Kubernetes cluster:
- Cluster-scoped: Operates across the entire cluster with access to all namespaces
- Namespace-scoped: Limited to specific namespace(s) for isolation and security
Manager scope vs CRD scope
These concepts are independent and configured separately:
- Manager Scope: Controls which namespace(s) the manager watches (configured via deployment RBAC and cache)
- CRD Scope: Controls whether custom resources are namespace-specific or cluster-wide (configured in CRD manifest)
You can combine them in different ways - for example, a cluster-scoped manager can manage namespace-scoped CRDs (the default pattern).
Learn more
For detailed information, configuration steps, and code examples:
- Manager Scope - Manager scope configuration, RBAC, cache setup, and namespace watching
- CRD Scope - CRD scope configuration, markers, and RBAC considerations
- Migrating to Namespace-Scoped Manager - Step-by-step migration guide for existing projects
Manager scope
Manager scope determines which namespace(s) your manager watches and manages resources in.
Overview
Kubebuilder supports three types of manager scope:
| Scope | Description | Use Case |
|---|---|---|
| Cluster-scoped (default) | Watches all namespaces in the cluster | Single manager managing resources cluster-wide |
| Namespace-scoped | Watches only specific namespace(s) | Multi-tenant, least-privilege deployments |
| Multi-namespace | Watches multiple specific namespaces | Manager managing resources in subset of namespaces |
Manager scope is configured through:
- RBAC resources (Role vs ClusterRole)
- Cache configuration in
cmd/main.go WATCH_NAMESPACEenvironment variable
Cluster-scoped (default)
By default, Kubebuilder scaffolds cluster-scoped managers that watch all namespaces in the cluster.
kubebuilder init --domain example.com
Characteristics:
- Uses
ClusterRoleandClusterRoleBindingfor RBAC - Manager watches all namespaces
- No cache configuration needed
When to use:
- Single manager instance for the entire cluster
- Managing cluster-scoped resources (Nodes, ClusterRoles, Namespaces)
- Simpler RBAC model when cluster-wide access is acceptable
Namespace-scoped
Namespace-scoped managers watch only specific namespace(s), configured via the WATCH_NAMESPACE environment variable.
# New projects
kubebuilder init --domain example.com --namespaced
# Existing projects
kubebuilder edit --namespaced=true
Characteristics:
- Uses namespace-scoped
RoleandRoleBindingfor RBAC - Manager watches only specified namespace(s)
- Requires cache configuration in
cmd/main.go - Requires
namespace=parameter in controller RBAC markers
When to use:
- Multi-tenant environments (one manager per tenant/namespace)
- Security policies requiring least-privilege access
- Multiple manager instances in different namespaces
RBAC markers:
Controllers in namespace-scoped projects use the namespace= parameter in RBAC markers to generate namespace-scoped Role resources:
// +kubebuilder:rbac:groups=myapp.example.com,namespace=myproject-system,resources=mykinds,verbs=get;list;watch;create;update;patch;delete
// +kubebuilder:rbac:groups=myapp.example.com,namespace=myproject-system,resources=mykinds/status,verbs=get;update;patch
// +kubebuilder:rbac:groups=myapp.example.com,namespace=myproject-system,resources=mykinds/finalizers,verbs=update
When controller-gen sees the namespace= parameter, it generates kind: Role instead of kind: ClusterRole. The namespace field is added by kustomize during the build process (configured in config/default/kustomization.yaml).
Cache configuration:
Kubebuilder automatically scaffolds the cache configuration in cmd/main.go when using --namespaced flag:
// setupCacheNamespaces configures the cache to watch specific namespace(s).
// It supports both single namespace ("ns1") and multi-namespace ("ns1,ns2,ns3") formats.
func setupCacheNamespaces(namespaces string) cache.Options {
defaultNamespaces := make(map[string]cache.Config)
for ns := range strings.SplitSeq(namespaces, ",") {
defaultNamespaces[strings.TrimSpace(ns)] = cache.Config{}
}
return cache.Options{
DefaultNamespaces: defaultNamespaces,
}
}
// In main()
watchNamespace, err := getWatchNamespace()
if err != nil {
setupLog.Error(err, "Unable to get WATCH_NAMESPACE")
os.Exit(1)
}
mgrOptions := ctrl.Options{
Scheme: scheme,
Metrics: metricsServerOptions,
WebhookServer: webhookServer,
HealthProbeBindAddress: probeAddr,
LeaderElection: enableLeaderElection,
LeaderElectionID: "your-leader-election-id",
}
// Configure cache to watch namespace(s) specified in WATCH_NAMESPACE
mgrOptions.Cache = setupCacheNamespaces(watchNamespace)
setupLog.Info("Watching namespace(s)", "namespaces", watchNamespace)
mgr, err := ctrl.NewManager(ctrl.GetConfigOrDie(), mgrOptions)
This configuration works for both single namespace (WATCH_NAMESPACE=my-namespace) and multi-namespace (WATCH_NAMESPACE=ns1,ns2,ns3) scenarios.
Multi-namespace
Managers can watch multiple specific namespaces using comma-separated values in WATCH_NAMESPACE.
Characteristics:
- Requires
RoleandRoleBindingin each watched namespace - Uses the same
setupCacheNamespaceshelper function - Same code as single-namespace mode (KISS principle)
Example:
# Deploy manager to watch multiple namespaces
export WATCH_NAMESPACE=namespace1,namespace2,namespace3
kubectl apply -f dist/install.yaml
The setupCacheNamespaces helper function automatically handles both single and multiple namespaces without conditional logic.
See also
- Understanding Scopes - Overview of manager and CRD scopes
- CRD Scope - Configuring CustomResourceDefinition scope
- Namespace-Scoped Migration - Detailed implementation guide
- Project Config - PROJECT file configuration
CRD scope
This document explains CustomResourceDefinition (CRD) scope in Kubernetes: how CRDs can be defined as namespace-scoped or cluster-scoped resources.
Overview
CRD scope determines the visibility and availability of custom resources:
| Scope | Description | Example Resources |
|---|---|---|
| Namespace-scoped (default) | Resources exist within a specific namespace | Deployments, Services, ConfigMaps, Pods |
| Cluster-scoped | Resources are global across the entire cluster | Nodes, ClusterRoles, Namespaces, PersistentVolumes |
Namespace-scoped CRDs (default)
By default, Kubebuilder creates namespace-scoped CRDs:
kubebuilder create api --group cache --version v1alpha1 --kind Memcached
Generated CRD manifest:
apiVersion: apiextensions.k8s.io/v1
kind: CustomResourceDefinition
metadata:
name: memcacheds.cache.example.com
spec:
scope: Namespaced # Default
group: cache.example.com
names:
kind: Memcached
plural: memcacheds
versions:
- name: v1alpha1
# ...
Custom resources are created in specific namespaces:
kubectl apply -f memcached.yaml -n my-namespace
kubectl get memcacheds -n my-namespace
When to use:
- Resources tied to specific applications, teams, or tenants
- Multi-tenant environments where isolation is required
- Most application-level resources
Considerations:
- Testing new CRD versions requires proper versioning and conversion strategies
- Conversion webhooks must account for namespace scope
- Facilitates controlled rollout within specific namespaces
Cluster-scoped CRDs
Cluster-scoped CRDs create resources that are global across the entire cluster.
Creating cluster-scoped CRDs
When creating the API, use the --namespaced=false flag:
kubebuilder create api --group infrastructure --version v1 --kind Database --namespaced=false
Generated CRD manifest:
apiVersion: apiextensions.k8s.io/v1
kind: CustomResourceDefinition
metadata:
name: databases.infrastructure.example.com
spec:
scope: Cluster # Cluster-scoped
group: infrastructure.example.com
names:
kind: Database
plural: databases
versions:
- name: v1
# ...
Custom resources are cluster-wide (no namespace):
kubectl apply -f database.yaml
kubectl get databases # No namespace needed
When to use:
- Resources that are global to the cluster (infrastructure, configuration)
- Resources that need to be accessible from all namespaces
- Resources that manage cluster-level concerns
Examples:
- Infrastructure configurations (cloud provider settings, cluster DNS)
- Global policies or quotas
- Cross-namespace resource aggregation
Changing CRD scope
For existing APIs
After creating an API, you can change its scope using the +kubebuilder:resource:scope marker:
For cluster-scoped:
//+kubebuilder:object:root=true
//+kubebuilder:subresource:status
//+kubebuilder:resource:scope=Cluster
// Database is the Schema for the databases API
type Database struct {
metav1.TypeMeta `json:",inline"`
metav1.ObjectMeta `json:"metadata,omitempty"`
Spec DatabaseSpec `json:"spec,omitempty"`
Status DatabaseStatus `json:"status,omitempty"`
}
For namespace-scoped:
//+kubebuilder:object:root=true
//+kubebuilder:subresource:status
//+kubebuilder:resource:scope=Namespaced
// Memcached is the Schema for the memcacheds API
type Memcached struct {
metav1.TypeMeta `json:",inline"`
metav1.ObjectMeta `json:"metadata,omitempty"`
Spec MemcachedSpec `json:"spec,omitempty"`
Status MemcachedStatus `json:"status,omitempty"`
}
After updating markers, regenerate manifests:
make manifests
RBAC for CRD scope
Namespace-scoped CRDs
Controllers watching namespace-scoped CRDs use namespace-scoped RBAC:
//+kubebuilder:rbac:groups=cache.example.com,resources=memcacheds,verbs=get;list;watch;create;update;patch;delete
//+kubebuilder:rbac:groups=cache.example.com,resources=memcacheds/status,verbs=get;update;patch
//+kubebuilder:rbac:groups=cache.example.com,resources=memcacheds/finalizers,verbs=update
Generated RBAC (cluster-scoped manager):
apiVersion: rbac.authorization.k8s.io/v1
kind: ClusterRole
metadata:
name: manager-role
rules:
- apiGroups: ["cache.example.com"]
resources: ["memcacheds"]
verbs: ["get", "list", "watch", "create", "update", "patch", "delete"]
Generated RBAC (namespace-scoped manager):
apiVersion: rbac.authorization.k8s.io/v1
kind: Role
metadata:
name: manager-role
namespace: manager-namespace
rules:
- apiGroups: ["cache.example.com"]
resources: ["memcacheds"]
verbs: ["get", "list", "watch", "create", "update", "patch", "delete"]
Cluster-scoped CRDs
Controllers watching cluster-scoped CRDs must use cluster-wide RBAC:
//+kubebuilder:rbac:groups=infrastructure.example.com,resources=databases,verbs=get;list;watch;create;update;patch;delete
//+kubebuilder:rbac:groups=infrastructure.example.com,resources=databases/status,verbs=get;update;patch
//+kubebuilder:rbac:groups=infrastructure.example.com,resources=databases/finalizers,verbs=update
Generated RBAC (always ClusterRole for cluster-scoped CRDs):
apiVersion: rbac.authorization.k8s.io/v1
kind: ClusterRole
metadata:
name: manager-role
rules:
- apiGroups: ["infrastructure.example.com"]
resources: ["databases"]
verbs: ["get", "list", "watch", "create", "update", "patch", "delete"]
Version conversion and webhooks
For namespace-scoped CRDs with multiple versions, conversion webhooks must account for namespace scope:
//+kubebuilder:webhook:path=/convert,mutating=false,failurePolicy=fail,groups=cache.example.com,resources=memcacheds,verbs=create;update,versions=v1;v1beta1,name=cmemcached.kb.io,sideEffects=None,admissionReviewVersions=v1
The webhook must handle conversion for resources in any namespace. See the multi-version tutorial for details.
Testing
Testing namespace-scoped CRDs
# Create resource in namespace
kubectl apply -f config/samples/cache_v1alpha1_memcached.yaml -n test-namespace
# Verify it exists in that namespace only
kubectl get memcacheds -n test-namespace
kubectl get memcacheds -n other-namespace # Should not find it
Testing cluster-scoped CRDs
# Create cluster-scoped resource (no namespace)
kubectl apply -f config/samples/infrastructure_v1_database.yaml
# Verify it is cluster-wide
kubectl get databases # No namespace needed
See also
- Manager Scope - Configuring manager watching scope
- Generating CRDs - CRD generation and markers
- Multi-Version Tutorial - CRD versioning and conversion
- Kubernetes CRD Documentation
Sub-module layouts
This part describes how to modify a scaffolded project for use with multiple go.mod files for APIs and Controllers.
Sub-Module Layouts (in a way you could call them a special form of Monorepo’s) are a special use case and can help in scenarios that involve reuse of APIs without introducing indirect dependencies that should not be available in the project consuming the API externally.
Overview
Separate go.mod modules for APIs and Controllers can help for the following cases:
- There is an enterprise version of an operator available that wants to reuse APIs from the Community Version
- There are many (possibly external) modules depending on the API and you want to have a more strict separation of transitive dependencies
- If you want to reduce impact of transitive dependencies on your API being included in other projects
- If you are looking to separately manage the lifecycle of your API release process from your controller release process.
- If you are looking to modularize your codebase without splitting your code between multiple repositories.
They introduce however multiple caveats into typical projects which is one of the main factors that makes them hard to recommend in a generic use-case or plugin:
- Multiple
go.modmodules are not recommended as a go best practice and multiple modules are mostly discouraged - There is always the possibility to extract your APIs into a new repository and arguably also have more control over the release process in a project spanning multiple repos relying on the same API types.
- It requires at least one replace directive either through
go.workwhich is at least 2 more files plus an environment variable for build environments without GO_WORK or throughgo.modreplace, which has to be manually dropped and added for every release.
Adjusting your project
For a proper Sub-Module layout, use the generated APIs as a starting point.
For the steps below, assume you created your project in your GOPATH with
kubebuilder init
and created an API & controller with
kubebuilder create api --group operator --version v1alpha1 --kind Sample --resource --controller --make
Creating a second module for your API
Now that you have a base layout in place, enable it for multiple modules.
- Navigate to
api/v1alpha1 - Run
go mod initto create a new submodule - Run
go mod tidyto resolve the dependencies
Your api go.mod file could now look like this:
module YOUR_GO_PATH/test-operator/api/v1alpha1
go 1.21.0
require (
k8s.io/apimachinery v0.28.4
sigs.k8s.io/controller-runtime v0.16.3
)
require (
github.com/go-logr/logr v1.2.4 // indirect
github.com/gogo/protobuf v1.3.2 // indirect
github.com/google/gofuzz v1.2.0 // indirect
github.com/json-iterator/go v1.1.12 // indirect
github.com/modern-go/concurrent v0.0.0-20180306012644-bacd9c7ef1dd // indirect
github.com/modern-go/reflect2 v1.0.2 // indirect
golang.org/x/net v0.17.0 // indirect
golang.org/x/text v0.13.0 // indirect
gopkg.in/inf.v0 v0.9.1 // indirect
gopkg.in/yaml.v2 v2.4.0 // indirect
k8s.io/klog/v2 v2.100.1 // indirect
k8s.io/utils v0.0.0-20230406110748-d93618cff8a2 // indirect
sigs.k8s.io/json v0.0.0-20221116044647-bc3834ca7abd // indirect
sigs.k8s.io/structured-merge-diff/v4 v4.2.3 // indirect
)
As you can see it only includes apimachinery and controller-runtime as dependencies and any dependencies you have declared in your controller are not taken over into the indirect imports.
Using replace directives for development
When trying to resolve your main module in the root folder of the operator, you will notice an error if you use a VCS path:
go mod tidy
go: finding module for package YOUR_GO_PATH/test-operator/api/v1alpha1
YOUR_GO_PATH/test-operator imports
YOUR_GO_PATH/test-operator/api/v1alpha1: cannot find module providing package YOUR_GO_PATH/test-operator/api/v1alpha1: module YOUR_GO_PATH/test-operator/api/v1alpha1: git ls-remote -q origin in LOCALVCSPATH: exit status 128:
remote: Repository not found.
fatal: repository 'https://YOUR_GO_PATH/test-operator/' not found
The reason for this is that you may have not pushed your modules into the VCS yet and resolving the main module fails as it can no longer directly access the API types as a package but only as a module.
To solve this issue, tell the go tooling to properly replace the API module with a local reference to your path.
You can do this with 2 different approaches: go modules and go workspaces.
Using go modules
For go modules, you will edit the main go.mod file of your project and issue a replace directive.
You can do this by editing the go.mod with
go mod edit -require YOUR_GO_PATH/test-operator/api/v1alpha1@v0.0.0 # Only if you did not already resolve the module
go mod edit -replace YOUR_GO_PATH/test-operator/api/v1alpha1@v0.0.0=./api/v1alpha1
go mod tidy
Note that this example uses the placeholder version v0.0.0 of the API Module. In case you already released your API module once,
you can use the real version as well. However this will only work if the API Module is already available in the VCS.
Using go workspaces
For go workspaces, you will not edit the go.mod files yourself, but rely on the workspace support in go.
To initialize a workspace for your project, run go work init in the project root.
Now include both modules in the workspace:
go work use . # This includes the main module with the controller
go work use api/v1alpha1 # This is the API submodule
go work sync
This will lead to commands such as go run or go build to respect the workspace and make sure that local resolution is used.
You are able to work with this locally without having to build your module.
When using go.work files, it is recommended to not commit them into the repository and add them to .gitignore.
go.work
go.work.sum
When releasing with a present go.work file, make sure to set the environment variable GOWORK=off (verifiable with go env GOWORK) to make sure the release process does not get impeded by a potentially committed go.work file.
Adjusting the Dockerfile
When building your controller image, kubebuilder by default is not able to work with multiple modules. You have to manually add the new API module into the download of dependencies:
# Build the manager binary
FROM docker.io/golang:1.20 as builder
ARG TARGETOS
ARG TARGETARCH
WORKDIR /workspace
# Copy the Go Modules manifests
COPY go.mod go.mod
COPY go.sum go.sum
# Copy the Go Sub-Module manifests
COPY api/v1alpha1/go.mod api/go.mod
COPY api/v1alpha1/go.sum api/go.sum
# cache deps before building and copying source so that we do not need to re-download as much
# and so that source changes do not invalidate our downloaded layer
RUN go mod download
# Copy the go source
COPY cmd/main.go cmd/main.go
COPY api/ api/
COPY internal/controller/ internal/controller/
# Build
# the GOARCH has not a default value to allow the binary be built according to the host where the command
# was called. For example, if you call make docker-build in a local env which has the Apple Silicon M1 SO
# the docker BUILDPLATFORM arg is linux/arm64 when for Apple x86 it is linux/amd64. Therefore,
# by leaving it empty you can ensure that the container and binary shipped on it has the same platform.
RUN CGO_ENABLED=0 GOOS=${TARGETOS:-linux} GOARCH=${TARGETARCH} go build -a -o manager cmd/main.go
# Use distroless as minimal base image to package the manager binary
# Refer to https://github.com/GoogleContainerTools/distroless for more details
FROM gcr.io/distroless/static:nonroot
WORKDIR /
COPY --from=builder /workspace/manager .
USER 65532:65532
ENTRYPOINT ["/manager"]
Creating a new API and controller release
Because you adjusted the default layout, before releasing your first version of your operator, make sure to familiarize yourself with mono-repo/multi-module releases with multiple go.mod files in different subdirectories.
Assuming a single API was created, the release process could look like this:
git commit
git tag v1.0.0 # this is your main module release
git tag api/v1.0.0 # this is your api release
go mod edit -require YOUR_GO_PATH/test-operator/api@v1.0.0 # now we depend on the api module in the main module
go mod edit -dropreplace YOUR_GO_PATH/test-operator/api/v1alpha1 # this will drop the replace directive for local development in case you use go modules, meaning the sources from the VCS is used instead of the ones in your monorepo checked out locally.
git push origin main v1.0.0 api/v1.0.0
After this, your modules is available in VCS and you do not need a local replacement anymore. However if you are making local changes,
make sure to adopt your behavior with replace directives accordingly.
Reusing your extracted API module
Whenever you want to reuse your API module with a separate kubebuilder, follow the guide for using an external Type.
When you get to the step Edit the API files simply import the dependency with
go get YOUR_GO_PATH/test-operator/api@v1.0.0
and then use it as explained in the guide.
Using external resources
In some cases, your project may need to work with resources that are not defined by your own APIs. These external resources fall into two main categories:
- Core Types: API types defined by Kubernetes itself, such as
Pods,Services, andDeployments. - External Types: API types defined in other projects, such as CRDs defined by another solution.
Managing external types
Creating a controller for external types
To create a controller for an external type without scaffolding a resource,
use the create api command with the --resource=false option and specify the path to the
external API type using the --external-api-path and --external-api-domain flag options.
This generates a controller for types defined outside your project,
such as CRDs managed by other Operators.
The command looks like this:
kubebuilder create api --group <theirgroup> --version <theirversion> --kind <theirKind> --controller --resource=false --external-api-path=<their Golang path import> --external-api-domain=<theirdomain>
--external-api-path: Provide the Go import path where you define the external types.--external-api-domain: Provide the domain for the external types. Kubebuilder uses this value to generate RBAC permissions and create the QualifiedGroup, such as -apiGroups: <group>.<domain>
For example, if you are managing Certificates from Cert Manager:
kubebuilder create api --group certmanager --version v1 --kind Certificate --controller=true --resource=false --external-api-path=github.com/cert-manager/cert-manager/pkg/apis/certmanager/v1 --external-api-domain=io
See the RBAC markers generated for this:
// +kubebuilder:rbac:groups=cert-manager.io,resources=certificates,verbs=get;list;watch;create;update;patch;delete
// +kubebuilder:rbac:groups=cert-manager.io,resources=certificates/status,verbs=get;update;patch
// +kubebuilder:rbac:groups=cert-manager.io,resources=certificates/finalizers,verbs=update
Also, the RBAC role:
- apiGroups:
- cert-manager.io
resources:
- certificates
verbs:
- create
- delete
- get
- list
- patch
- update
- watch
- apiGroups:
- cert-manager.io
resources:
- certificates/finalizers
verbs:
- update
- apiGroups:
- cert-manager.io
resources:
- certificates/status
verbs:
- get
- patch
- update
This scaffolds a controller for the external type but skips creating new resource definitions since an external project defines the type.
Creating a webhook to manage an external type
You can create webhooks for external types by providing the external API path, domain, and optionally the module:
kubebuilder create webhook --group certmanager --version v1 --kind Issuer \
--defaulting --programmatic-validation \
--external-api-path=github.com/cert-manager/cert-manager/pkg/apis/certmanager/v1 \
--external-api-domain=cert-manager.io
You can also pin the version using the --external-api-module flag:
kubebuilder create webhook --group certmanager --version v1 --kind Issuer \
--defaulting --programmatic-validation \
--external-api-path=github.com/cert-manager/cert-manager/pkg/apis/certmanager/v1 \
--external-api-domain=cert-manager.io \
--external-api-module=github.com/cert-manager/cert-manager@v1.18.2
Managing core types
Core Kubernetes API types, such as Pods, Services, and Deployments, are predefined by Kubernetes.
To create a controller for these core types without scaffolding the resource,
use the Kubernetes group name described in the following
table and specify the version and kind.
| Group | K8s API Group |
|---|---|
| admission | k8s.io/admission |
| admissionregistration | k8s.io/admissionregistration |
| apps | apps |
| auditregistration | k8s.io/auditregistration |
| apiextensions | k8s.io/apiextensions |
| authentication | k8s.io/authentication |
| authorization | k8s.io/authorization |
| autoscaling | autoscaling |
| batch | batch |
| certificates | k8s.io/certificates |
| coordination | k8s.io/coordination |
| core | core |
| events | k8s.io/events |
| extensions | extensions |
| imagepolicy | k8s.io/imagepolicy |
| networking | k8s.io/networking |
| node | k8s.io/node |
| metrics | k8s.io/metrics |
| policy | policy |
| rbac.authorization | k8s.io/rbac.authorization |
| scheduling | k8s.io/scheduling |
| setting | k8s.io/setting |
| storage | k8s.io/storage |
The command to create a controller to manage Pods looks like this:
kubebuilder create api --group core --version v1 --kind Pod --controller=true --resource=false
For instance, to create a controller to manage Deployment the command would be like:
create api --group apps --version v1 --kind Deployment --controller=true --resource=false
See the RBAC markers generated for this:
// +kubebuilder:rbac:groups=apps,resources=deployments,verbs=get;list;watch;create;update;patch;delete
// +kubebuilder:rbac:groups=apps,resources=deployments/status,verbs=get;update;patch
// +kubebuilder:rbac:groups=apps,resources=deployments/finalizers,verbs=update
Also, the RBAC for the above markers:
- apiGroups:
- apps
resources:
- deployments
verbs:
- create
- delete
- get
- list
- patch
- update
- watch
- apiGroups:
- apps
resources:
- deployments/finalizers
verbs:
- update
- apiGroups:
- apps
resources:
- deployments/status
verbs:
- get
- patch
- update
This scaffolds a controller for the Core type corev1.Pod but skips creating new resource
definitions since the type is already defined in the Kubernetes API.
Creating a webhook to manage a core type
You run the command with the Core Type data, just as you would for controllers. See an example:
kubebuilder create webhook --group core --version v1 --kind Pod --programmatic-validation
Multiple controllers per resource
Kubebuilder supports multiple named controllers for the same API resource. This allows different reconciliation logic for the same resource type.
Usage
Creating the first controller
kubebuilder create api --group crew --version v1 --kind Captain \
--resource=true \
--controller=true \
--controller-name=captain
Creates:
- API types in
api/v1/captain_types.go - Controller in
internal/controller/captain_controller.gowith structCaptainReconciler - Registration in
cmd/main.go
Adding additional controllers
kubebuilder create api --group crew --version v1 --kind Captain \
--resource=false \
--controller=true \
--controller-name=captain-backup
Creates:
- Controller in
internal/controller/captain_backup_controller.gowith structCaptainBackupReconciler - Additional registration in
cmd/main.go
The API is only created once. Additional controllers reference the existing API.
PROJECT file format
Legacy format (still supported)
resources:
- api:
crdVersion: v1
controller: true
group: crew
kind: Captain
version: v1
Multiple controllers format
resources:
- api:
crdVersion: v1
controllers:
- name: captain
- name: captain-backup
group: crew
kind: Captain
version: v1
When both formats exist on the same resource (due to manual editing), the controllers: array takes precedence and controller: true is automatically cleared.
Controller naming
Storage
Controller names are stored in the PROJECT file exactly as provided by the user.
Code generation
Names are normalized for Go code:
- File name: Replace hyphens with underscores:
captain-backup→captain_backup_controller.go - Struct name: Convert to PascalCase and append Reconciler:
captain-backup→CaptainBackupReconciler - Runtime name: Use exact name from PROJECT:
Named("captain-backup") - Multigroup: Prefix with group name:
Named("crew-captain-backup")
Validation rules
- Names must be unique within a resource
- Names must be valid DNS labels: lowercase, alphanumeric, and hyphens only, max 63 characters
- Different names that normalize to the same identifier are rejected (e.g.,
captain-backupandcaptainbackup)
Controller coordination
Multiple controllers for the same resource require coordination to avoid conflicts:
- Field ownership: Each controller should manage different fields
- Finalizers: Use unique names:
{controller-name}.example.com/finalizer - Status updates: Assign different status subfields to each controller
- Conditional logic: Use labels or annotations to route resources to specific controllers
Kubebuilder scaffolds the controllers but does not manage coordination between them.
Migration from legacy format
Existing projects with controller: true continue to work unchanged. When adding named controllers to a resource with controller: true, Kubebuilder automatically migrates the format:
Before migration:
resources:
- api:
crdVersion: v1
controller: true
group: crew
kind: Captain
version: v1
After adding a named controller:
kubebuilder create api --group crew --version v1 --kind Captain \
--resource=false \
--controller=true \
--controller-name=captain-backup
Result:
resources:
- api:
crdVersion: v1
controllers:
- name: captain
- name: captain-backup
group: crew
kind: Captain
version: v1
The original unnamed controller is assigned the name captain (lowercase kind) and the controller: true flag is automatically cleared. This maintains backward compatibility while enabling multiple controllers.
Common errors
“duplicate controller name”: Two controllers have the same name. Use unique names.
“conflicts with … both normalize to”: Different names generate the same struct name. Choose distinct names.
“controller with name … already exists”: Controller already exists for this resource. Use a different name.
Configuring envtest for integration tests
The controller-runtime/pkg/envtest Go library helps write integration tests for your controllers by setting up and starting an instance of etcd and the
Kubernetes API server, without kubelet, controller-manager or other components.
Installation
Installing the binaries is as a simple as running make envtest. envtest will download the Kubernetes API server binaries to the bin/ folder in your project
by default. make test is the one-stop shop for downloading the binaries, setting up the test environment, and running the tests.
You can refer to the Makefile of the Kubebuilder scaffold and observe that the envtest setup is consistently aligned across all controller-runtime releases. Kubebuilder configures it to automatically download the artefact from the correct location, ensuring that kubebuilder users are not impacted.
## Tool binaries
..
ENVTEST ?= $(LOCALBIN)/setup-envtest
...
## Tool versions
...
#ENVTEST_VERSION is the controller-runtime version to use for setup-envtest, derived from go.mod
ENVTEST_VERSION ?= $(shell go list -m -f "{{ .Version }}" sigs.k8s.io/controller-runtime)
#ENVTEST_K8S_VERSION is the version of Kubernetes to use for setting up ENVTEST binaries (i.e. 1.31)
ENVTEST_K8S_VERSION ?= $(shell go list -m -f "{{ .Version }}" k8s.io/api | awk -F'[v.]' '{printf "1.%d", $$3}')
...
.PHONY: setup-envtest
setup-envtest: envtest ## Download the binaries required for ENVTEST in the local bin directory.
@echo "Setting up envtest binaries for Kubernetes version $(ENVTEST_K8S_VERSION)..."
@$(ENVTEST) use $(ENVTEST_K8S_VERSION) --bin-dir $(LOCALBIN) -p path || { \
echo "Error: Failed to set up envtest binaries for version $(ENVTEST_K8S_VERSION)."; \
exit 1; \
}
.PHONY: envtest
envtest: $(ENVTEST) ## Download setup-envtest locally if necessary.
$(ENVTEST): $(LOCALBIN)
$(call go-install-tool,$(ENVTEST),sigs.k8s.io/controller-runtime/tools/setup-envtest,$(ENVTEST_VERSION))
Installation in air gapped/disconnected environments
If you would like to download the tarball containing the binaries, to use in a disconnected environment you can use
setup-envtest to download the required binaries locally. There are several ways to configure setup-envtest for air-gapped environments.
The examples below show how to install the Kubernetes API binaries using mostly defaults set by setup-envtest.
Download the binaries
make envtest downloads the setup-envtest binary to ./bin/.
make envtest
The setup-envtest tool stores binaries in OS-specific locations. See binary storage locations for details.
./bin/setup-envtest use 1.31.0
Update the test make target
Once you install these binaries, change the test make target to include a -i like below. -i will only check for locally installed
binaries and not reach out to remote resources. You could also set the ENVTEST_INSTALLED_ONLY env variable.
test: manifests generate fmt vet
KUBEBUILDER_ASSETS="$(shell $(ENVTEST) use $(ENVTEST_K8S_VERSION) -i --bin-dir $(LOCALBIN) -p path)" go test ./... -coverprofile cover.out
NOTE: The ENVTEST_K8S_VERSION needs to match the setup-envtest you downloaded above. Otherwise, you will see an error like the below
no such version (1.24.5) exists on disk for this architecture (darwin/amd64) -- try running `list -i` to see what is on disk
Writing tests
Using envtest in integration tests follows the general flow of:
import sigs.k8s.io/controller-runtime/pkg/envtest
//specify testEnv configuration
testEnv = &envtest.Environment{
CRDDirectoryPaths: []string{filepath.Join("..", "config", "crd", "bases")},
}
//start testEnv
cfg, err = testEnv.Start()
//write test logic
//stop testEnv
err = testEnv.Stop()
kubebuilder does the boilerplate setup and teardown of testEnv for you, in the ginkgo test suite that it generates under the /controllers directory.
Logs from the test runs are prefixed with test-env.
Configuring your test control plane
Controller-runtime’s envtest framework requires kubectl, kube-apiserver, and etcd binaries be present locally to simulate the API portions of a real cluster.
The make test command installs these binaries to the bin/ directory and uses them when running tests that use envtest.
Ie,
./bin/k8s/
└── 1.25.0-darwin-amd64
├── etcd
├── kube-apiserver
└── kubectl
You can use environment variables and/or flags to specify the kubectl,api-server and etcd setup within your integration tests.
Environment variables
| Variable name | Type | When to use |
|---|---|---|
USE_EXISTING_CLUSTER | boolean | Instead of setting up a local control plane, point to the control plane of an existing cluster. |
KUBEBUILDER_ASSETS | path to directory | Point integration tests to a directory containing all binaries (api-server, etcd and kubectl). |
TEST_ASSET_KUBE_APISERVER, TEST_ASSET_ETCD, TEST_ASSET_KUBECTL | paths to, respectively, api-server, etcd and kubectl binaries | Similar to KUBEBUILDER_ASSETS, but more granular. Point integration tests to use binaries other than the default ones. These environment variables can also be used to ensure specific tests run with expected versions of these binaries. |
KUBEBUILDER_CONTROLPLANE_START_TIMEOUT and KUBEBUILDER_CONTROLPLANE_STOP_TIMEOUT | durations in format supported by time.ParseDuration | Specify timeouts different from the default for the test control plane to (respectively) start and stop; any test run that exceeds them fails. |
KUBEBUILDER_ATTACH_CONTROL_PLANE_OUTPUT | boolean | Set to true to attach the control plane’s stdout and stderr to os.Stdout and os.Stderr. This can be useful when debugging test failures, as output will include output from the control plane. |
See that the test makefile target ensures that all is properly setup when you are using it. However, if you would like to run the tests without use the Makefile targets, for example via an IDE, then you can set the environment variables directly in the code of your suite_test.go:
var _ = BeforeSuite(func(done Done) {
Expect(os.Setenv("TEST_ASSET_KUBE_APISERVER", "../bin/k8s/1.25.0-darwin-amd64/kube-apiserver")).To(Succeed())
Expect(os.Setenv("TEST_ASSET_ETCD", "../bin/k8s/1.25.0-darwin-amd64/etcd")).To(Succeed())
Expect(os.Setenv("TEST_ASSET_KUBECTL", "../bin/k8s/1.25.0-darwin-amd64/kubectl")).To(Succeed())
// OR
Expect(os.Setenv("KUBEBUILDER_ASSETS", "../bin/k8s/1.25.0-darwin-amd64")).To(Succeed())
logf.SetLogger(zap.New(zap.WriteTo(GinkgoWriter), zap.UseDevMode(true)))
testenv = &envtest.Environment{}
_, err := testenv.Start()
Expect(err).NotTo(HaveOccurred())
close(done)
}, 60)
var _ = AfterSuite(func() {
Expect(testenv.Stop()).To(Succeed())
Expect(os.Unsetenv("TEST_ASSET_KUBE_APISERVER")).To(Succeed())
Expect(os.Unsetenv("TEST_ASSET_ETCD")).To(Succeed())
Expect(os.Unsetenv("TEST_ASSET_KUBECTL")).To(Succeed())
})
Flags
Here’s an example of modifying the flags with which to start the API server in your integration tests, compared to the default values in envtest.DefaultKubeAPIServerFlags:
customApiServerFlags := []string{
"--secure-port=6884",
"--admission-control=MutatingAdmissionWebhook",
}
apiServerFlags := append([]string(nil), envtest.DefaultKubeAPIServerFlags...)
apiServerFlags = append(apiServerFlags, customApiServerFlags...)
testEnv = &envtest.Environment{
CRDDirectoryPaths: []string{filepath.Join("..", "config", "crd", "bases")},
KubeAPIServerFlags: apiServerFlags,
}
Testing considerations
Unless you are using an existing cluster, keep in mind that no built-in controllers run in the test context. In some ways, the test control plane behaves differently from “real” clusters, and that might impact how you write tests. One common example is garbage collection; because no controllers monitor built-in resources, Kubernetes does not delete objects, even if you set up an OwnerReference.
To test that the deletion lifecycle works, test the ownership instead of asserting on existence. For example:
expectedOwnerReference := v1.OwnerReference{
Kind: "MyCoolCustomResource",
APIVersion: "my.api.example.com/v1beta1",
UID: "d9607e19-f88f-11e6-a518-42010a800195",
Name: "userSpecifiedResourceName",
}
Expect(deployment.ObjectMeta.OwnerReferences).To(ContainElement(expectedOwnerReference))
Cert-manager and Prometheus options
Projects scaffolded with Kubebuilder can enable the metrics and the cert-manager options. Note that when using ENV TEST, you are looking to test the controllers and their reconciliation. It is considered an integrated test because the ENV TEST API will do the test against a cluster and because of this the binaries are downloaded and used to configure its pre-requirements, however, its purpose is mainly to unit test the controllers.
Therefore, to test a reconciliation in common cases you do not need to care about these options. However, if you would like to do tests with the Prometheus and the Cert-manager installed you can add the required steps to install them before running the tests. Following an example.
// Add the operations to install the Prometheus operator and the cert-manager
// before the tests.
BeforeEach(func() {
By("installing prometheus operator")
Expect(utils.InstallPrometheusOperator()).To(Succeed())
By("installing the cert-manager")
Expect(utils.InstallCertManager()).To(Succeed())
})
// You can also remove them after the tests::
AfterEach(func() {
By("uninstalling the Prometheus manager bundle")
utils.UninstallPrometheusOperManager()
By("uninstalling the cert-manager bundle")
utils.UninstallCertManager()
})
Check the following example of how you can implement the above operations:
const (
certmanagerVersion = "v1.5.3"
certmanagerURLTmpl = "https://github.com/cert-manager/cert-manager/releases/download/%s/cert-manager.yaml"
defaultKindCluster = "kind"
defaultKindBinary = "kind"
prometheusOperatorVersion = "0.51"
prometheusOperatorURL = "https://raw.githubusercontent.com/prometheus-operator/" + "prometheus-operator/release-%s/bundle.yaml"
)
func warnError(err error) {
_, _ = fmt.Fprintf(GinkgoWriter, "warning: %v\n", err)
}
// InstallPrometheusOperator installs the prometheus Operator to be used to export the enabled metrics.
func InstallPrometheusOperator() error {
url := fmt.Sprintf(prometheusOperatorURL, prometheusOperatorVersion)
cmd := exec.Command("kubectl", "apply", "-f", url)
_, err := Run(cmd)
return err
}
// UninstallPrometheusOperator uninstalls the prometheus
func UninstallPrometheusOperator() {
url := fmt.Sprintf(prometheusOperatorURL, prometheusOperatorVersion)
cmd := exec.Command("kubectl", "delete", "-f", url)
if _, err := Run(cmd); err != nil {
warnError(err)
}
}
// UninstallCertManager uninstalls the cert manager
func UninstallCertManager() {
url := fmt.Sprintf(certmanagerURLTmpl, certmanagerVersion)
cmd := exec.Command("kubectl", "delete", "-f", url)
if _, err := Run(cmd); err != nil {
warnError(err)
}
}
// InstallCertManager installs the cert manager bundle.
func InstallCertManager() error {
url := fmt.Sprintf(certmanagerURLTmpl, certmanagerVersion)
cmd := exec.Command("kubectl", "apply", "-f", url)
if _, err := Run(cmd); err != nil {
return err
}
// Wait for cert-manager-webhook to be ready, which can take time if cert-manager
//was re-installed after uninstalling on a cluster.
cmd = exec.Command("kubectl", "wait", "deployment.apps/cert-manager-webhook",
"--for", "condition=Available",
"--namespace", "cert-manager",
"--timeout", "5m",
)
_, err := Run(cmd)
return err
}
// LoadImageToKindClusterWithName loads a local docker image to the kind cluster
func LoadImageToKindClusterWithName(name string) error {
cluster := defaultKindCluster
if v, ok := os.LookupEnv("KIND_CLUSTER"); ok {
cluster = v
}
kindOptions := []string{"load", "docker-image", name, "--name", cluster}
kindBinary := defaultKindBinary
if v, ok := os.LookupEnv("KIND"); ok {
kindBinary = v
}
cmd := exec.Command(kindBinary, kindOptions...)
_, err := Run(cmd)
return err
}
However, see that tests for the metrics and cert-manager might fit better well as e2e tests and not under the tests done using ENV TEST for the controllers. You might want to give a look at the sample example implemented into Operator-SDK repository to know how you can write your e2e tests to ensure the basic workflows of your project. Also, see that you can run the tests against a cluster where you have some configurations in place they can use the option to test using an existing cluster:
testEnv = &envtest.Environment{
UseExistingCluster: true,
}
Metrics
By default, controller-runtime builds a global prometheus registry and publishes a collection of performance metrics for each controller.
Metrics configuration
By looking at the file config/default/kustomization.yaml you can
check the metrics are exposed by default:
# [METRICS] Expose the controller manager metrics service.
- metrics_service.yaml
patches:
# [METRICS] The following patch enables the metrics endpoint using HTTPS and the port :8443.
# More info: ./metrics.md
- path: manager_metrics_patch.yaml
target:
kind: Deployment
Then, you can check in the cmd/main.go where you configure the metrics server:
// Metrics endpoint is enabled in 'config/default/kustomization.yaml'. The Metrics options configure the server.
// For more info: https://pkg.go.dev/sigs.k8s.io/controller-runtime/pkg/metrics/server
Metrics: metricsserver.Options{
...
},
Consuming controller metrics in Kubebuilder
You can consume the metrics exposed by the controller using the curl
command or any other HTTP client such as Prometheus.
However, before doing so, ensure that your client has the
required RBAC permissions to access the /metrics endpoint.
Granting permissions to access metrics
Kubebuilder scaffolds a ClusterRole with the necessary read permissions under:
config/rbac/metrics_reader_role.yaml
This file contains the required RBAC rules to allow access to the metrics endpoint.
Create a ClusterRoleBinding
You can create the binding via kubectl:
kubectl create clusterrolebinding metrics \
--clusterrole=<project-prefix>-metrics-reader \
--serviceaccount=<namespace>:<service-account-name>
Or with a manifest:
apiVersion: rbac.authorization.k8s.io/v1
kind: ClusterRoleBinding
metadata:
name: allow-metrics-access
roleRef:
apiGroup: rbac.authorization.k8s.io
kind: ClusterRole
name: metrics-reader
subjects:
- kind: ServiceAccount
name: controller-manager
namespace: system # Replace 'system' with your controller-manager's namespace
Testing the metrics endpoint (via curl pod)
If you’d like to manually test access to the metrics endpoint, follow these steps:
- Create Role Binding
kubectl create clusterrolebinding <project-name>-metrics-binding \
--clusterrole=<project-name>-metrics-reader \
--serviceaccount=<project-name>-system:<project-name>-controller-manager
- Generate a Token
export TOKEN=$(kubectl create token <project-name>-controller-manager -n <project-name>-system)
echo $TOKEN
- Launch Curl Pod
kubectl run curl-metrics --rm -it --restart=Never \
--image=curlimages/curl:7.87.0 -n <project-name>-system -- /bin/sh
- Call Metrics Endpoint
Inside the pod, use:
curl -v -k -H "Authorization: Bearer $TOKEN" \
https://<project-name>-controller-manager-metrics-service.<project-name>-system.svc.cluster.local:8443/metrics
Metrics protection and available options
Unprotected metrics endpoints can expose valuable data to unauthorized users, such as system performance, application behavior, and potentially confidential operational metrics. This exposure can lead to security vulnerabilities where an attacker could gain insights into the system’s operation and exploit weaknesses.
By using authn/authz (enabled by default)
To mitigate these risks, Kubebuilder projects utilize authentication (authn) and authorization (authz) to protect the metrics endpoint. This approach ensures that only authorized users and service accounts can access sensitive metrics data, enhancing the overall security of the system.
In the past, the kube-rbac-proxy was employed to provide this protection.
However, its usage has been discontinued in recent versions. Since the release of v4.1.0, projects have had the
metrics endpoint enabled and protected by default using the WithAuthenticationAndAuthorization
feature provided by controller-runtime.
Therefore, you find the following configuration:
- In the
cmd/main.go:
if secureMetrics {
...
metricsServerOptions.FilterProvider = filters.WithAuthenticationAndAuthorization
}
This configuration leverages the FilterProvider to enforce authentication and authorization on the metrics endpoint. By using this method, you ensure that the endpoint is accessible only to those with the appropriate permissions.
- In the
config/rbac/kustomization.yaml:
# The following RBAC configurations are used to protect
# the metrics endpoint with authn/authz. These configurations
# ensure that only authorized users and service accounts
# can access the metrics endpoint.
- metrics_auth_role.yaml
- metrics_auth_role_binding.yaml
- metrics_reader_role.yaml
In this way, only Pods using the ServiceAccount token are authorized to read the metrics endpoint. For example:
apiVersion: v1
kind: Pod
metadata:
name: metrics-consumer
namespace: system
spec:
# Use the scaffolded service account name to allow authn/authz
serviceAccountName: controller-manager
containers:
- name: metrics-consumer
image: curlimages/curl:latest
command: ["/bin/sh"]
args:
- "-c"
- >
while true;
do
# Note here that this passes the token obtained from the ServiceAccount to curl the metrics endpoint
curl -s -k -H "Authorization: Bearer $(cat /var/run/secrets/kubernetes.io/serviceaccount/token)"
https://controller-manager-metrics-service.system.svc.cluster.local:8443/metrics;
sleep 60;
done
(Recommended) Enabling certificates for production (disabled by default)
Projects built with Kubebuilder releases 4.4.0 and above have the logic scaffolded
to enable the usage of certificates managed by CertManager
for securing the metrics server. Following the steps below, you can configure your
project to use certificates managed by CertManager.
-
Enable Cert-Manager in
config/default/kustomization.yaml:-
Uncomment the cert-manager resource to include it in your project:
- ../certmanager
-
-
Enable the Patch to configure the usage of the certs in the Controller Deployment in
config/default/kustomization.yaml:-
Uncomment the
cert_metrics_manager_patch.yamlto mount theserving-certsecret in the Manager Deployment.# Uncomment the patches line if you enable Metrics and CertManager # [METRICS-WITH-CERTS] To enable metrics protected with certManager, uncomment the following line. # This patch will protect the metrics with certManager self-signed certs. - path: cert_metrics_manager_patch.yaml target: kind: Deployment
-
-
Enable the CertManager replaces for the Metrics Server certificates in
config/default/kustomization.yaml:-
Uncomment the replacements block bellow. It is required to properly set the DNS names for the certificates configured under
config/certmanager.# [CERTMANAGER] To enable cert-manager, uncomment all sections with 'CERTMANAGER' prefix. # Uncomment the following replacements to add the cert-manager CA injection annotations #replacements: # - source: # Uncomment the following block to enable certificates for metrics # kind: Service # version: v1 # name: controller-manager-metrics-service # fieldPath: metadata.name # targets: # - select: # kind: Certificate # group: cert-manager.io # version: v1 # name: metrics-certs # fieldPaths: # - spec.dnsNames.0 # - spec.dnsNames.1 # options: # delimiter: '.' # index: 0 # create: true # # - source: # kind: Service # version: v1 # name: controller-manager-metrics-service # fieldPath: metadata.namespace # targets: # - select: # kind: Certificate # group: cert-manager.io # version: v1 # name: metrics-certs # fieldPaths: # - spec.dnsNames.0 # - spec.dnsNames.1 # options: # delimiter: '.' # index: 1 # create: true #
-
-
Enable the Patch for the
ServiceMonitorto Use the Cert-Manager-Managed Secretconfig/prometheus/kustomization.yaml:-
Add or uncomment the
ServiceMonitorpatch to securely reference the cert-manager-managed secret, replacing insecure configurations with secure certificate verification:# [PROMETHEUS-WITH-CERTS] The following patch configures the ServiceMonitor in ../prometheus # to securely reference certificates created and managed by cert-manager. # Additionally, ensure that you uncomment the [METRICS WITH CERTMANAGER] patch under config/default/kustomization.yaml # to mount the "metrics-server-cert" secret in the Manager Deployment. patches: - path: monitor_tls_patch.yaml target: kind: ServiceMonitor
NOTE that the
ServiceMonitorpatch above ensures that if you enable the Prometheus integration, it securely references the certificates created and managed by CertManager. But it does not enable the integration with Prometheus. To enable the integration with Prometheus, you need uncomment the#- ../certmanagerin theconfig/default/kustomization.yaml. For more information, see Exporting Metrics for Prometheus. -
(Optional) By using network policy (disabled by default)
NetworkPolicy acts as a basic firewall for pods within a Kubernetes cluster, controlling traffic
flow at the IP address or port level. However, it does not handle authn/authz.
Uncomment the following line in the config/default/kustomization.yaml:
# [NETWORK POLICY] Protect the /metrics endpoint and Webhook Server with NetworkPolicy.
# Only Pod(s) running a namespace labeled with 'metrics: enabled' are able to gather the metrics.
# Only CR(s) which uses webhooks and applied on namespaces labeled 'webhooks: enabled' are able to work properly.
#- ../network-policy
Exporting metrics for Prometheus
Follow the steps below to export the metrics using the Prometheus Operator:
-
Install Prometheus and Prometheus Operator. We recommend using kube-prometheus in production if you do not have your own monitoring system. If you are just experimenting, you can only install Prometheus and Prometheus Operator.
-
Uncomment the line
- ../prometheusin theconfig/default/kustomization.yaml. It creates theServiceMonitorresource which enables exporting the metrics.
# [PROMETHEUS] To enable prometheus monitor, uncomment all sections with 'PROMETHEUS'.
- ../prometheus
Note that, when you install your project in the cluster, it creates the
ServiceMonitor to export the metrics. To check the ServiceMonitor,
run kubectl get ServiceMonitor -n <project>-system. See an example:
$ kubectl get ServiceMonitor -n monitor-system
NAME AGE
monitor-controller-manager-metrics-monitor 2m8s
Also, notice that the metrics are exported by default through port 8443. In this way,
you are able to check the Prometheus metrics in its dashboard. To verify it, search
for the metrics exported from the namespace where the project is running
{namespace="<project>-system"}. See an example:
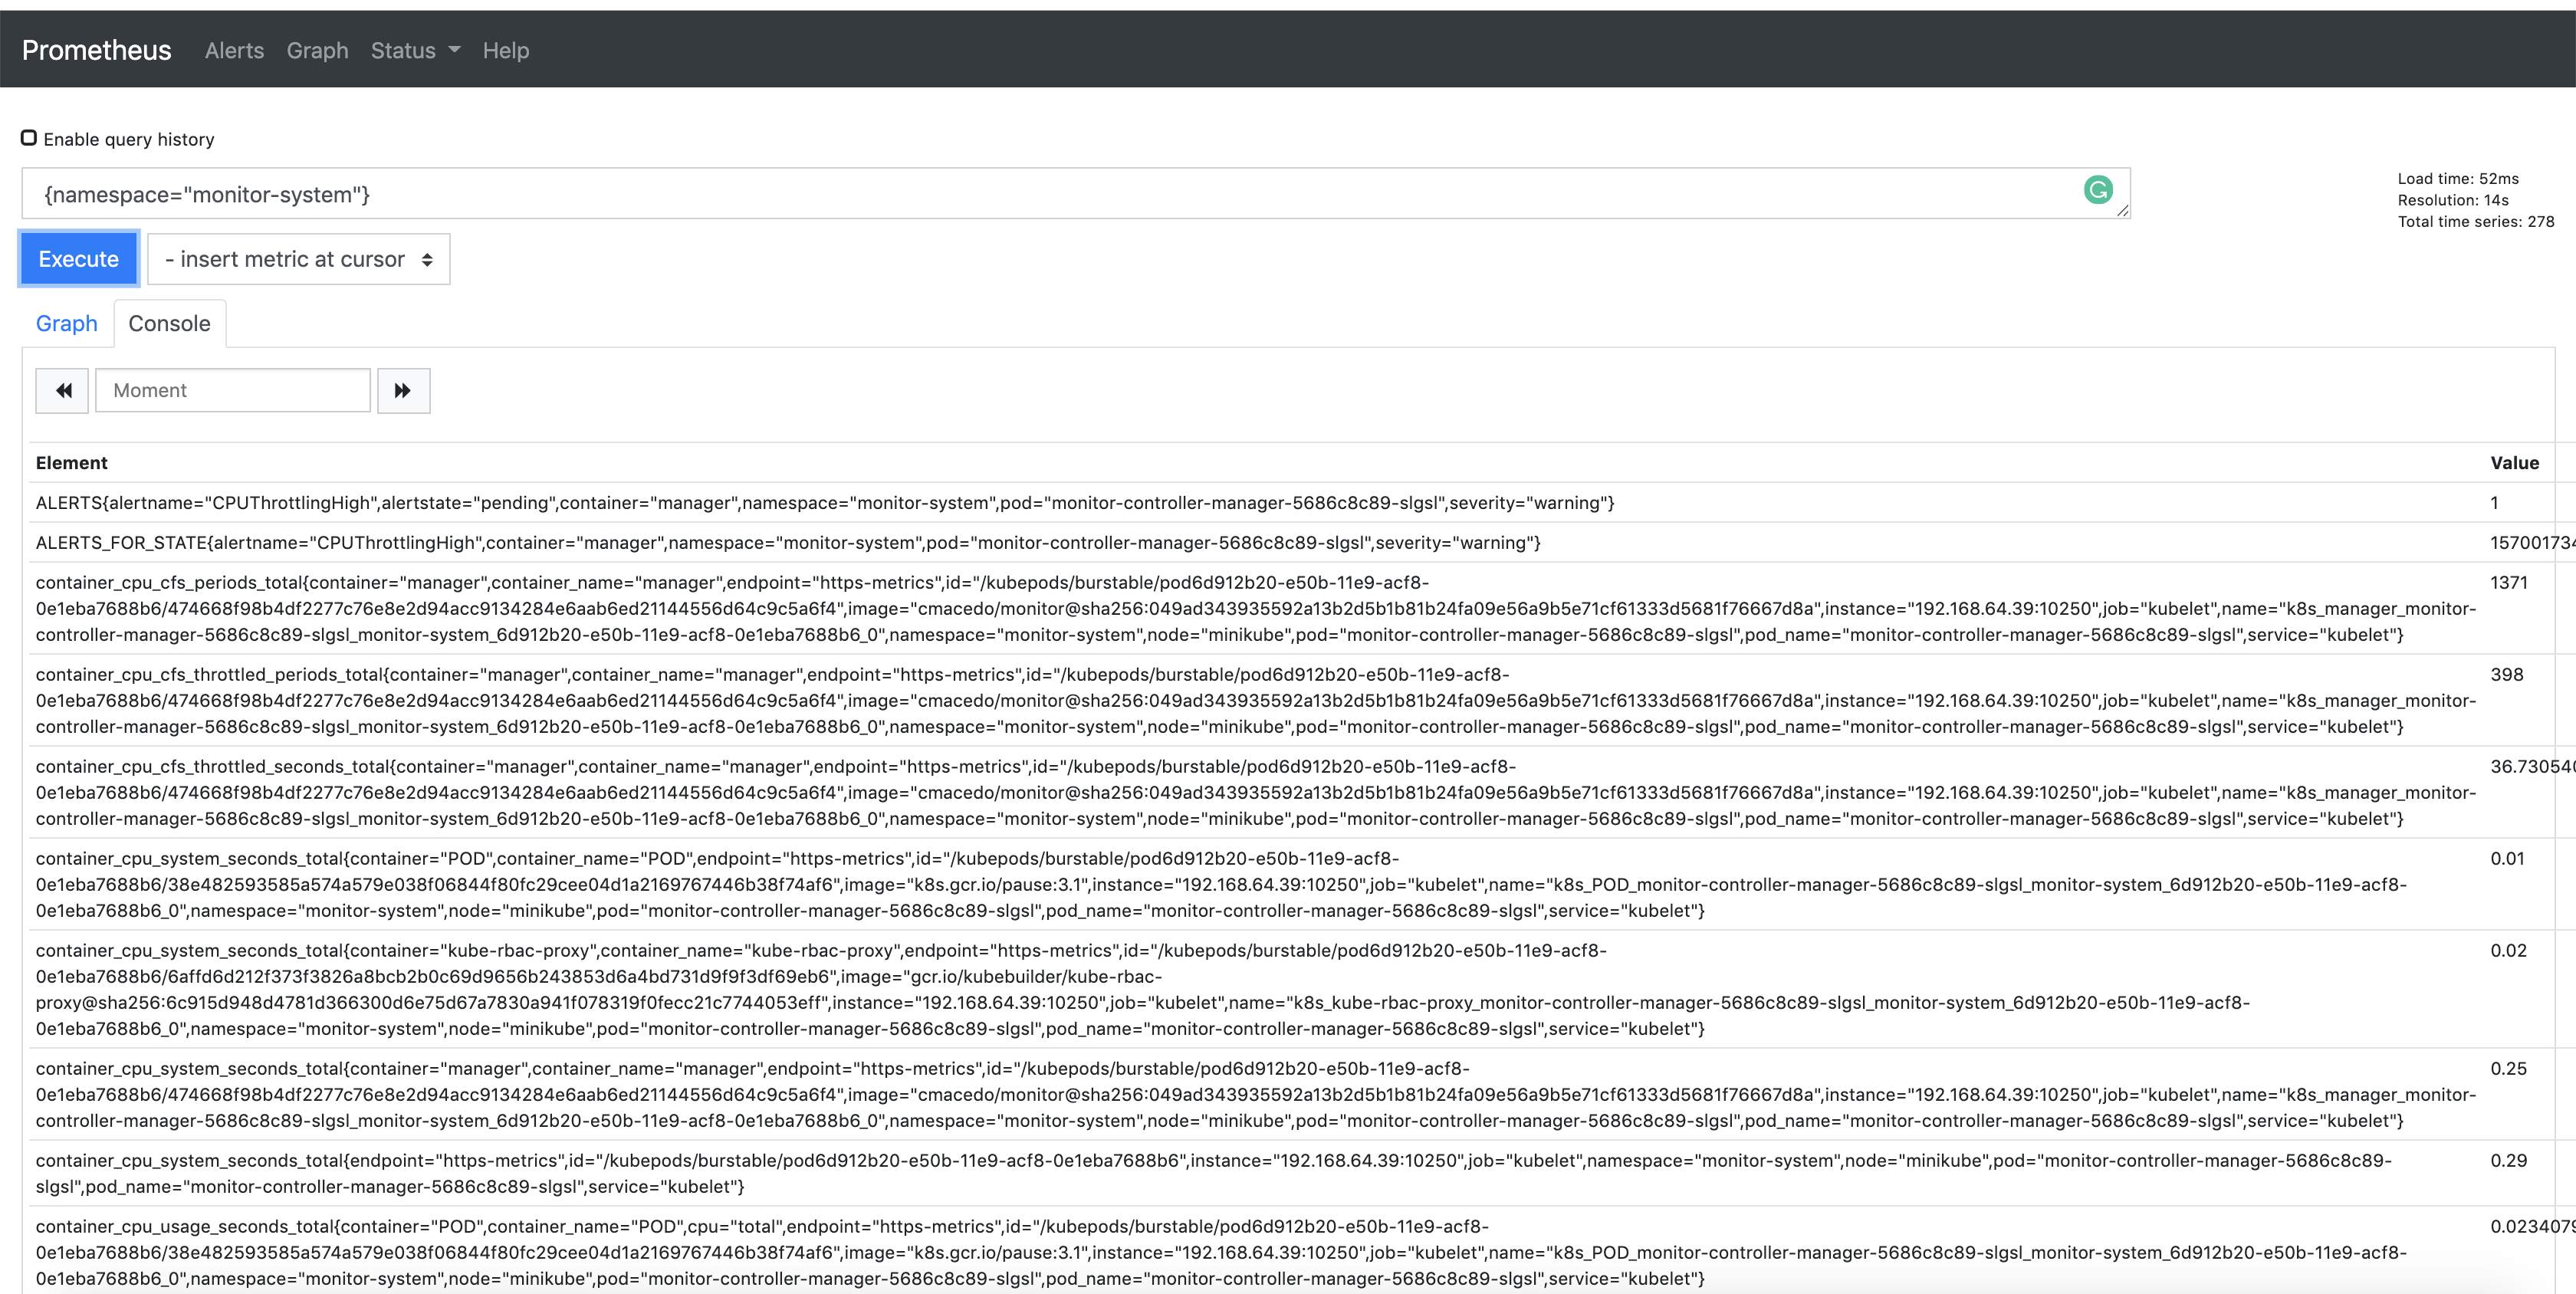
Publishing additional metrics
If you wish to publish additional metrics from your controllers, this
can be easily achieved by using the global registry from
controller-runtime/pkg/metrics.
One way to achieve this is to declare your collectors as global variables and then register them using init() in the controller’s package.
For example:
import (
"github.com/prometheus/client_golang/prometheus"
"sigs.k8s.io/controller-runtime/pkg/metrics"
)
var (
goobers = prometheus.NewCounter(
prometheus.CounterOpts{
Name: "goobers_total",
Help: "Number of goobers processed",
},
)
gooberFailures = prometheus.NewCounter(
prometheus.CounterOpts{
Name: "goober_failures_total",
Help: "Number of failed goobers",
},
)
)
func init() {
// Register custom metrics with the global prometheus registry
metrics.Registry.MustRegister(goobers, gooberFailures)
}
You may then record metrics to those collectors from any part of your reconcile loop. These metrics can be evaluated from anywhere in the operator code.
Those metrics are available for prometheus or other openmetrics systems to scrape.

Default exported metrics references
Following the metrics which are exported and provided by controller-runtime by default:
| Metrics name | Type | Description |
|---|---|---|
| workqueue_depth | Gauge | Current depth of workqueue. |
| workqueue_adds_total | Counter | Total number of adds handled by workqueue. |
| workqueue_queue_duration_seconds | Histogram | How long in seconds an item stays in workqueue before being requested. |
| workqueue_work_duration_seconds | Histogram | How long in seconds processing an item from workqueue takes. |
| workqueue_unfinished_work_seconds | Gauge | How many seconds of work has been done that is in progress and has not been observed by work_duration. Large values indicate stuck threads. One can deduce the number of stuck threads by observing the rate at which this increases. |
| workqueue_longest_running_processor_seconds | Gauge | How many seconds has the longest running processor for workqueue been running. |
| workqueue_retries_total | Counter | Total number of retries handled by workqueue. |
| rest_client_requests_total | Counter | Number of HTTP requests, partitioned by status code, method, and host. |
| controller_runtime_reconcile_total | Counter | Total number of reconciliations per controller. |
| controller_runtime_reconcile_errors_total | Counter | Total number of reconciliation errors per controller. |
| controller_runtime_terminal_reconcile_errors_total | Counter | Total number of terminal errors from the reconciler. |
| controller_runtime_reconcile_time_seconds | Histogram | Length of time per reconciliation per controller. |
| controller_runtime_max_concurrent_reconciles | Gauge | Maximum number of concurrent reconciles per controller. |
| controller_runtime_active_workers | Gauge | Number of currently used workers per controller. |
| controller_runtime_webhook_latency_seconds | Histogram | Histogram of the latency of processing admission requests. |
| controller_runtime_webhook_requests_total | Counter | Total number of admission requests by HTTP status code. |
| controller_runtime_webhook_requests_in_flight | Gauge | Current number of admission requests being served. |
Project Config
Overview
The Project Config represents the configuration of a KubeBuilder project. All projects that you scaffold with the CLI (KB version 3.0 and higher) generate the PROJECT file in the projects’ root directory. Therefore, it stores all plugins and input data you used to generate the project and APIs to better enable plugins to make useful decisions when scaffolding.
Example
Following is an example of a PROJECT config file which is the result of a project generated with two APIs using the Deploy Image Plugin.
# Code generated by tool. DO NOT EDIT.
# This file is used to track the info used to scaffold your project
# and allow the plugins properly work.
# More info: ./project-config.md
domain: testproject.org
cliVersion: v4.6.0
layout:
- go.kubebuilder.io/v4
plugins:
deploy-image.go.kubebuilder.io/v1-alpha:
resources:
- domain: testproject.org
group: example.com
kind: Memcached
options:
containerCommand: memcached,--memory-limit=64,-o,modern,-v
containerPort: "11211"
image: memcached:1.4.36-alpine
runAsUser: "1001"
version: v1alpha1
- domain: testproject.org
group: example.com
kind: Busybox
options:
image: busybox:1.28
version: v1alpha1
projectName: project-v4-with-deploy-image
repo: sigs.k8s.io/kubebuilder/testdata/project-v4-with-deploy-image
resources:
- api:
crdVersion: v1
namespaced: true
controller: true
domain: testproject.org
group: example.com
kind: Memcached
path: sigs.k8s.io/kubebuilder/testdata/project-v4-with-deploy-image/api/v1alpha1
version: v1alpha1
webhooks:
validation: true
webhookVersion: v1
- api:
crdVersion: v1
namespaced: true
controller: true
domain: testproject.org
group: example.com
kind: Busybox
path: sigs.k8s.io/kubebuilder/testdata/project-v4-with-deploy-image/api/v1alpha1
version: v1alpha1
- controller: true
domain: io
external: true
group: cert-manager
kind: Certificate
path: github.com/cert-manager/cert-manager/pkg/apis/certmanager/v1
module: github.com/cert-manager/cert-manager@v1.18.2
version: v1
version: "3"
Why store the plugins and data used?
Following some examples of motivations to track the input used:
- check if a plugin can or cannot be scaffolded on top of an existing plugin (i.e.) plugin compatibility while chaining multiple of them together.
- what operations can or cannot be done such as verify if the layout allow API(s) for different groups to be scaffolded for the current configuration or not.
- verify what data can or not be used in the CLI operations such as to ensure that WebHooks can only be created for pre-existent API(s)
Note that KubeBuilder is not only a CLI tool but can also be used as a library to allow users to create their plugins/tools, provide helpers and customizations on top of their existing projects - an example of which is Operator-SDK. SDK leverages KubeBuilder to create plugins to allow users to work with other languages and provide helpers for their users to integrate their projects with, for example, the Operator Framework solutions/OLM. You can check the plugin’s documentation to know more about creating custom plugins.
Additionally, another motivation for the PROJECT file is to help us to create a feature that allows users to easily upgrade their projects by providing helpers that automatically re-scaffold the project. By having all the required metadata regarding the APIs, their configurations and versions in the PROJECT file. For example, it can be used to automate the process of re-scaffolding while migrating between plugin versions. (More info).
Versioning
The Project config is versioned according to its layout. For further information see Versioning.
Layout definition
The PROJECT version 3 layout looks like:
domain: testproject.org
cliVersion: v4.6.0
layout:
- go.kubebuilder.io/v4
plugins:
deploy-image.go.kubebuilder.io/v1-alpha:
resources:
- domain: testproject.org
group: example.com
kind: Memcached
options:
containerCommand: memcached,--memory-limit=64,-o,modern,-v
containerPort: "11211"
image: memcached:memcached:1.6.26-alpine3.19
runAsUser: "1001"
version: v1alpha1
- domain: testproject.org
group: example.com
kind: Busybox
options:
image: busybox:1.36.1
version: v1alpha1
projectName: project-v4-with-deploy-image
repo: sigs.k8s.io/kubebuilder/testdata/project-v4-with-deploy-image
resources:
- api:
crdVersion: v1
namespaced: true
controller: true
domain: testproject.org
group: example.com
kind: Memcached
path: sigs.k8s.io/kubebuilder/testdata/project-v4-with-deploy-image/api/v1alpha1
version: v1alpha1
webhooks:
validation: true
webhookVersion: v1
- api:
crdVersion: v1
namespaced: true
controller: true
domain: testproject.org
group: example.com
kind: Busybox
path: sigs.k8s.io/kubebuilder/testdata/project-v4-with-deploy-image/api/v1alpha1
version: v1alpha1
- controller: true
domain: io
external: true
group: cert-manager
kind: Certificate
path: github.com/cert-manager/cert-manager/pkg/apis/certmanager/v1
module: github.com/cert-manager/cert-manager@v1.18.2
version: v1
version: "3"
Now let us check its layout fields definition:
| Field | Description |
|---|---|
cliVersion | Used to record the specific CLI version used during project scaffolding with init. Helps identifying the version of the tooling employed, aiding in troubleshooting and ensuring compatibility with updates. |
layout | Defines the global plugins, e.g. a project init with --plugins="go/v4,deploy-image/v1-alpha" means that any sub-command used will always call its implementation for both plugins in a chain. |
domain | Store the domain of the project. This information can be provided by the user when the project is generate with the init sub-command and the domain flag. |
plugins | Defines the plugins used to do custom scaffolding, e.g. to use the optional deploy-image/v1-alpha plugin to do scaffolding for just a specific api via the command kubebuider create api [options] --plugins=deploy-image/v1-alpha. |
projectName | The name of the project. This is used to scaffold the manager data. By default it is the name of the project directory, however, it can be provided by the user in the init sub-command via the --project-name flag. |
repo | The project repository which is the Golang module, e.g github.com/example/myproject-operator. |
multigroup | (Optional) When set to true, enables multi-group project layout. APIs are organized into group-specific directories (api/<group>/<version>/). Can be set during initialization via kubebuilder init --multigroup or enabled/disabled later via kubebuilder edit --multigroup. Default is false (omitted from PROJECT file). |
namespaced | (Optional) When set to true, configures the project for namespace-scoped deployment. The operator will only watch and manage resources within its deployment namespace, using namespace-scoped RBAC (Role/RoleBinding instead of ClusterRole/ClusterRoleBinding). Can be enabled/disabled via kubebuilder edit --namespaced. Default is false (cluster-scoped, omitted from PROJECT file). |
resources | An array of all resources that you scaffolded in the project. |
resources.api | The API scaffolded in the project via the sub-command create api. |
resources.api.crdVersion | The Kubernetes API version (apiVersion) used to do the scaffolding for the CRD resource. |
resources.api.namespaced | The API RBAC permissions which can be namespaced or cluster scoped. |
resources.api.ssa | (Optional, Alpha) When set to true, the API was scaffolded with Server-Side Apply support via create api --ssa. The scaffold adds the +genclient marker and generates apply configurations for the type. Alpha feature: it may change in future releases. Default is false (omitted from the PROJECT file). |
resources.controller | Indicates whether you scaffolded a controller for the API. |
resources.domain | The domain of the resource that you provided by the --domain flag when you initialized the project or via the flag --external-api-domain when you used it to scaffold controllers for an External Type. |
resources.group | The GKV group of the resource that you provide by the --group flag when you use the sub-command create api. |
resources.version | The GKV version of the resource that you provide by the --version flag when you use the sub-command create api. |
resources.kind | Stores the GKV Kind of the resource that you provide by the --kind flag when you use the sub-command create api. |
resources.path | The import path for the API resource. It is <repo>/api/<kind> unless the API added to the project is an external or core-type. For the core-types scenarios, the paths used are mapped here. Or either the path informed by the flag --external-api-path |
resources.core | It is true when the group used is from Kubernetes API and the API resource is not defined on the project. |
resources.external | It is true when you use the flag --external-api-path to generate the scaffold for an External Type. |
resources.module | (Optional) The Go module path for external API dependencies, optionally including a version (e.g., github.com/cert-manager/cert-manager@v1.18.2 or just github.com/cert-manager/cert-manager). Only used when external is true. Provided via the --external-api-module flag to explicitly pin a specific version in go.mod or to specify the module when it cannot be automatically determined from --external-api-path. If not provided, go mod tidy will resolve the dependency automatically. |
resources.webhooks | Stores the webhooks data when you use the sub-command create webhook. |
resources.webhooks.spoke | Store the API version that acts as the Spoke with the designated Hub version for conversion webhooks. |
resources.webhooks.webhookVersion | The Kubernetes API version (apiVersion) used to scaffold the webhook resource. |
resources.webhooks.conversion | It is true when the webhook was scaffold with the --conversion flag which means that is a conversion webhook. |
resources.webhooks.defaulting | It is true when the webhook was scaffold with the --defaulting flag which means that is a defaulting webhook. |
resources.webhooks.validation | It is true when the webhook was scaffold with the --programmatic-validation flag which means that is a validation webhook. |
Versions compatibility and supportability
Projects created by Kubebuilder contain a Makefile that installs tools at versions defined during project creation.
The main tools included are:
Additionally, these projects include a go.mod file specifying dependency versions.
Kubebuilder relies on controller-runtime and its Go and Kubernetes dependencies.
Therefore, the versions defined in the Makefile and go.mod files are the ones that have been tested, supported, and recommended.
Each minor version of Kubebuilder is tested with a specific minor version of client-go. While a Kubebuilder minor version may be compatible with other client-go minor versions, or other tools this compatibility is not guaranteed, supported, or tested.
The minimum Go version required by Kubebuilder is determined by the highest minimum
Go version required by its dependencies. This is usually aligned with the minimum
Go version required by the corresponding k8s.io/* dependencies.
Compatible k8s.io/* versions, client-go versions, and minimum Go versions can be found in the go.mod
file scaffolded for each project for each tag release.
Example: For the 4.1.1 release, the minimum Go version compatibility is 1.22.
You can refer to the samples in the testdata directory of the tag released v4.1.1,
such as the go.mod file for project-v4. You can also check the tools versions supported and
tested for this release by examining the Makefile.
Operating systems supported
Kubebuilder officially supports macOS and Linux platforms. If you are using Windows, see the Windows instructions.
Contributions towards supporting Windows are not planned.
Plugins
Kubebuilder’s architecture is fundamentally plugin-based. This design enables the Kubebuilder CLI to evolve while maintaining backward compatibility with older versions, allowing users to opt-in or opt-out of specific features, and enabling seamless integration with external tools.
By leveraging plugins, projects can extend Kubebuilder and use it as a library to support new functionalities or implement custom scaffolding tailored to their users’ needs. This flexibility allows maintainers to build on top of Kubebuilder’s foundation, adapting it to specific use cases while benefiting from its powerful scaffolding engine.
Plugins offer several key advantages:
- Backward compatibility: Ensures older layouts and project structures remain functional with newer versions.
- Customization: Allows users to opt-in or opt-out for specific features (i.e. Grafana and Deploy Image plugins)
- Extensibility: Facilitates integration with third-party tools and projects that wish to provide their own External Plugins, which can be used alongside Kubebuilder to modify and enhance project scaffolding or introduce new features.
For example, to initialize a project with multiple global plugins:
kubebuilder init --plugins=pluginA,pluginB,pluginC
For example, to apply custom scaffolding using specific plugins:
kubebuilder create api --plugins=pluginA,pluginB,pluginC
OR
kubebuilder create webhook --plugins=pluginA,pluginB,pluginC
OR
kubebuilder edit --plugins=pluginA,pluginB,pluginC
This section details the available plugins, how to extend Kubebuilder, and how to create your own plugins while following the same layout structures.
Available plugins
This section describes the plugins supported and shipped in with the Kubebuilder project.
To scaffold the projects
The following plugins are useful to scaffold the whole project with the tool.
| Plugin | Key | Description |
|---|---|---|
| go.kubebuilder.io/v4 - (Default scaffold with Kubebuilder init) | go/v4 | Scaffold composite by base.go.kubebuilder.io/v4 and kustomize.common.kubebuilder.io/v2. Responsible for scaffolding Golang projects and its configurations. |
To add optional features
The following plugins are useful to generate code and take advantage of optional features
| Plugin | Key | Description |
|---|---|---|
| autoupdate.kubebuilder.io/v1-alpha | autoupdate/v1-alpha | Optional helper which scaffolds a scheduled worker that helps keep your project updated with changes in the ecosystem, significantly reducing the burden of manual maintenance. |
| deploy-image.go.kubebuilder.io/v1-alpha | deploy-image/v1-alpha | Optional helper plugin which can be used to scaffold APIs and controller with code implementation to Deploy and Manage an Operand(image). |
| grafana.kubebuilder.io/v1-alpha | grafana/v1-alpha | Optional helper plugin which can be used to scaffold Grafana Manifests Dashboards for the default metrics which are exported by controller-runtime. |
| helm.kubebuilder.io/v1-alpha (deprecated) | helm/v1-alpha | Deprecated - Optional helper plugin which can be used to scaffold a Helm Chart to distribute the project under the dist directory. Use v2-alpha instead. |
| helm.kubebuilder.io/v2-alpha | helm/v2-alpha | Optional helper plugin which dynamically generates Helm charts from kustomize output, preserving all customizations |
To be extended
The following plugins are useful for other tools and External Plugins which are looking to extend the Kubebuilder functionality.
You can use the kustomize plugin, which is responsible for scaffolding the
kustomize files under config/. The base language plugins are responsible
for scaffolding the necessary Golang files, allowing you to create your
own plugins for other languages (e.g., Operator-SDK enables
users to work with Ansible/Helm) or add additional functionality.
For example, Operator-SDK has a plugin which integrates the projects with OLM by adding its own features on top.
| Plugin | Key | Description |
|---|---|---|
| kustomize.common.kubebuilder.io/v2 | kustomize/v2 | Responsible for scaffolding all kustomize files under the config/ directory |
base.go.kubebuilder.io/v4 | base/v4 | Responsible for scaffolding all files which specifically requires Golang. This plugin is used in the composition to create the plugin (go/v4) |
AutoUpdate (autoupdate/v1-alpha)
Keeping your Kubebuilder project up to date with the latest improvements shouldn’t be a chore. With a small amount of setup, you can receive automatic Pull Request suggestions whenever a new Kubebuilder release is available — keeping your project maintained, secure, and aligned with ecosystem changes.
This automation uses the kubebuilder alpha update command with a 3-way merge strategy to
refresh your project scaffold, and wraps it in a GitHub Actions workflow that opens an Issue with a Pull Request compare link so you can create the PR and review it.
When to use it
- When you want to reduce the burden of keeping the project updated and well-maintained.
How to use it
- If you want to add the
autoupdateplugin to your project:
kubebuilder edit --plugins="autoupdate/v1-alpha"
How it works
The plugin scaffolds a GitHub Actions workflow that checks for new Kubebuilder releases every week. When an update is available, it:
- Creates a new branch with the merged changes
- Opens a GitHub Issue with a PR compare link
Example Issue:
Conflict help (when needed):
Customizing the workflow
The generated workflow uses the kubebuilder alpha update command with default flags. You can customize the workflow by editing .github/workflows/auto_update.yml to add additional flags:
Default flags used:
--force- Continue even if conflicts occur (automation-friendly)--push- Automatically push the output branch to remote--restore-path .github/workflows- Preserve CI workflows from base branch--open-gh-issue- Create a GitHub Issue with PR compare link
Additional available flags:
--merge-message- Custom commit message for clean merges--conflict-message- Custom commit message when conflicts occur--from-version- Specify the version to upgrade from--to-version- Specify the version to upgrade to--output-branch- Custom output branch name--show-commits- Keep full history instead of squashing--git-config- Pass per-invocation Git config
For complete documentation on all available flags, see the kubebuilder alpha update reference.
Example: Customize commit messages
Edit .github/workflows/auto_update.yml:
- name: Run kubebuilder alpha update
run: |
kubebuilder alpha update \
--force \
--push \
--restore-path .github/workflows \
--open-gh-issue \
--merge-message "chore: update kubebuilder scaffold" \
--conflict-message "chore: update with conflicts - review needed"
Demonstration
Deploy Image Plugin (deploy-image/v1-alpha)
The deploy-image plugin allows users to create controllers and custom resources that deploy and manage container images on the cluster, following Kubernetes best practices. It simplifies the complexities of deploying images while allowing users to customize their projects as needed.
By using this plugin, you will get:
- A controller implementation to deploy and manage an Operand (image) on the cluster.
- Tests to verify the reconciliation logic, using ENVTEST.
- Custom resource samples updated with the necessary specifications.
- Environment variable support for managing the Operand (image) within the manager.
When to use it?
- This plugin is ideal for users who are just getting started with Kubernetes operators.
- It helps users deploy and manage an image (Operand) using the Operator pattern.
- If you are looking for a quick and efficient way to set up a custom controller and manage a container image, this plugin is a great choice.
How to use it?
-
Initialize your project: After creating a new project with
kubebuilder init, you can use this plugin to create APIs. Ensure that you have completed the quick start guide before proceeding. -
Create APIs: With this plugin, you can create APIs to specify the image (Operand) you want to deploy on the cluster. You can also optionally specify the command, port, and security context using various flags:
Example command:
kubebuilder create api --group example.com --version v1alpha1 --kind Memcached --image=memcached:1.6.15-alpine --image-container-command="memcached,--memory-limit=64,modern,-v" --image-container-port="11211" --run-as-user="1001" --plugins="deploy-image/v1-alpha"
Subcommands
The deploy-image plugin includes the following subcommand:
create api: Use this command to scaffold the API and controller code to manage the container image.
Affected files
When using the create api command with this plugin, the following
files are affected, in addition to the existing Kubebuilder scaffolding:
controllers/*_controller_test.go: Scaffolds tests for the controller.controllers/*_suite_test.go: Scaffolds or updates the test suite.api/<version>/*_types.go: Scaffolds the API specs.config/samples/*_.yaml: Scaffolds default values for the custom resource.main.go: Updates the file to add the controller setup.config/manager/manager.yaml: Updates to include environment variables for storing the image.
Further resources
- Check out this video to see how it works.
go/v4 (go.kubebuilder.io/v4)
(Default Scaffold)
Kubebuilder scaffolds using the go/v4 plugin only if specified when initializing the project.
This plugin is a composition of the kustomize.common.kubebuilder.io/v2 and base.go.kubebuilder.io/v4 plugins
using the Bundle Plugin. It scaffolds a project template
that helps in constructing sets of controllers.
By following the quickstart and creating any project, you is using this plugin by default.
How to use it ?
To create a new project with the go/v4 plugin the following command can be used:
kubebuilder init --domain tutorial.kubebuilder.io --repo tutorial.kubebuilder.io/project --plugins=go/v4
Subcommands supported by the plugin
- Init -
kubebuilder init [OPTIONS] - Edit -
kubebuilder edit [OPTIONS] - Create API -
kubebuilder create api [OPTIONS] - Create Webhook -
kubebuilder create webhook [OPTIONS]
Further resources
- To see the composition of plugins, you can check the source code for the Kubebuilder main.go.
- Check the code implementation of the base Golang plugin
base.go.kubebuilder.io/v4. - Check the code implementation of the Kustomize/v2 plugin.
- Check controller-runtime to know more about controllers.
Grafana Plugin (grafana/v1-alpha)
The Grafana plugin is an optional plugin that can be used to scaffold Grafana Dashboards to allow you to check out the default metrics which are exported by projects using controller-runtime.
When to use it?
- If you are looking to observe the metrics exported by controller metrics and collected by Prometheus via Grafana.
How to use it?
Prerequisites:
- Your project must be using controller-runtime to expose the metrics via the controller default metrics and they need to be collected by Prometheus.
- Access to Prometheus.
- Prometheus should have an endpoint exposed. (For
prometheus-operator, this is similar as: http://prometheus-k8s.monitoring.svc:9090 ) - The endpoint is ready to/already become the datasource of your Grafana. See Add a data source
- Prometheus should have an endpoint exposed. (For
- Access to Grafana. Make sure you have:
- Dashboard edit permission
- Prometheus Data source

Basic usage
The Grafana plugin is attached to the edit subcommand:
# Enable grafana plugin to an existing project
kubebuilder edit --plugins grafana.kubebuilder.io/v1-alpha
The plugin creates a new directory and scaffold the JSON files under it (i.e. grafana/controller-runtime-metrics.json).
Show case
See an example of how to use the plugin in your project:

Now, let us check how to use the Grafana dashboards
- Copy the JSON file
- Visit
<your-grafana-url>/dashboard/importto import a new dashboard. - Paste the JSON content to
Import via panel json, then pressLoadbutton
- Select the data source for Prometheus metrics

- Once the JSON is imported in Grafana, the dashboard is ready.
Grafana dashboard
Controller runtime reconciliation total & errors
- Metrics:
- controller_runtime_reconcile_total
- controller_runtime_reconcile_errors_total
- Query:
- sum(rate(controller_runtime_reconcile_total{job=“$job”}[5m])) by (instance, pod)
- sum(rate(controller_runtime_reconcile_errors_total{job=“$job”}[5m])) by (instance, pod)
- Description:
- Per-second rate of total reconciliation as measured over the last 5 minutes
- Per-second rate of reconciliation errors as measured over the last 5 minutes
- Sample:

Controller CPU & memory usage
- Metrics:
- process_cpu_seconds_total
- process_resident_memory_bytes
- Query:
- rate(process_cpu_seconds_total{job=“$job”, namespace=“$namespace”, pod=“$pod”}[5m]) * 100
- process_resident_memory_bytes{job=“$job”, namespace=“$namespace”, pod=“$pod”}
- Description:
- Per-second rate of CPU usage as measured over the last 5 minutes
- Allocated Memory for the running controller
- Sample:

Seconds of P50/90/99 items stay in work queue
- Metrics
- workqueue_queue_duration_seconds_bucket
- Query:
- histogram_quantile(0.50, sum(rate(workqueue_queue_duration_seconds_bucket{job=“$job”, namespace=“$namespace”}[5m])) by (instance, name, le))
- Description
- Seconds an item stays in workqueue before being requested.
- Sample:

Seconds of P50/90/99 items processed in work queue
- Metrics
- workqueue_work_duration_seconds_bucket
- Query:
- histogram_quantile(0.50, sum(rate(workqueue_work_duration_seconds_bucket{job=“$job”, namespace=“$namespace”}[5m])) by (instance, name, le))
- Description
- Seconds of processing an item from workqueue takes.
- Sample:

Add rate in work queue
- Metrics
- workqueue_adds_total
- Query:
- sum(rate(workqueue_adds_total{job=“$job”, namespace=“$namespace”}[5m])) by (instance, name)
- Description
- Per-second rate of items added to work queue
- Sample:

Retries rate in work queue
- Metrics
- workqueue_retries_total
- Query:
- sum(rate(workqueue_retries_total{job=“$job”, namespace=“$namespace”}[5m])) by (instance, name)
- Description
- Per-second rate of retries handled by workqueue
- Sample:

Number of workers in use
- Metrics
- controller_runtime_active_workers
- Query:
- controller_runtime_active_workers{job=“$job”, namespace=“$namespace”}
- Description
- The number of active controller workers
- Sample:
WorkQueue depth
- Metrics
- workqueue_depth
- Query:
- workqueue_depth{job=“$job”, namespace=“$namespace”}
- Description
- Current depth of workqueue
- Sample:
Unfinished seconds
- Metrics
- workqueue_unfinished_work_seconds
- Query:
- rate(workqueue_unfinished_work_seconds{job=“$job”, namespace=“$namespace”}[5m])
- Description
- How many seconds of work has done that is in progress and has not been observed by work_duration.
- Sample:
Visualize custom metrics
The Grafana plugin supports scaffolding manifests for custom metrics.
Generate config template
When the plugin is triggered for the first time, grafana/custom-metrics/config.yaml is generated.
---
customMetrics:
# - metric: # Raw custom metric (required)
# type: # Metric type: counter/gauge/histogram (required)
# expr: # Prom_ql for the metric (optional)
# unit: # Unit of measurement, examples: s,none,bytes,percent,etc. (optional)
Add custom metrics to config
You can enter multiple custom metrics in the file. For each element, you need to specify the metric and its type.
The Grafana plugin can automatically generate expr for visualization.
Alternatively, you can provide expr and the plugin uses the specified one directly.
---
customMetrics:
- metric: memcached_operator_reconcile_total # Raw custom metric (required)
type: counter # Metric type: counter/gauge/histogram (required)
unit: none
- metric: memcached_operator_reconcile_time_seconds_bucket
type: histogram
Scaffold manifest
Once config.yaml is configured, you can run kubebuilder edit --plugins grafana.kubebuilder.io/v1-alpha again.
This time, the plugin generates grafana/custom-metrics/custom-metrics-dashboard.json, which can be imported to Grafana UI.
Show case
See an example of how to visualize your custom metrics:

Subcommands
The Grafana plugin implements the following subcommand:
- edit (
$ kubebuilder edit [OPTIONS])
Affected files
The following scaffolds is created or updated by this plugin:
grafana/*.json
Further resources
- Check out video to show how it works
- Checkout the video to show how the custom metrics feature works
- Refer to a sample of
serviceMonitorprovided by kustomize plugin - Check the plugin implementation
- Grafana Docs of importing JSON file
- The usage of serviceMonitor by Prometheus Operator
Helm Plugin (helm/v1-alpha) - DEPRECATED
The Helm plugin is an optional plugin that can be used to scaffold a Helm chart, allowing you to distribute the project using Helm.
By default, users can generate a bundle with all the manifests by running the following command:
make build-installer IMG=<some-registry>/<project-name:tag>
This allows the project consumer to install the solution by applying the bundle with:
kubectl apply -f https://raw.githubusercontent.com/<org>/project-v4/<tag or branch>/dist/install.yaml
However, in many scenarios, you might prefer to provide a Helm chart to package your solution.
If so, you can use this plugin to generate the Helm chart under the dist directory.
When to use it
- If you want to provide a Helm chart for users to install and manage your project.
- If you need to update the Helm chart generated under
dist/chart/with the latest project changes:- After generating new manifests, use the
editoption to sync the Helm chart. - IMPORTANT: If you have created a webhook or an API using the DeployImage plugin,
you must run the
editcommand with the--forceflag to regenerate the Helm chart values based on the latest manifests (after runningmake manifests) to ensure that the HelmChart values are updated accordingly. In this case, if you have customized the files underdist/chart/values.yaml, and thetemplates/manager/manager.yaml, you needs to manually reapply your customizations on top of the latest changes after regenerating the Helm chart.
- After generating new manifests, use the
How to use it?
Basic usage
The Helm plugin is attached to the edit subcommand as the helm/v1-alpha plugin
relies on the Go project being scaffolded first.
# Initialize a new project
kubebuilder init
# Enable or Update the helm chart via the helm plugin to an existing project
# Before run the edit command, run `make manifests` to generate the manifest under `config/`
make manifests
kubebuilder edit --plugins=helm/v1-alpha
Subcommands
The Helm plugin implements the following subcommands:
- edit (
$ kubebuilder edit [OPTIONS])
Affected files
The following scaffolds is created or updated by this plugin:
dist/chart/*
Helm Plugin (helm/v2-alpha)
The helm/v2-alpha plugin generates Helm charts from your project’s kustomize output, letting you distribute your operator as either a bundle or a Helm chart.
The plugin dynamically builds charts from make build-installer output and preserves your customizations like environment variables, labels, annotations, and security contexts.
Why use Helm
By default, Kubebuilder creates a bundle of manifests:
make build-installer IMG=<registry>/<project-name:tag>
Users install it with:
kubectl apply -f https://raw.githubusercontent.com/<org>/project-v4/<tag-or-branch>/dist/install.yaml
Many users prefer Helm for packaging and upgrades. This plugin converts dist/install.yaml into a Helm chart that mirrors your project.
Features
- Generates charts from kustomize output, not boilerplate
- Preserves environment variables, labels, annotations, and patches
- Organizes templates to match your
config/directory layout - Includes only configurable parameters in
values.yaml - Never overwrites
Chart.yaml; preservesvalues.yaml,NOTES.txt,_helpers.tpl,.helmignore,test-chart.yml,network-policy/allow-metrics-traffic.yaml, andnetwork-policy/allow-webhook-traffic.yamlunless you use--force - Adds default
ServiceMonitorandNetworkPolicytemplates when kustomize output does not provide them - Places custom resources in
templates/extras/with Helm templating
Usage
Basic workflow
Create a project and build the installer bundle:
kubebuilder init
make build-installer IMG=<registry>/<project:tag>
Generate the Helm chart from kustomize output:
kubebuilder edit --plugins=helm/v2-alpha
To regenerate preserved files (except Chart.yaml), use --force:
kubebuilder edit --plugins=helm/v2-alpha --force
Advanced options
Use a custom manifests file:
kubebuilder edit --plugins=helm/v2-alpha --manifests=manifests/custom-install.yaml
Write chart to a custom output directory:
kubebuilder edit --plugins=helm/v2-alpha --output-dir=charts
Combine custom manifests and output directory:
kubebuilder edit --plugins=helm/v2-alpha \
--manifests=manifests/install.yaml \
--output-dir=helm-charts
Chart structure
The plugin generates a chart layout that mirrors your config/ directory:
<output-dir>/chart/
├── Chart.yaml
├── values.yaml
├── .helmignore
└── templates/
├── NOTES.txt
├── _helpers.tpl
├── rbac/ # Individual RBAC files (examples)
│ ├── controller-manager.yaml
│ ├── leader-election-role.yaml
│ ├── leader-election-rolebinding.yaml
│ ├── manager-role.yaml
│ ├── manager-rolebinding.yaml
│ ├── metrics-auth-role.yaml
│ ├── metrics-auth-rolebinding.yaml
│ ├── metrics-reader.yaml
│ └── ...
├── crd/ # Individual CRD files (examples)
│ ├── busyboxes.example.com.testproject.org.yaml
│ └── ...
├── cert-manager/
│ ├── metrics-certs.yaml
│ ├── selfsigned-issuer.yaml
│ └── serving-cert.yaml
├── manager/
│ └── manager.yaml
├── metrics/
│ └── controller-manager-metrics-service.yaml
├── webhook/
│ ├── validating-webhook-configuration.yaml
│ └── webhook-service.yaml
├── monitoring/
│ └── servicemonitor.yaml
├── network-policy/
│ ├── allow-metrics-traffic.yaml
│ └── allow-webhook-traffic.yaml # If webhooks are configured
└── extras/ # Custom resources (if any)
├── my-service.yaml
└── my-config.yaml
Values configuration
The generated values.yaml provides configuration options extracted from your actual deployment.
Namespace creation is not managed by the chart; use Helm’s --namespace and --create-namespace flags when installing.
How values are formatted
Values are uncommented when:
- Extracted from kustomize source manifests
- Standard Helm fields (replicas, image, resource names)
Values stay commented when:
- Optional Kubernetes features not in use (imagePullSecrets, priorityClassName)
- Advanced configuration not needed for basic usage (topology spread, pod disruption budget)
- User customization fields (name overrides, custom labels)
Example:
## String to partially override chart.fullname template (will maintain the release name)
##
# nameOverride: ""
## String to fully override chart.fullname template
##
# fullnameOverride: ""
## Configure the controller manager deployment
##
manager:
## Set to false to skip manager installation
##
enabled: true
replicas: 1
image:
repository: controller
## Image tag (defaults to Chart.appVersion if not set)
##
# tag: ""
pullPolicy: IfNotPresent
## Arguments
##
args:
- --leader-elect
## Health probes.
## The manager serves the liveness (/healthz) and readiness (/readyz) endpoints on this port.
##
healthProbe:
# Health probe server port
port: 8081
## Image pull secrets
##
# imagePullSecrets:
# - name: myregistrykey
## Pod-level security settings
##
podSecurityContext:
runAsNonRoot: true
seccompProfile:
type: RuntimeDefault
## Container-level security settings
##
securityContext:
allowPrivilegeEscalation: false
capabilities:
drop:
- ALL
readOnlyRootFilesystem: true
## Resource limits and requests
##
resources:
limits:
cpu: 500m
memory: 128Mi
requests:
cpu: 10m
memory: 64Mi
## Manager pod's affinity
##
affinity: {}
## Manager pod's node selector
##
nodeSelector: {}
## Manager pod's tolerations
##
tolerations: []
## Deployment strategy
##
# strategy:
# type: RollingUpdate
# rollingUpdate:
# maxSurge: 25%
# maxUnavailable: 25%
## Priority class name
##
# priorityClassName: ""
## Topology spread constraints
##
# topologySpreadConstraints: []
## Termination grace period seconds
##
terminationGracePeriodSeconds: 10
## Custom Deployment labels
##
# labels: {}
## Custom Deployment annotations
##
# annotations: {}
## Custom Pod labels and annotations
##
# pod:
# labels: {}
# annotations: {}
## RBAC configuration
##
rbac:
## RBAC resource scope
## - false (default): ClusterRole/ClusterRoleBinding (all namespaces)
## - true: Role/RoleBinding (release namespace only)
##
namespaced: false
## Helper roles for CRD management (admin/editor/viewer)
##
helpers:
## Install convenience admin/editor/viewer roles for CRDs
##
enabled: false
## ServiceAccount configuration
##
serviceAccount:
# Install default ServiceAccount provided
enabled: true
## Existing ServiceAccount name (required when enabled=false)
## Set to "default" to use the namespace default ServiceAccount
## Note: When enabled=true, respects nameOverride/fullnameOverride
##
# name: ""
## Custom ServiceAccount annotations
##
# annotations: {}
## Custom ServiceAccount labels
##
# labels: {}
## Custom Resource Definitions
##
crd:
# Install CRDs with the chart
enabled: true
# Keep CRDs when uninstalling
keep: true
## Controller metrics endpoint.
## Enable to expose /metrics endpoint
##
metrics:
enabled: true
# Metrics server port
port: 8443
# Enable secure metrics: HTTPS with certs/auth (true) or HTTP (false).
# Note: Metrics authn/authz needs ClusterRole access.
secure: true
## Cert-manager integration for TLS certificates.
## Required for webhook certificates and metrics endpoint certificates.
##
certManager:
enabled: false
## Prometheus ServiceMonitor for metrics scraping.
## Requires prometheus-operator to be installed in the cluster.
##
prometheus:
enabled: false
## Network policies for controlling traffic flow.
## Enable to restrict ingress to the controller manager.
##
networkPolicy:
enabled: false
Installation
The plugin adds Helm targets to your Makefile:
make helm-deploy IMG=<registry>/<project:tag>
make helm-status
Install manually with all features enabled:
helm install my-release ./dist/chart --namespace my-project-system --create-namespace
Install only CRDs and RBAC:
helm install my-release ./dist/chart --set manager.enabled=false --set webhook.enabled=false
Install without webhooks:
helm install my-release ./dist/chart --set webhook.enabled=false --set certManager.enabled=false
Install with NetworkPolicy resources:
helm install my-release ./dist/chart --set networkPolicy.enabled=true
Extra volumes
Add volumes and volume mounts to the manager deployment beyond webhook and metrics certificates.
Volumes in your kustomize configuration (config/manager/manager.yaml or patches) are written to the chart template. When the manager has extra volumes, values.yaml includes manager.extraVolumes and manager.extraVolumeMounts fields. Use these to add more volumes at install time.
Webhook and metrics certificates (webhook-certs, metrics-certs) are managed separately and controlled by certManager.enabled and (for metrics TLS) metrics.enabled + metrics.secure.
Metrics configuration
metrics.port
Set metrics.port to change the port used by the metrics endpoint. The chart applies the same value to the manager --metrics-bind-address argument, the metrics Service port and targetPort, and the metrics NetworkPolicy.
For example, install the chart with the metrics endpoint on port 8444:
helm install my-operator ./dist/chart --set metrics.port=8444
The default is 8443, detected from your project configuration.
metrics.secure
Control transport security and authentication for the metrics endpoint (default: true).
When true:
- Uses HTTPS with TLS certificates (when
certManager.enabled=true) - Creates
metrics-auth-roleClusterRole for authentication - ServiceMonitor uses HTTPS
When false:
- Uses HTTP without authentication
- No TLS certificates
- ServiceMonitor uses HTTP
Webhook port configuration
Set webhook.port to change the port used by the manager webhook server. The chart applies the same value to the manager argument, container port, webhook service, and webhook NetworkPolicy.
For example, install the chart with the webhook server on port 9444:
helm install my-operator ./dist/chart --set webhook.port=9444
The default is 9443, detected from your project configuration.
Health probe port configuration
Set manager.healthProbe.port to change the port where the manager serves its health probes. The liveness (/healthz) and readiness (/readyz) endpoints bind to this port. The chart applies the same value to the --health-probe-bind-address argument, the health container port, and the httpGet port of both probes.
For example, install the chart with the health probes on port 8082:
helm install my-operator ./dist/chart --set manager.healthProbe.port=8082
The default is 8081, detected from your project configuration.
Passing args for the manager
Use manager.args in values.yaml to pass extra flags to the manager container that the chart does not expose as dedicated values. The chart renders each entry through Helm’s tpl function, evaluated against the chart’s root context, so an arg can reference other values, release information, or chart template functions instead of only a static string.
For example, set the leader election namespace from the release namespace and add a plain flag:
manager:
args:
- --leader-election-namespace={{ .Release.Namespace }}
- --leader-elect
Helm evaluates {{ .Release.Namespace }} at render time, so the manager container receives --leader-election-namespace=<release-namespace>. The --leader-elect flag has no template syntax, so it renders unchanged.
NetworkPolicy configuration
Set networkPolicy.enabled: true to install NetworkPolicy resources for the manager pod.
When the kustomize output includes NetworkPolicy resources, the plugin converts them into chart templates and sets networkPolicy.enabled: true. When no NetworkPolicy resources are present in the kustomize output, the plugin generates default templates for metrics traffic, and also for webhook traffic when webhooks are detected in the provided kustomize input files.
Custom labels and annotations
Add custom labels and annotations using manager.labels, manager.annotations, manager.pod.labels, and manager.pod.annotations. Duplicate keys from kustomize are filtered automatically.
ServiceAccount configuration
Set serviceAccount.enabled: true (default) to create a ServiceAccount. Set serviceAccount.enabled: false to use an existing one:
serviceAccount:
enabled: false
name: my-existing-sa
The chart ships with the toggle enabled:
serviceAccount:
enabled: true
Helm merges this default into any values file that omits the section, so omitting it keeps creating the account.
When serviceAccount.enabled: false, serviceAccount.name is required and the chart fails to render without it. Set name: default explicitly to use the namespace default ServiceAccount.
The resolved name is used consistently in the Deployment and in all RBAC bindings, for both cluster-scoped and namespaced RBAC modes:
serviceAccount.enabled | serviceAccount.name | ServiceAccount created | Name used (Deployment + RBAC bindings) |
|---|---|---|---|
true (default) | any | Yes | Generated (<fullname>-controller-manager, name is ignored) |
false | set | No | The provided name |
false | default | No | Namespace default ServiceAccount |
false | unset | No | Render fails with a clear error |
The generated name is built from the chart fullname, typically <release>-<chart>, plus the -controller-manager suffix, truncated to the 63-character Kubernetes limit. It respects nameOverride and fullnameOverride.
Add annotations for cloud provider integrations:
serviceAccount:
enabled: true
annotations:
iam.gke.io/gcp-service-account: my-operator@project.iam.gserviceaccount.com
External ServiceAccount names are used as-is and ignore nameOverride or fullnameOverride.
RBAC configuration
rbac.namespaced
Set the scope of RBAC permissions:
false(default): ClusterRole and ClusterRoleBinding for all namespacestrue: Role and RoleBinding for release namespace only
rbac.roleNamespaces
When your kustomize output includes Roles and RoleBindings for specific namespaces (other than the manager namespace), the plugin automatically detects them and creates roleNamespaces entries.
Add namespace-specific RBAC markers to your controller:
// +kubebuilder:rbac:groups=apps,namespace=infrastructure,resources=deployments,verbs=get;list;watch
// +kubebuilder:rbac:groups="",namespace=users,resources=secrets,verbs=get;list;watch
Run make manifests to generate the RBAC manifests, then run the plugin. The generated values.yaml includes:
rbac:
namespaced: false
## Namespace configuration for Roles deployed to namespaces different from the manager namespace
## Keys are resource name suffixes (without project prefix)
##
roleNamespaces:
# RBAC resource manager-role-infrastructure deploys to namespace infrastructure
"manager-role-infrastructure": "infrastructure"
# RBAC resource manager-rolebinding-infrastructure deploys to namespace infrastructure
"manager-rolebinding-infrastructure": "infrastructure"
# RBAC resource manager-role-users deploys to namespace users
"manager-role-users": "users"
# RBAC resource manager-rolebinding-users deploys to namespace users
"manager-rolebinding-users": "users"
helpers:
enabled: false
Override namespaces at deployment using a values file:
# custom-values.yaml
rbac:
roleNamespaces:
"manager-role-infrastructure": "prod-infra"
"manager-rolebinding-infrastructure": "prod-infra"
"manager-role-users": "prod-users"
"manager-rolebinding-users": "prod-users"
Install with custom namespaces:
helm install my-operator ./dist/chart -f custom-values.yaml
Or use --set:
helm install my-operator ./dist/chart \
--set 'rbac.roleNamespaces[manager-role-infrastructure]=prod-infra' \
--set 'rbac.roleNamespaces[manager-role-users]=prod-users'
Flags
| Flag | Description |
|---|---|
| –manifests | Path to YAML file containing Kubernetes manifests (default: dist/install.yaml) |
| –output-dir string | Output directory for chart (default: dist) |
| –force | Regenerates preserved files except Chart.yaml (values.yaml, NOTES.txt, _helpers.tpl, .helmignore, test-chart.yml, network-policy/allow-metrics-traffic.yaml, network-policy/allow-webhook-traffic.yaml) |
Kustomize v2
(Default Scaffold)
The Kustomize plugin allows you to scaffold all kustomize manifests used
with the language base plugin base.go.kubebuilder.io/v4.
This plugin is used to generate the manifest under the config/ directory
for projects built within the go/v4 plugin (default scaffold).
Projects like Operator-sdk use the Kubebuilder project as a library and provide options for working with other languages such as Ansible and Helm. The Kustomize plugin helps them maintain consistent configuration across languages. It also simplifies the creation of plugins that perform changes on top of the default scaffold, removing the need for manual updates across multiple language plugins. This approach allows the creation of “helper” plugins that work with different projects and languages.
How to use it
If you want your language plugin to use kustomize, use the Bundle Plugin to specify that your language plugin is composed of your language-specific plugin and kustomize for its configuration, as shown:
import (
...
kustomizecommonv2 "sigs.k8s.io/kubebuilder/v4/pkg/plugins/common/kustomize/v2"
golangv4 "sigs.k8s.io/kubebuilder/v4/pkg/plugins/golang/v4"
...
)
// Bundle plugin for Golang projects scaffolded by Kubebuilder go/v4
gov4Bundle, _ := plugin.NewBundle(plugin.WithName(golang.DefaultNameQualifier),
plugin.WithVersion(plugin.Version{Number: 4}),
plugin.WithPlugins(kustomizecommonv2.Plugin{}, golangv4.Plugin{}), // Scaffold the config/ directory and all kustomize files
)
You can also use kustomize/v2 alone via:
kubebuilder init --plugins=kustomize/v2
$ ls -la
total 24
drwxr-xr-x 6 camilamacedo86 staff 192 31 Mar 09:56 .
drwxr-xr-x 11 camilamacedo86 staff 352 29 Mar 21:23 ..
-rw------- 1 camilamacedo86 staff 129 26 Mar 12:01 .dockerignore
-rw------- 1 camilamacedo86 staff 367 26 Mar 12:01 .gitignore
-rw------- 1 camilamacedo86 staff 94 31 Mar 09:56 PROJECT
drwx------ 6 camilamacedo86 staff 192 31 Mar 09:56 config
Or combined with the base language plugins:
# Provides the same scaffold of go/v4 plugin which is composition but with kustomize/v2
kubebuilder init --plugins=kustomize/v2,base.go.kubebuilder.io/v4 --domain example.org --repo example.org/guestbook-operator
Subcommands
The kustomize plugin implements the following subcommands:
- init (
$ kubebuilder init [OPTIONS]) - create api (
$ kubebuilder create api [OPTIONS]) - create webhook (
$ kubebuilder create api [OPTIONS])
Affected files
The following scaffolds is created or updated by this plugin:
config/*
Further resources
- Check the kustomize plugin implementation
- Check the kustomize documentation
- Check the kustomize repository
Extending Kubebuilder
Kubebuilder provides an extensible architecture to scaffold projects using plugins. These plugins allow you to customize the CLI behavior or integrate new features.
Overview
Kubebuilder’s CLI can be extended through custom plugins, allowing you to:
- Build new scaffolds.
- Enhance existing ones.
- Add new commands and functionality to Kubebuilder’s scaffolding.
This flexibility enables you to create custom project setups tailored to specific needs.
Options to Extend
Extending Kubebuilder can be achieved in two main ways:
-
Extending CLI features and Plugins: You can import and build upon existing Kubebuilder plugins to extend its features and plugins. This is useful when you need to add specific features to a tool that already benefits from Kubebuilder’s scaffolding system. For example, Operator SDK leverages the kustomize plugin to provide language support for tools like Ansible or Helm. So that the project can be focused to keep maintained only what is specific language based.
-
Creating External Plugins: You can build standalone, independent plugins as binaries. These plugins can be written in any language and should follow an execution pattern that Kubebuilder recognizes. For more information, see Creating external plugins.
For further details on how to extend Kubebuilder, explore the following sections:
- CLI and Plugins to learn how to extend CLI features and plugins.
- External Plugins for creating standalone plugins.
- E2E Tests to ensure your plugin functions as expected.
Extending CLI features and plugins
Kubebuilder provides an extensible architecture to scaffold projects using plugins. These plugins allow you to customize the CLI behavior or integrate new features.
In this guide, we’ll explore how to extend CLI features, create custom plugins, and bundle multiple plugins.
Creating custom plugins
To create a custom plugin, you need to implement the Kubebuilder Plugin interface.
This interface allows your plugin to hook into Kubebuilder’s
commands (init, create api, create webhook, etc.)
and add custom logic.
Example of a Custom Plugin
You can create a plugin that generates both language-specific scaffolds and the necessary configuration files, using the Bundle Plugin. This example shows how to combine the Golang plugin with a Kustomize plugin:
import (
kustomizecommonv2 "sigs.k8s.io/kubebuilder/v4/pkg/plugins/common/kustomize/v2"
golangv4 "sigs.k8s.io/kubebuilder/v4/pkg/plugins/golang/v4"
)
mylanguagev1Bundle, _ := plugin.NewBundle(
plugin.WithName("mylanguage.kubebuilder.io"),
plugin.WithVersion(plugin.Version{Number: 1}),
plugin.WithPlugins(kustomizecommonv2.Plugin{}, mylanguagev1.Plugin{}),
)
This composition allows you to scaffold a common
configuration base (via Kustomize) and the
language-specific files (via mylanguagev1).
You can also use your plugin to scaffold specific
resources like CRDs and controllers, using
the create api and create webhook subcommands.
Plugin subcommands
Plugins are responsible for implementing the code that is executed when the sub-commands are called. You can create a new plugin by implementing the Plugin interface.
On top of being a Base, a plugin should also implement the SubcommandMetadata
interface so it can be run with a CLI. Optionally, a custom help
text for the target command can be set; this method can be a no-op, which will
preserve the default help text set by the cobra command
constructors.
Kubebuilder CLI plugins wrap scaffolding and CLI features in conveniently packaged Go types that are executed by the
kubebuilder binary, or any binary which imports them. More specifically, a plugin configures the execution of one
of the following CLI commands:
init: Initializes the project structure.create api: Scaffolds a new API and controller.create webhook: Scaffolds a new webhook.edit: edit the project structure.
Here’s an example of using the init subcommand with a custom plugin:
kubebuilder init --plugins=mylanguage.kubebuilder.io/v1
This would initialize a project using the mylanguage plugin.
Plugin keys
Plugins are identified by a key of the form <name>/<version>.
There are two ways to specify a plugin to run:
-
Setting
kubebuilder init --plugins=<plugin key>, which will initialize a project configured for plugin with key<plugin key>. -
A
layout: <plugin key>in the scaffolded PROJECT configuration file. Commands (except forinit, which scaffolds this file) will look at this value before running to choose which plugin to run.
By default, <plugin key> is go.kubebuilder.io/vX, where X is some integer.
For a full implementation example, check out Kubebuilder’s native go.kubebuilder.io plugin.
Plugin naming
Plugin names must be DNS1123 labels and should be fully qualified, i.e. they have a suffix like
.example.com. For example, the base Go scaffold used with kubebuilder commands has name go.kubebuilder.io.
Qualified names prevent conflicts between plugin names; both go.kubebuilder.io and go.example.com can both scaffold
Go code and can be specified by a user.
Plugin versioning
A plugin’s Version() method returns a plugin.Version object containing an integer value
and optionally a stage string of either “alpha” or “beta”. The integer denotes the current version of a plugin.
Two different integer values between versions of plugins indicate that the two plugins are incompatible. The stage
string denotes plugin stability:
alpha: should be used for plugins that are frequently changed and may break between uses.beta: should be used for plugins that are only changed in minor ways, ex. bug fixes.
Boilerplates
The Kubebuilder internal plugins use boilerplates to generate the
files of code. Kubebuilder uses templating to scaffold files for plugins.
For instance, when creating a new project, the go/v4 plugin
scaffolds the go.mod file using a template defined in
its implementation.
You can extend this functionality in your custom plugin by defining your own templates and using Kubebuilder’s machinery library to generate files. This library allows you to:
- Define file I/O behaviors.
- Add markers to the scaffolded files.
- Specify templates for your scaffolds.
Example: Boilerplate
For instance, the go/v4 scaffolds the go.mod file by defining an object that implements the machinery interface.
The raw template is set to the TemplateBody field on the Template.SetTemplateDefaults method:
/*
Copyright 2022 The Kubernetes Authors.
Licensed under the Apache License, Version 2.0 (the "License");
you may not use this file except in compliance with the License.
You may obtain a copy of the License at
http://www.apache.org/licenses/LICENSE-2.0
Unless required by applicable law or agreed to in writing, software
distributed under the License is distributed on an "AS IS" BASIS,
WITHOUT WARRANTIES OR CONDITIONS OF ANY KIND, either express or implied.
See the License for the specific language governing permissions and
limitations under the License.
*/
package templates
import (
"sigs.k8s.io/kubebuilder/v4/pkg/machinery"
)
var _ machinery.Template = &GoMod{}
// GoMod scaffolds a file that defines the project dependencies
type GoMod struct {
machinery.TemplateMixin
machinery.RepositoryMixin
ControllerRuntimeVersion string
}
// SetTemplateDefaults implements machinery.Template
func (f *GoMod) SetTemplateDefaults() error {
if f.Path == "" {
f.Path = "go.mod"
}
f.TemplateBody = goModTemplate
f.IfExistsAction = machinery.OverwriteFile
return nil
}
const goModTemplate = `module {{ .Repo }}
go 1.26.0
require (
sigs.k8s.io/controller-runtime {{ .ControllerRuntimeVersion }}
)
`
Such object that implements the machinery interface will later pass to the execution of scaffold:
// Scaffold implements cmdutil.Scaffolder
func (s *initScaffolder) Scaffold() error {
log.Println("Writing scaffold for you to edit...")
// Initialize the machinery.Scaffold that writes the boilerplate file to disk
// The boilerplate file needs to be scaffolded as a separate step as it is going to
// be used by the rest of the files, even those scaffolded in this command call.
scaffold := machinery.NewScaffold(s.fs,
machinery.WithConfig(s.config),
)
...
return scaffold.Execute(
...
&templates.GoMod{
ControllerRuntimeVersion: ControllerRuntimeVersion,
},
...
)
}
Example: Overwriting a File in a Plugin
Imagine that when a subcommand is called, you want to overwrite an existing file.
For example, to modify the Makefile and add custom build steps,
in the definition of your Template you can use the following option:
f.IfExistsAction = machinery.OverwriteFile
By using those options, your plugin can take control of certain files generated by Kubebuilder’s default scaffolds.
Customizing existing scaffolds
Kubebuilder provides utility functions to help you modify the default scaffolds. By using the plugin utilities, you can insert, replace, or append content to files generated by Kubebuilder, giving you full control over the scaffolding process.
These utilities allow you to:
- Insert content: Add content at a specific location within a file.
- Replace content: Search for and replace specific sections of a file.
- Append content: Add content to the end of a file without removing or altering the existing content.
Example
If you need to insert custom content into a scaffolded file,
you can use the InsertCode function provided by the plugin utilities:
pluginutil.InsertCode(filename, target, code)
This approach enables you to extend and modify the generated scaffolds while building custom plugins.
For more details, refer to the Kubebuilder plugin utilities.
Bundle plugin
Plugins can be bundled to compose more complex scaffolds. A plugin bundle is a composition of multiple plugins that are executed in a predefined order. For example:
myPluginBundle, _ := plugin.NewBundle(
plugin.WithName("myplugin.example.com"),
plugin.WithVersion(plugin.Version{Number: 1}),
plugin.WithPlugins(pluginA.Plugin{}, pluginB.Plugin{}, pluginC.Plugin{}),
)
This bundle executes the init subcommand for each
plugin in the specified order:
pluginApluginBpluginC
The following command runs the bundled plugins:
kubebuilder init --plugins=myplugin.example.com/v1
CLI system
Plugins are run using a CLI object, which maps a plugin type to a subcommand and calls that plugin’s methods.
For example, writing a program that injects an Init plugin into a CLI then calling CLI.Run() will call the
plugin’s SubcommandMetadata, UpdatesMetadata and Run methods with information a user has passed to the
program in kubebuilder init. Following an example:
package cli
import (
log "log/slog"
"github.com/spf13/cobra"
"sigs.k8s.io/kubebuilder/v4/pkg/cli"
cfgv3 "sigs.k8s.io/kubebuilder/v4/pkg/config/v3"
"sigs.k8s.io/kubebuilder/v4/pkg/plugin"
kustomizecommonv2 "sigs.k8s.io/kubebuilder/v4/pkg/plugins/common/kustomize/v2"
"sigs.k8s.io/kubebuilder/v4/pkg/plugins/golang"
deployimagev1alpha1 "sigs.k8s.io/kubebuilder/v4/pkg/plugins/golang/deploy-image/v1alpha1"
golangv4 "sigs.k8s.io/kubebuilder/v4/pkg/plugins/golang/v4"
)
var (
// The following is an example of the commands
// that you might have in your own binary
commands = []*cobra.Command{
myExampleCommand.NewCmd(),
}
alphaCommands = []*cobra.Command{
myExampleAlphaCommand.NewCmd(),
}
)
// GetPluginsCLI returns the plugins based CLI configured to be used in your CLI binary
func GetPluginsCLI() (*cli.CLI) {
// Bundle plugin which built the golang projects scaffold by Kubebuilder go/v4
gov3Bundle, _ := plugin.NewBundleWithOptions(plugin.WithName(golang.DefaultNameQualifier),
plugin.WithVersion(plugin.Version{Number: 3}),
plugin.WithPlugins(kustomizecommonv2.Plugin{}, golangv4.Plugin{}),
)
c, err := cli.New(
// Add the name of your CLI binary
cli.WithCommandName("example-cli"),
// Add the version of your CLI binary
cli.WithVersion(versionString()),
// Register the plugins options which can be used to do the scaffolds via your CLI tool. See that we are using as example here the plugins which are implemented and provided by Kubebuilder
cli.WithPlugins(
gov3Bundle,
&deployimagev1alpha1.Plugin{},
),
// Defines what is the default plugin used by your binary. It means that is the plugin used if no info be provided such as when the user runs `kubebuilder init`
cli.WithDefaultPlugins(cfgv3.Version, gov3Bundle),
// Define the default project configuration version which is used by the CLI when none is informed by --project-version flag.
cli.WithDefaultProjectVersion(cfgv3.Version),
// Adds your own commands to the CLI
cli.WithExtraCommands(commands...),
// Add your own alpha commands to the CLI
cli.WithExtraAlphaCommands(alphaCommands...),
// Adds the completion option for your CLI
cli.WithCompletion(),
)
if err != nil {
log.Fatal(err)
}
return c
}
// versionString returns the CLI version
func versionString() string {
// return your binary project version
}
This program can then be built and run in the following ways:
Default behavior:
# Initialize a project with the default Init plugin, "go.example.com/v1".
# This key is automatically written to a PROJECT config file.
$ my-bin-builder init
# Create an API and webhook with "go.example.com/v1" CreateAPI and
# CreateWebhook plugin methods. This key was read from the config file.
$ my-bin-builder create api [flags]
$ my-bin-builder create webhook [flags]
Selecting a plugin using --plugins:
# Initialize a project with the "ansible.example.com/v1" Init plugin.
# Like above, this key is written to a config file.
$ my-bin-builder init --plugins ansible
# Create an API and webhook with "ansible.example.com/v1" CreateAPI
# and CreateWebhook plugin methods. This key was read from the config file.
$ my-bin-builder create api [flags]
$ my-bin-builder create webhook [flags]
Inputs should be tracked in the PROJECT file
The CLI is responsible for managing the PROJECT file configuration, which represents the configuration of the projects scaffolded by the CLI tool.
When extending Kubebuilder, it is recommended to ensure that your tool or External Plugin properly uses the PROJECT file to track relevant information. This ensures that other external tools and plugins can properly integrate with the project. It also allows tools features to help users re-scaffold their projects such as using the Alpha Commands to upgrade the project scaffold to a newer version of Kubebuilder, ensuring the tracked information in the PROJECT file can be leveraged for various purposes.
For example, plugins can check whether they support the project setup and re-execute commands based on the tracked inputs.
Example
By running the following command to use the Deploy Image plugin to scaffold an API and its controller:
kubebyilder create api --group example.com --version v1alpha1 --kind Memcached --image=memcached:memcached:1.6.26-alpine3.19 --image-container-command="memcached,--memory-limit=64,-o,modern,-v" --image-container-port="11211" --run-as-user="1001" --plugins="deploy-image/v1-alpha" --make=false
The following entry would be added to the PROJECT file:
...
plugins:
deploy-image.go.kubebuilder.io/v1-alpha:
resources:
- domain: testproject.org
group: example.com
kind: Memcached
options:
containerCommand: memcached,--memory-limit=64,-o,modern,-v
containerPort: "11211"
image: memcached:memcached:1.6.26-alpine3.19
runAsUser: "1001"
version: v1alpha1
- domain: testproject.org
group: example.com
kind: Busybox
options:
image: busybox:1.36.1
version: v1alpha1
...
By inspecting the PROJECT file, it becomes possible to understand how the plugin was used and what inputs were provided. This not only allows re-execution of the command based on the tracked data but also enables creating features or plugins that can rely on this information.
Creating external plugins for Kubebuilder
Overview
Kubebuilder’s functionality can be extended through external plugins.
These plugins are executables (written in any language) that follow an
execution pattern recognized by Kubebuilder. Kubebuilder interacts with
these plugins via stdin and stdout, enabling seamless communication.
Why use external plugins?
External plugins enable third-party solution maintainers to integrate their tools with Kubebuilder. Much like Kubebuilder’s own plugins, these can be opt-in, offering users flexibility in tool selection. By developing plugins in their repositories, maintainers ensure updates are aligned with their CI pipelines and can manage any changes within their domain of responsibility.
If you are interested in this type of integration, collaborating with the maintainers of the third-party solution is recommended. Kubebuilder’s maintainers are always willing to provide support in extending its capabilities.
How to Write an External Plugin
Communication between Kubebuilder and an external plugin occurs via standard I/O. Any language can be used to create the plugin, as long as it follows the PluginRequest and PluginResponse structures.
PluginRequest contains the data collected from the CLI and any previously executed plugins. Kubebuilder sends this data as a JSON object to the external plugin via stdin.
Fields:
apiVersion: Version of the PluginRequest schema.args: Command-line arguments passed to the plugin.command: The subcommand being executed (e.g.,init,create api,create webhook,edit).universe: Map of file paths to contents, updated across the plugin chain.pluginChain(optional): Array of plugin keys in the order they were executed. External plugins can inspect this to tailor behavior based on other plugins that ran (for example,go.kubebuilder.io/v4orkustomize.common.kubebuilder.io/v2).config(optional): Serialized PROJECT file configuration for the current project. Use it to inspect metadata, existing resources, or plugin-specific settings. Kubebuilder omits this field before the PROJECT file exists—typically during the firstinit—so plugins should check for its presence.
Note: Whenever Kubebuilder has a PROJECT file available (for example during create api, create webhook, edit, or a subsequent init run), PluginRequest includes the config field. During the very first init run the field is omitted because the PROJECT file does not exist yet.
Example PluginRequest (triggered by kubebuilder init --plugins go/v4,sampleexternalplugin/v1 --domain my.domain):
{
"apiVersion": "v1alpha1",
"args": ["--domain", "my.domain"],
"command": "init",
"universe": {},
"pluginChain": ["go.kubebuilder.io/v4", "kustomize.common.kubebuilder.io/v2", "sampleexternalplugin/v1"]
}
Example PluginRequest for create api (includes config):
{
"apiVersion": "v1alpha1",
"args": ["--group", "crew", "--version", "v1", "--kind", "Captain"],
"command": "create api",
"universe": {},
"pluginChain": ["go.kubebuilder.io/v4", "kustomize.common.kubebuilder.io/v2", "sampleexternalplugin/v1"],
"config": {
"domain": "my.domain",
"repo": "github.com/example/my-project",
"projectName": "my-project",
"version": "3",
"layout": ["go.kubebuilder.io/v4"],
"multigroup": false,
"resources": []
}
}
Example PluginRequest (triggered by kubebuilder edit --plugins sampleexternalplugin/v1):
{
"apiVersion": "v1alpha1",
"args": [],
"command": "edit",
"universe": {}
}
PluginResponse
PluginResponse contains the modifications made by the plugin to the project. This data is serialized as JSON and returned to Kubebuilder through stdout.
Example PluginResponse:
{
"apiVersion": "v1alpha1",
"command": "edit",
"metadata": {
"description": "The `edit` subcommand adds Prometheus instance configuration for monitoring your operator.",
"examples": "kubebuilder edit --plugins sampleexternalplugin/v1"
},
"universe": {
"config/prometheus/prometheus.yaml": "# Prometheus CR manifest...",
"config/prometheus/kustomization.yaml": "resources:\n - prometheus.yaml\n",
"config/default/kustomization_prometheus_patch.yaml": "# Instructions for enabling Prometheus..."
},
"error": false,
"errorMsgs": []
}
How to Use an External Plugin
Prerequisites
- Kubebuilder CLI version > 3.11.0
- An executable for the external plugin
- Plugin path configuration using
${EXTERNAL_PLUGINS_PATH}or default OS-based paths:- Linux:
$HOME/.config/kubebuilder/plugins/${name}/${version}/${name} - macOS:
~/Library/Application Support/kubebuilder/plugins/${name}/${version}/${name}
- Linux:
Example: For a plugin foo.acme.io version v2 on Linux, the path would be $HOME/.config/kubebuilder/plugins/foo.acme.io/v2/foo.acme.io.
Available subcommands
External plugins can support the following Kubebuilder subcommands:
init: Project initializationcreate api: Scaffold Kubernetes API definitionscreate webhook: Scaffold Kubernetes webhooksedit: Update project configuration
Optional subcommands for enhanced user experience:
metadata: Provide plugin descriptions and examples with the--helpflag.flags: Inform Kubebuilder of supported flags, enabling early error detection.
Configuring plugin path
Set the environment variable $EXTERNAL_PLUGINS_PATH
to specify a custom plugin binary path:
export EXTERNAL_PLUGINS_PATH=<custom-path>
Otherwise, Kubebuilder would search for the plugins in a default path based on your OS.
Example CLI commands
You can now use it by calling the CLI commands:
# Add Prometheus monitoring to an existing project
kubebuilder edit --plugins sampleexternalplugin/v1
# Update an existing project with Prometheus monitoring
kubebuilder edit --plugins sampleexternalplugin/v1
# Display help information for the init subcommand
kubebuilder init --plugins sampleexternalplugin/v1 --help
# Display help information for the edit subcommand
kubebuilder edit --plugins sampleexternalplugin/v1 --help
# Plugin chaining example: Use go/v4 plugin first, then apply external plugin
kubebuilder edit --plugins go/v4,sampleexternalplugin/v1
Further resources
- A sample external plugin written in Go
- A sample external plugin written in Python
- A sample external plugin written in JavaScript
Creating custom markers
Overview
When using Kubebuilder as a library, you may need to scaffold files with extensions that are not natively supported by Kubebuilder’s marker system. This guide shows you how to create custom marker support for any file extension.
When to Use Custom Markers
Custom markers are useful when:
- You’re building an external plugin for languages not natively supported by Kubebuilder
- You want to scaffold files with custom extensions (
.rs,.java,.py,.tpl, etc.) - You need scaffolding markers in non-Go files for your own use cases
- Your file extensions are not (and should not be) part of the core
commentsByExtmap
Understanding markers
Markers are special comments used by Kubebuilder for scaffolding purposes. They indicate where code can be inserted or modified. The core Kubebuilder marker system only supports .go, .yaml, and .yml files by default.
Example of a marker in a Go file:
// +kubebuilder:scaffold:imports
Implementation example
Here’s how to implement custom markers for Rust files (.rs). This same pattern can be applied to any file extension.
Define your marker type
// pkg/markers/rust.go
package markers
import (
"fmt"
"path/filepath"
"strings"
)
const RustPluginPrefix = "+rust:scaffold:"
type RustMarker struct {
prefix string
comment string
value string
}
func NewRustMarker(path string, value string) (RustMarker, error) {
ext := filepath.Ext(path)
if ext != ".rs" {
return RustMarker{}, fmt.Errorf("expected .rs file, got %s", ext)
}
return RustMarker{
prefix: formatPrefix(RustPluginPrefix),
comment: "//",
value: value,
}, nil
}
func (m RustMarker) String() string {
return m.comment + " " + m.prefix + m.value
}
func formatPrefix(prefix string) string {
trimmed := strings.TrimSpace(prefix)
var builder strings.Builder
if !strings.HasPrefix(trimmed, "+") {
builder.WriteString("+")
}
builder.WriteString(trimmed)
if !strings.HasSuffix(trimmed, ":") {
builder.WriteString(":")
}
return builder.String()
}
Use in Template Generation
package templates
import (
"fmt"
"github.com/yourorg/yourplugin/pkg/markers"
)
func GenerateRustFile(projectName string) (string, error) {
marker, err := markers.NewRustMarker("src/main.rs", "imports")
if err != nil {
return "", err
}
content := fmt.Sprintf(`// Generated by Rust Plugin
%s
use std::error::Error;
fn main() -> Result<(), Box<dyn Error>> {
println!("Hello from %s!");
Ok(())
}
`, marker.String(), projectName)
return content, nil
}
func GenerateCargoToml(projectName string) string {
return fmt.Sprintf(`[package]
name = "%s"
version = "0.1.0"
edition = "2021"
[dependencies]
`, projectName)
}
Integrate with External Plugin
package main
import (
"bufio"
"encoding/json"
"fmt"
"io"
"os"
"sigs.k8s.io/kubebuilder/v4/pkg/plugin/external"
"github.com/yourorg/yourplugin/pkg/markers"
)
func main() {
// External plugins communicate via JSON over STDIN/STDOUT
reader := bufio.NewReader(os.Stdin)
input, err := io.ReadAll(reader)
if err != nil {
returnError(fmt.Errorf("error reading STDIN: %w", err))
return
}
pluginRequest := &external.PluginRequest{}
err = json.Unmarshal(input, pluginRequest)
if err != nil {
returnError(fmt.Errorf("error unmarshaling request: %w", err))
return
}
var response external.PluginResponse
switch pluginRequest.Command {
case "init":
response = handleInit(pluginRequest)
default:
response = external.PluginResponse{
Command: pluginRequest.Command,
Error: true,
ErrorMsgs: []string{fmt.Sprintf("unknown command: %s", pluginRequest.Command)},
}
}
output, err := json.Marshal(response)
if err != nil {
fmt.Fprintf(os.Stderr, "failed to marshal response: %v\n", err)
os.Exit(1)
}
fmt.Printf("%s", output)
}
func handleInit(req *external.PluginRequest) external.PluginResponse {
// Create Rust file with custom markers
marker, err := markers.NewRustMarker("src/main.rs", "imports")
if err != nil {
return external.PluginResponse{
Command: "init",
Error: true,
ErrorMsgs: []string{fmt.Sprintf("failed to create Rust marker: %v", err)},
}
}
fileContent := fmt.Sprintf(`// Generated by Rust Plugin
%s
use std::error::Error;
fn main() -> Result<(), Box<dyn Error>> {
println!("Hello from Rust!");
Ok(())
}
`, marker.String())
// External plugins use "universe" to represent file changes.
// "universe" is a map from file paths to their file contents,
// passed through the plugin chain to coordinate file generation.
universe := make(map[string]string)
universe["src/main.rs"] = fileContent
return external.PluginResponse{
Command: "init",
Universe: universe,
}
}
func returnError(err error) {
response := external.PluginResponse{
Error: true,
ErrorMsgs: []string{err.Error()},
}
output, marshalErr := json.Marshal(response)
if marshalErr != nil {
fmt.Fprintf(os.Stderr, "failed to marshal error response: %v\n", marshalErr)
os.Exit(1)
}
fmt.Printf("%s", output)
}
Adapting for Other Languages
To support other file extensions, modify the marker implementation by changing:
- The comment syntax (e.g.,
//for Java,#for Python,{{/* ... */}}for templates) - The file extension check (e.g.,
.java,.py,.tpl) - The marker prefix (e.g.,
+java:scaffold:,+python:scaffold:)
For more information on creating external plugins, see External Plugins.
Write E2E tests
You can check the Kubebuilder/v4/test/e2e/utils package, which offers TestContext with rich methods:
- NewTestContext helps define:
- A temporary folder for testing projects.
- A temporary controller-manager image.
- The Kubectl execution method.
- The CLI executable (whether
kubebuilder,operator-sdk, or your extended CLI).
Once defined, you can use TestContext to:
-
Setup the testing environment, e.g.:
- Clean up the environment and create a temporary directory. See Prepare.
- Install prerequisite CRDs. See InstallCertManager, InstallPrometheusManager.
-
Validate the plugin behavior, e.g.:
- Trigger the plugin’s bound subcommands. See Init, CreateAPI.
- Use PluginUtil to verify scaffolded outputs. See InsertCode, ReplaceInFile, UncommentCode.
-
Ensure the scaffolded output works, e.g.:
- Execute commands in your
Makefile. See Make. - Temporarily load an image of the testing controller. See LoadImageToKindCluster.
- Call Kubectl to validate running resources. See Kubectl.
- Execute commands in your
-
Cleanup temporary resources after testing:
- Uninstall prerequisite CRDs. See UninstallPrometheusOperManager.
- Delete the temporary directory. See Destroy.
References:
Generate test samples
It’s straightforward to view the content of sample projects generated by your plugin.
For example, Kubebuilder generates sample projects based on different plugins to validate the layouts.
You can also use TestContext to generate folders of scaffolded
projects from your plugin. The commands are similar to those
mentioned in Extending CLI Features and Plugins.
Here’s a general workflow to create a sample project using the go/v4 plugin (kbc is an instance of TestContext):
-
To initialize a project:
By("initializing a project") err = kbc.Init( "--plugins", "go/v4", "--project-version", "3", "--domain", kbc.Domain, "--fetch-deps=false", ) Expect(err).NotTo(HaveOccurred(), "Failed to initialize a project") -
To define API:
By("creating API definition") err = kbc.CreateAPI( "--group", kbc.Group, "--version", kbc.Version, "--kind", kbc.Kind, "--namespaced", "--resource", "--controller", "--make=false", ) Expect(err).NotTo(HaveOccurred(), "Failed to create an API") -
To scaffold webhook configurations:
By("scaffolding mutating and validating webhooks") err = kbc.CreateWebhook( "--group", kbc.Group, "--version", kbc.Version, "--kind", kbc.Kind, "--defaulting", "--programmatic-validation", ) Expect(err).NotTo(HaveOccurred(), "Failed to create an webhook")
Plugins Versioning
| Name | Example | Description |
|---|---|---|
| Kubebuilder version | v2.2.0, v2.3.0, v2.3.1, v4.2.0 | Tagged versions of the Kubebuilder project, representing changes to the source code in this repository. See the releases page for binary releases. |
| Project version | "1", "2", "3" | Project version defines the scheme of a PROJECT configuration file. This version is defined in a PROJECT file’s version. |
| Plugin version | v2, v3, v4 | Represents the version of an individual plugin, as well as the corresponding scaffolding that it generates. This version is defined in a plugin key, ex. go.kubebuilder.io/v2. See the design doc for more details. |
Incrementing versions
For more information on how Kubebuilder release versions work, see the semver documentation.
Project versions should only be increased if a breaking change is introduced in the PROJECT file scheme itself. Changes to the Go scaffolding or the Kubebuilder CLI do not affect project version.
Similarly, the introduction of a new plugin version might only lead to a new minor version release of Kubebuilder, since no breaking change is being made to the CLI itself. It’d only be a breaking change to Kubebuilder if we remove support for an older plugin version. See the plugins design doc versioning section for more details on plugin versioning.
Introducing changes to plugins
Changes made to plugins only require a plugin version increase if and only if a change is made to a plugin
that breaks projects scaffolded with the previous plugin version. Once a plugin version vX is stabilized (it does not
have an “alpha” or “beta” suffix), a new plugin package should be created containing a new plugin with version
v(X+1)-alpha. Typically this is done by (semantically) cp -r pkg/plugins/golang/vX pkg/plugins/golang/v(X+1) then updating
version numbers and paths. All further breaking changes to the plugin should be made in this package; the vX
plugin would then be frozen to breaking changes.
You must also add a migration guide to the migrations
section of the Kubebuilder book in your PR. It should detail the steps required
for users to upgrade their projects from vX to v(X+1)-alpha.
FAQ
How does the value informed via the domain flag (i.e. kubebuilder init --domain example.com) when we init a project?
After creating a project, you usually want to extend the Kubernetes APIs and define new APIs which your project owns. Therefore, Kubebuilder tracks the domain value in the PROJECT file which defines your project’s config and uses it as a domain to create the endpoints of your API(s). Please, ensure that you understand the Groups and Versions and Kinds, oh my!.
The domain is for the group suffix, to explicitly show the resource group category.
For example, if set --domain=example.com:
kubebuilder init --domain example.com --repo xxx --plugins=go/v4
kubebuilder create api --group mygroup --version v1beta1 --kind Mykind
Then the result resource group is mygroup.example.com.
If domain field not set, the default value is
my.domain.
I’d like to customize my project to use klog instead of the zap provided by controller-runtime. How to use klog or other loggers as the project logger?
In the main.go you can replace:
opts := zap.Options{
Development: true,
}
opts.BindFlags(flag.CommandLine)
flag.Parse()
ctrl.SetLogger(zap.New(zap.UseFlagOptions(&opts)))
with:
flag.Parse()
ctrl.SetLogger(klog.NewKlogr())
After make run, I see errors like “unable to find leader election namespace: not running in-cluster…”
You can enable the leader election. However, if you are testing the project locally using the make run
target which runs the manager outside of the cluster then, you might also need to set the
namespace where the manager creates the leader election resource, as follows:
mgr, err := ctrl.NewManager(ctrl.GetConfigOrDie(), ctrl.Options{
Scheme: scheme,
MetricsBindAddress: metricsAddr,
Port: 9443,
HealthProbeBindAddress: probeAddr,
LeaderElection: enableLeaderElection,
LeaderElectionID: "14be1926.testproject.org",
LeaderElectionNamespace: "<project-name>-system",
If you run the project on the cluster with the make deploy target
then, you might not want to add this option. So, you might want to customize this behaviour using
environment variables to only add this option for development purposes, such as:
leaderElectionNS := ""
if os.Getenv("ENABLE_LEADER_ELECTION_NAMESPACE") != "false" {
leaderElectionNS = "<project-name>-system"
}
mgr, err := ctrl.NewManager(ctrl.GetConfigOrDie(), ctrl.Options{
Scheme: scheme,
MetricsBindAddress: metricsAddr,
Port: 9443,
HealthProbeBindAddress: probeAddr,
LeaderElection: enableLeaderElection,
LeaderElectionNamespace: leaderElectionNS,
LeaderElectionID: "14be1926.testproject.org",
...
I am facing the error “open /var/run/secrets/kubernetes.io/serviceaccount/token: permission denied” when I deploy my project against Kubernetes old versions. How to sort it out?
If you are facing the error:
1.6656687258729894e+09 ERROR controller-runtime.client.config unable to get kubeconfig {"error": "open /var/run/secrets/kubernetes.io/serviceaccount/token: permission denied"}
sigs.k8s.io/controller-runtime/pkg/client/config.GetConfigOrDie
/go/pkg/mod/sigs.k8s.io/controller-runtime@v0.13.0/pkg/client/config/config.go:153
main.main
/workspace/main.go:68
runtime.main
/usr/local/go/src/runtime/proc.go:250
when you run the project against a Kubernetes old version (maybe <= 1.21), it might be caused by the issue. The reason is that Kubernetes sets the mounted token file to 0600, see solution here. Then, the workaround is:
Add fsGroup in the manager.yaml
securityContext:
runAsNonRoot: true
fsGroup: 65532 # add this fsGroup to make the token file readable
However, note that this problem is fixed and will not occur if you deploy the project in high versions (maybe >= 1.22).
The error Too long: must have at most 262144 bytes is faced when I run make install to apply the CRD manifests. How to solve it? Why this error is faced?
When attempting to run make install to apply the CRD manifests, the error Too long: must have at most 262144 bytes may be encountered. This error arises due to a size limit enforced by the Kubernetes API. Note that the make install target will apply the CRD manifest under config/crd using kubectl apply -f -. Therefore, when the apply command is used, the API annotates the object with the last-applied-configuration which contains the entire previous configuration. If this configuration is too large, it will exceed the allowed byte size. (More info)
You have a few options to work around this scenario such as:
By removing the descriptions from CRDs:
Controller-gen generates your CRDs. By using the option maxDescLen=0 to remove the description, you may reduce the size, potentially resolving the issue. To do it you can update the Makefile as the following example and then, call the target make manifest to regenerate your CRDs without description, see:
.PHONY: manifests
manifests: controller-gen ## Generate WebhookConfiguration, ClusterRole and CustomResourceDefinition objects.
# Note that the option maxDescLen=0 was added in the default scaffold in order to sort out the issue
# Too long: must have at most 262144 bytes. By using kubectl apply to create / update resources an annotation
# that the K8s API creates to store the latest version of the resource ( kubectl.kubernetes.io/last-applied-configuration).
# However, it has a size limit and if the CRD is too big with so many long descriptions as this one it will cause the failure.
$(CONTROLLER_GEN) rbac:roleName=manager-role crd:maxDescLen=0 webhook paths="./..." output:crd:artifacts:config=config/crd/bases
By re-design your APIs:
You can review the design of your APIs and see if it has not more specs than should be by hurting single responsibility principle for example. So that you might to re-design them.
By using Server-Side Apply for CRD installation:
Since this issue happens when CRDs are installed with client-side apply, another option is to install or update the CRDs with Server-Side Apply instead, for example by using kubectl apply --server-side -f .... This avoids storing the full manifest in the kubectl.kubernetes.io/last-applied-configuration annotation and can prevent the size-limit failure.
If you are updating existing CRDs, kubectl replace -f ... may also help, depending on your workflow.
How can I validate and parse fields in CRDs effectively?
To enhance user experience, it is recommended to use OpenAPI v3 schema validation when writing your CRDs. However, this approach can sometimes require an additional parsing step. For example, consider this code
type StructName struct {
// +kubebuilder:validation:Format=date-time
TimeField string `json:"timeField,omitempty"`
}
What happens in this scenario?
- Users will receive an error notification from the Kubernetes API if they attempt to create a CRD with an invalid timeField value.
- On the developer side, the string value needs to be parsed manually before use.
Is there a better approach?
To provide both a better user experience and a streamlined developer experience, it is advisable to use predefined types like metav1.Time
For example, consider this code
type StructName struct {
TimeField metav1.Time `json:"timeField,omitempty"`
}
What happens in this scenario?
- Users still receive error notifications from the Kubernetes API for invalid
timeFieldvalues. - Developers can directly use the parsed TimeField in their code without additional parsing, reducing errors and improving efficiency.
When I build the image with Podman or Buildah, the build fails with cmd/main.go: no such file or directory. How to solve it?
While we do our best to keep the scaffold working with other container tools, Kubebuilder is officially tested and supported with Docker.
The scaffolded .dockerignore re-includes all Go source files with !**/*.go. Docker honors this pattern. Podman and Buildah do not: they skip ignored directories, so no Go source reaches the build context. This is tracked upstream in buildah#6417 and was reported in kubebuilder#5181.
If you use Podman, re-include your source directories by name in .dockerignore:
!cmd
!api
!internal
Add any other directory in your project that holds Go source files.
When I build the image with Podman or Buildah I get short-name "golang:1.26" did not resolve to an alias and no unqualified-search registries are defined. How to solve it?
While we do our best to keep the scaffold working with other container tools, Kubebuilder is officially tested and supported with Docker.
Docker resolves short image names to Docker Hub. Podman and Buildah resolve them from the host, using either the short-name aliases in registries.conf.d or unqualified-search-registries in registries.conf. You hit this error when the host has neither. Debian 12, for example, ships neither.
Use one of the options below.
Override the base image. The scaffolded Dockerfile exposes it as a build argument:
ARG BASE_IMAGE=golang:1.26
FROM ${BASE_IMAGE} AS builder
# From Docker Hub
make docker-build IMG=<some-registry>/<project>:tag BASE_IMAGE=docker.io/library/golang:1.26
# From your own registry or mirror
make docker-build IMG=<some-registry>/<project>:tag BASE_IMAGE=<myregistry>/golang:1.26
make docker-buildx accepts BASE_IMAGE too.
Or add an alias on the host for the golang short name:
# /etc/containers/registries.conf.d/golang.conf
[aliases]
"golang" = "docker.io/library/golang"
A matching alias is used without consulting unqualified-search-registries, so it works even when that list is empty. It also ignores the tag, so one entry covers all golang tags. Prefer it over adding docker.io to the search list, which changes how every unqualified image name resolves on the host. For rootless Podman, use $HOME/.config/containers/registries.conf.d/golang.conf.